zappzy Support Center > Connect your social accounts > Connect your Instagram account: Step-by-step

Video or step-by-step guide with screenshots. Your choice. We keep it easy.
Already added your Facebook Page to zappzy?
Great — you don't need the full setup again. Just follow this shorter guide:
The part above doesn't apply to you?
Then this is the guide you need:
Step-by-step guide
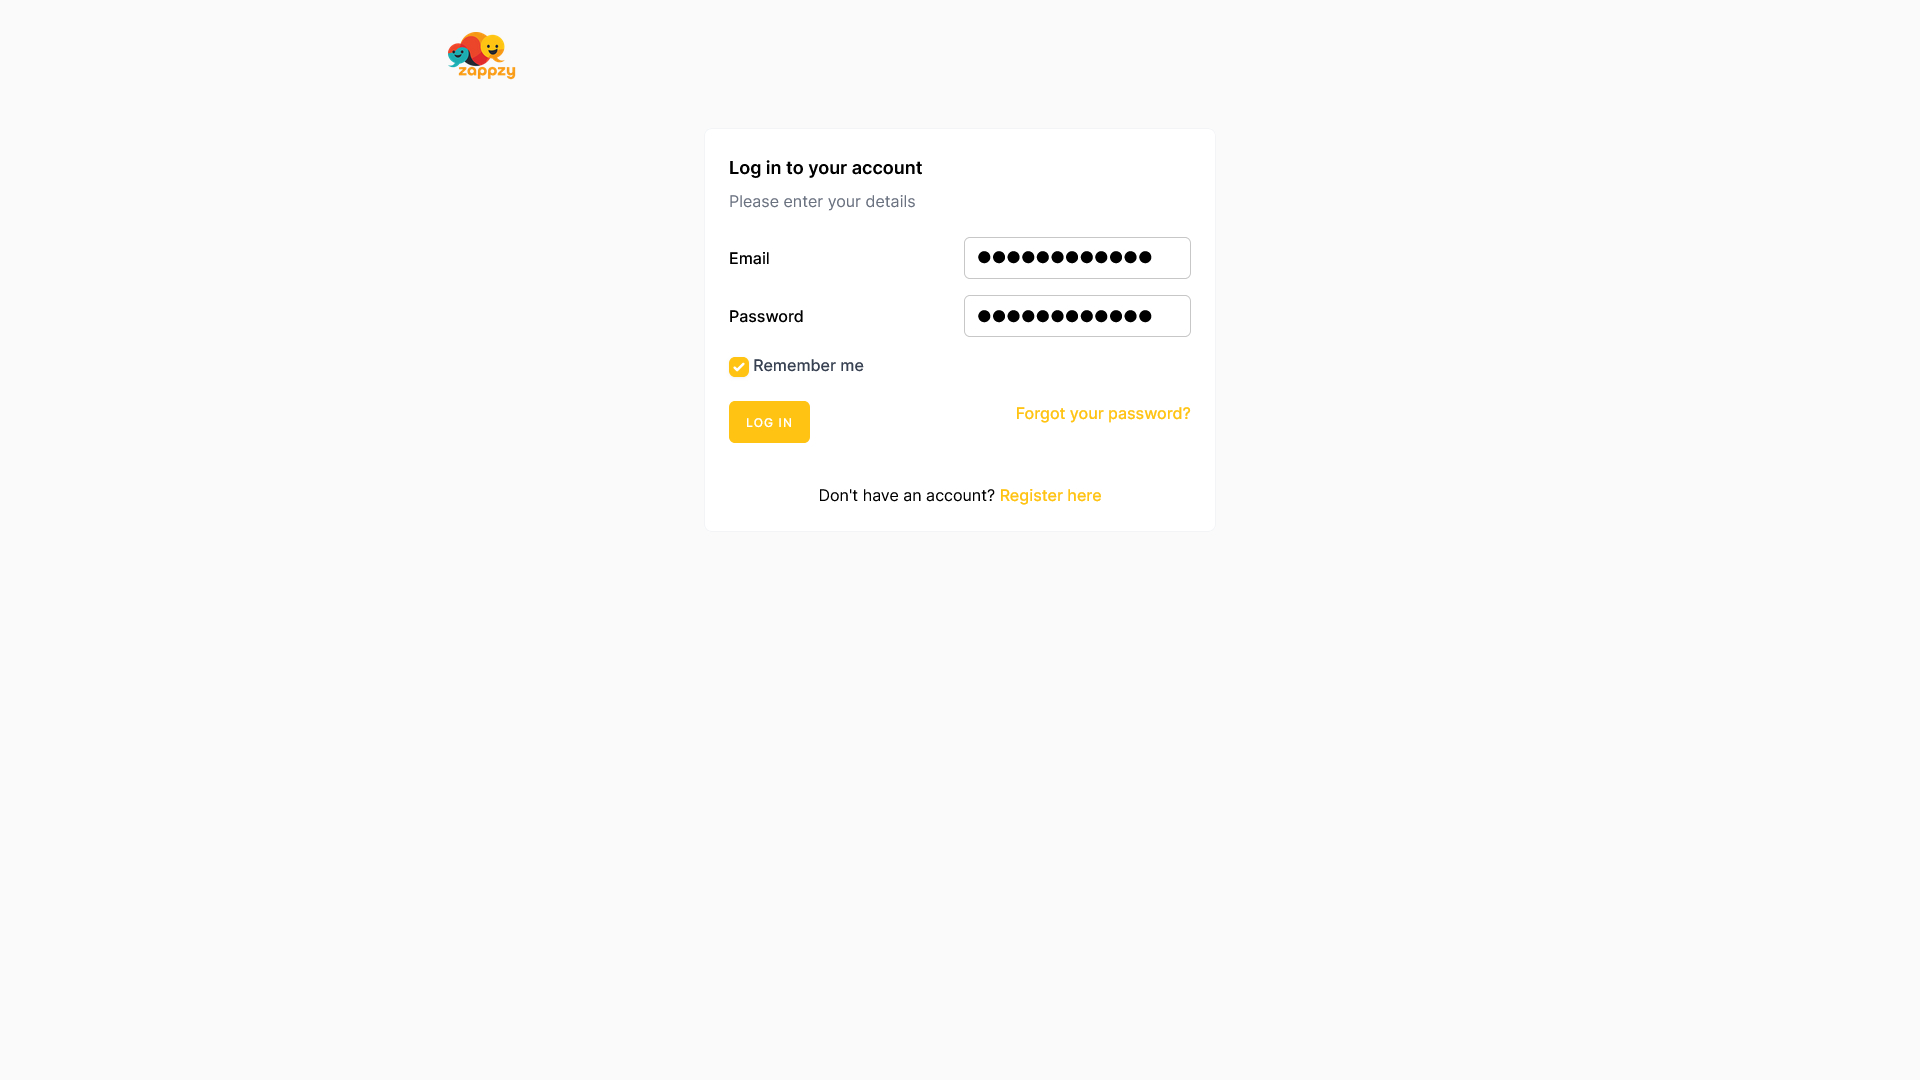
First, log in at zappzy.com, using your email and password.
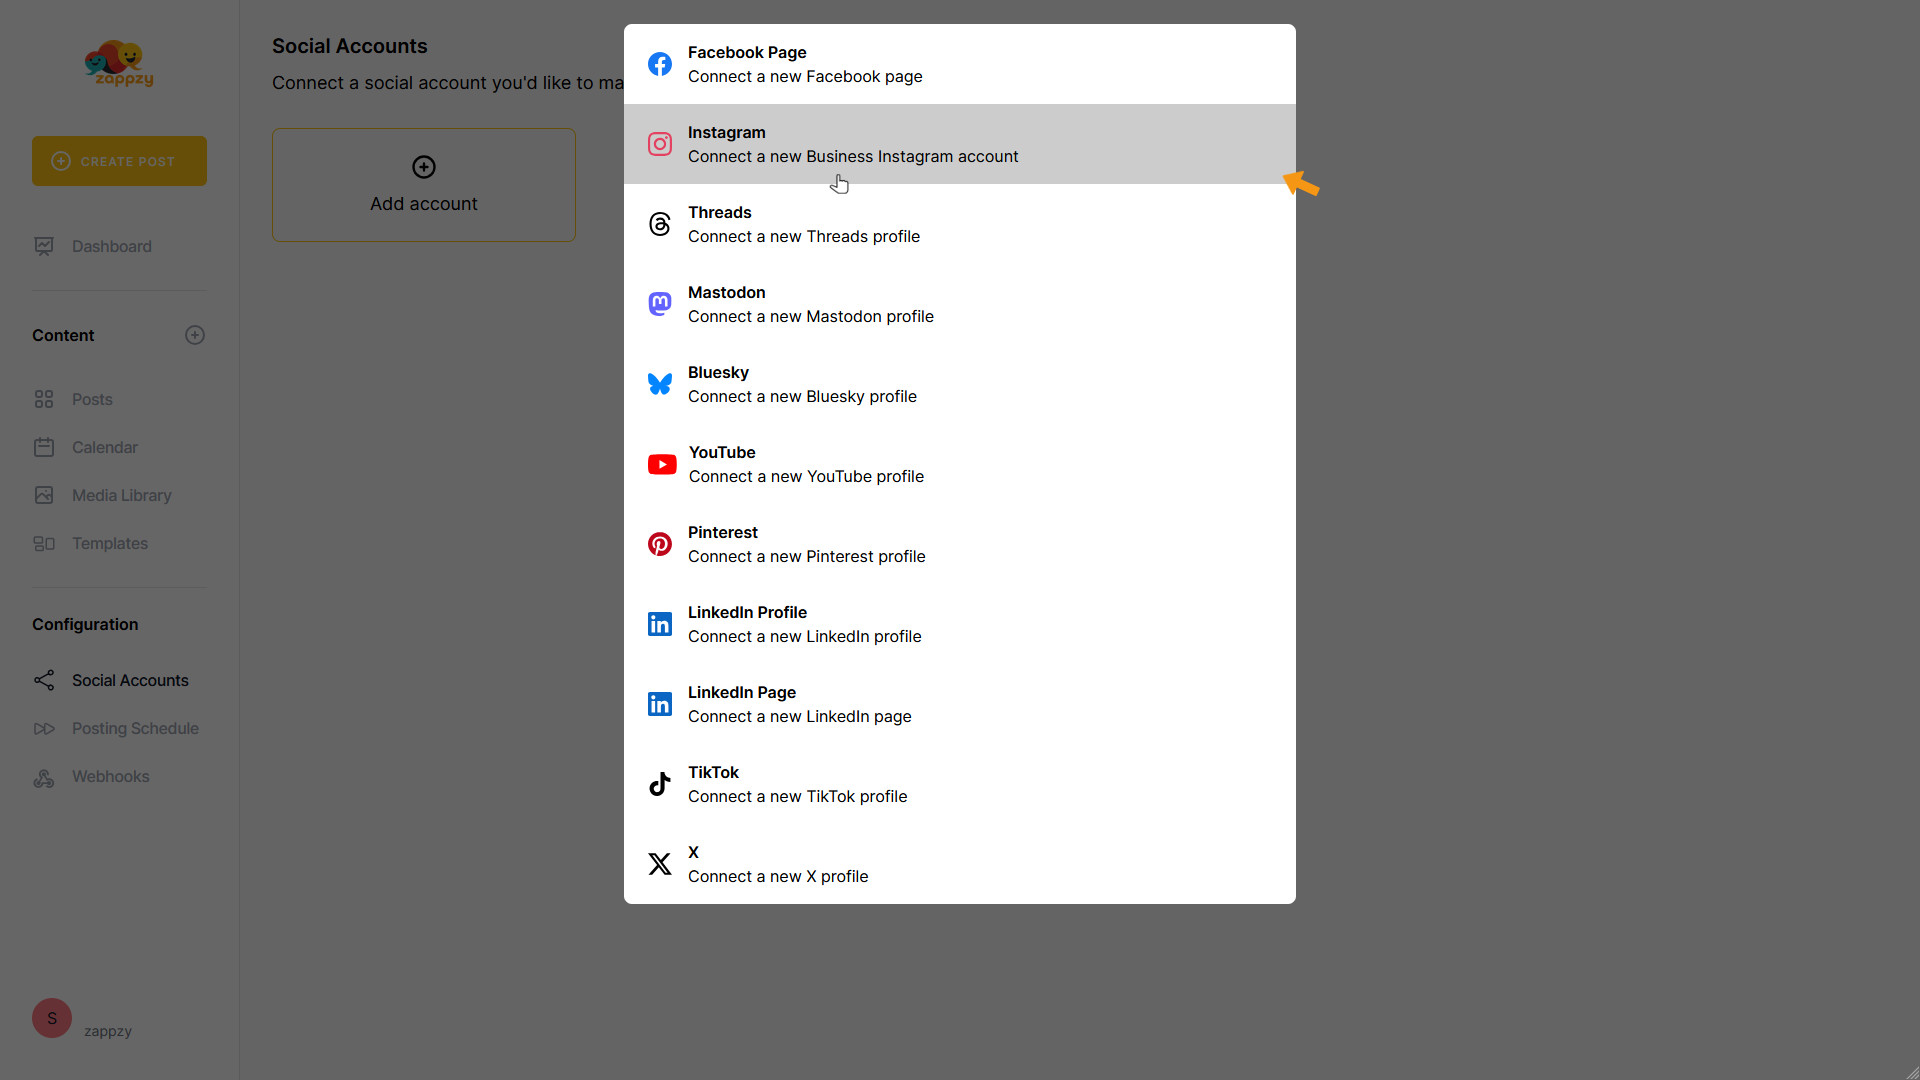
Click Social Accounts in the left menu.
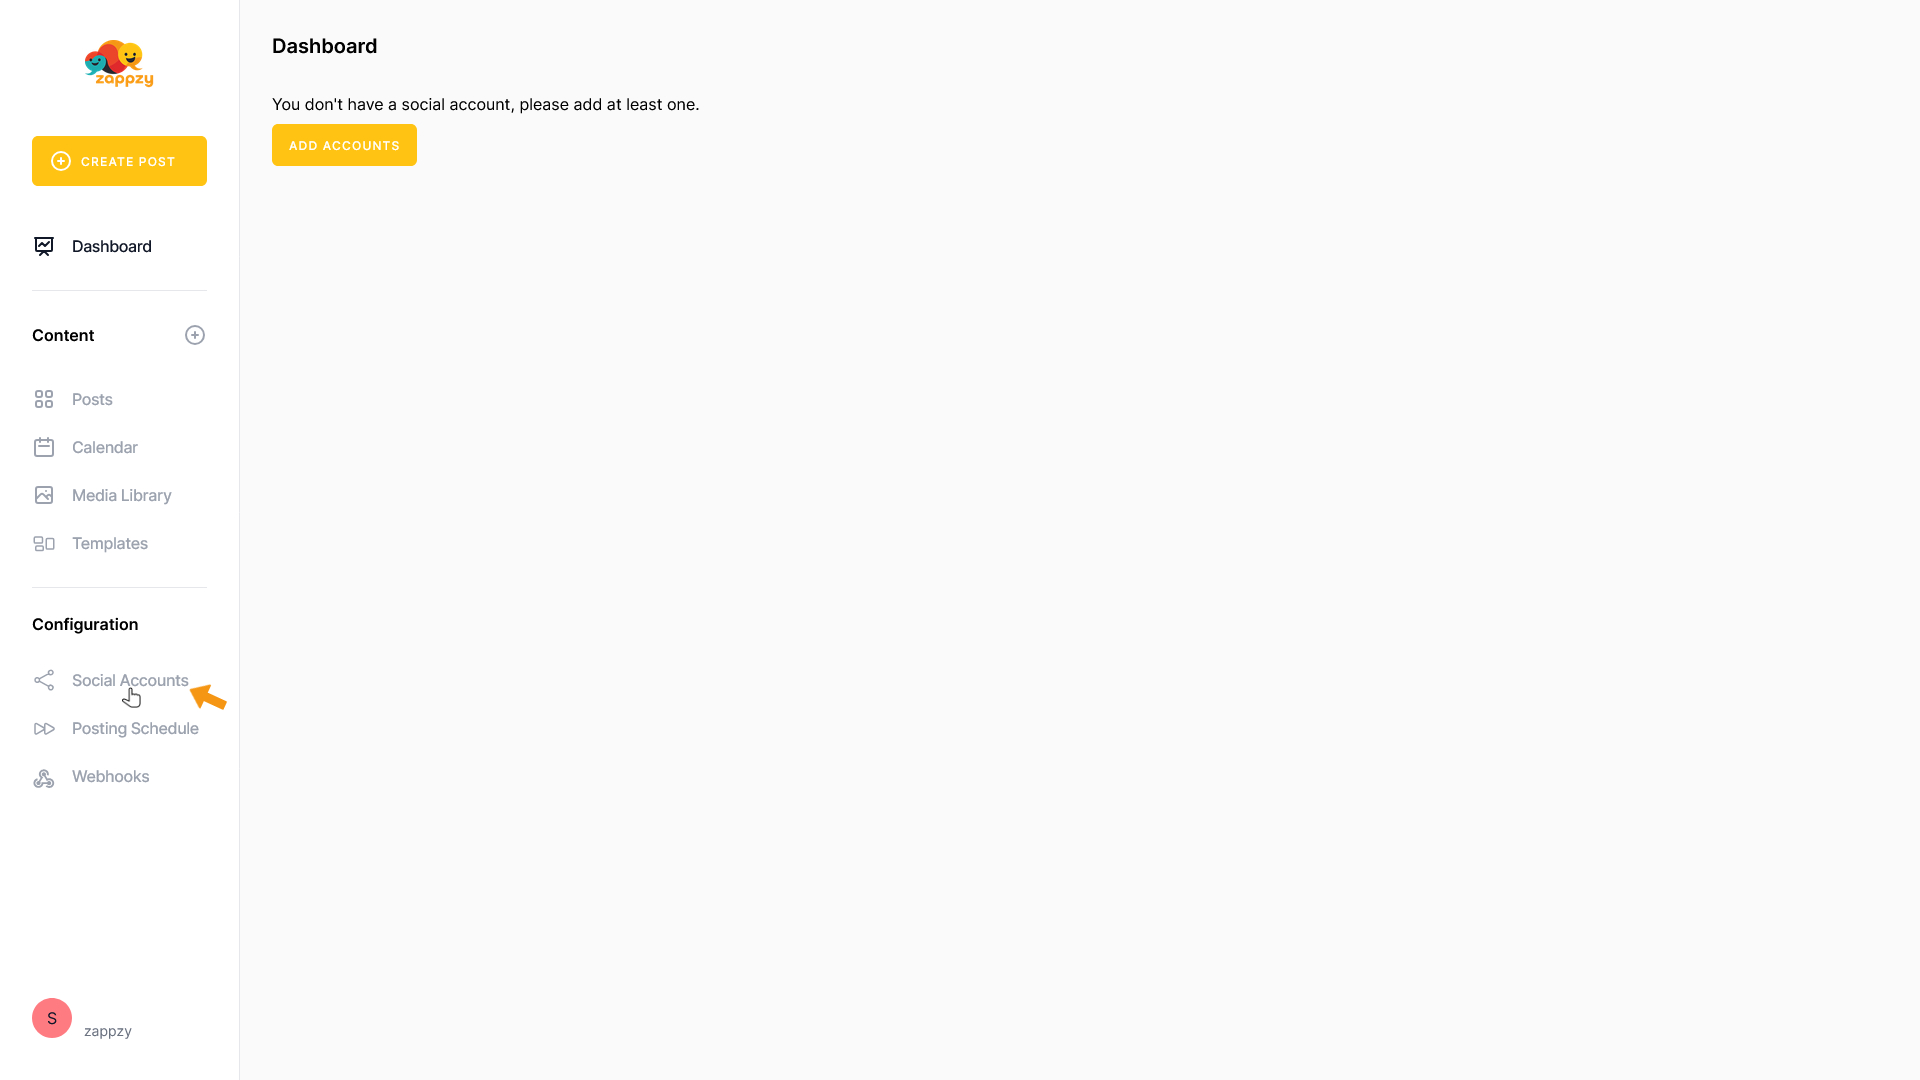
On the main screen, click the Add account button.
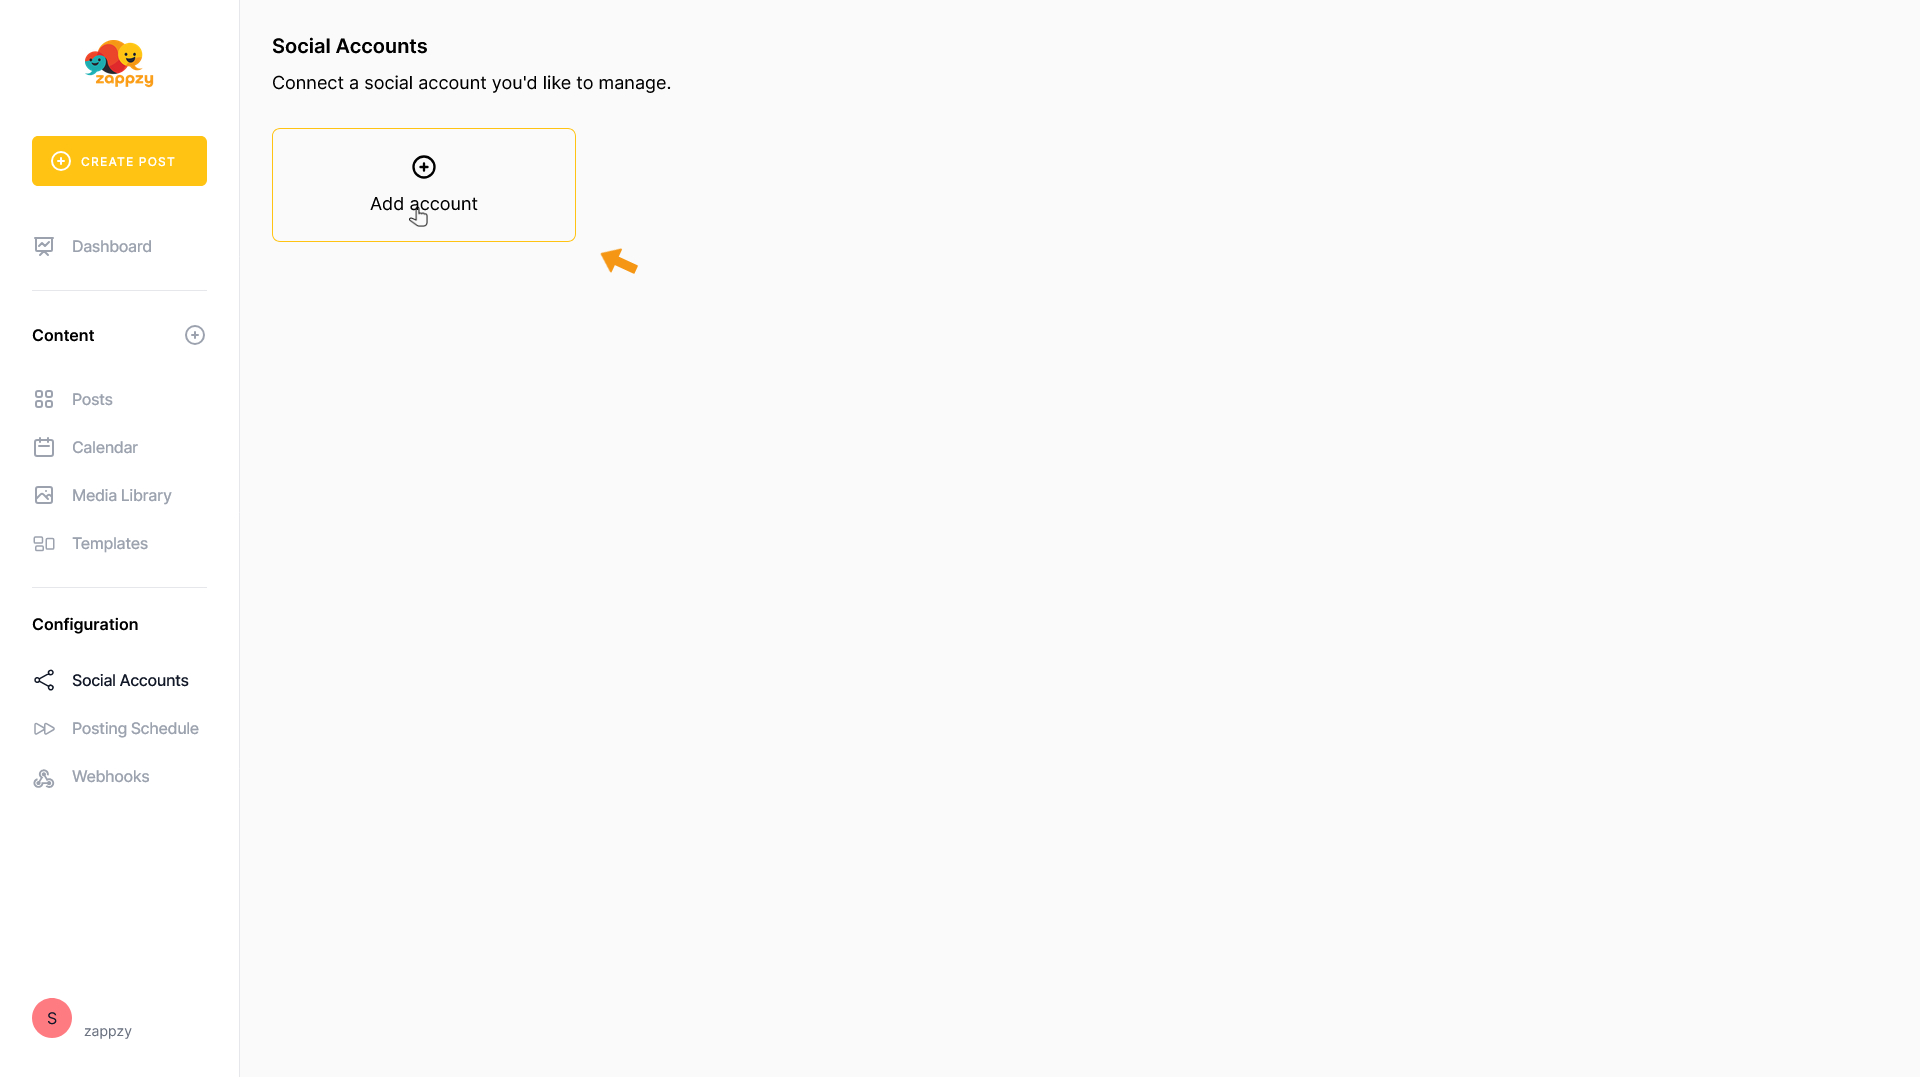
A list of supported social platforms will appear.
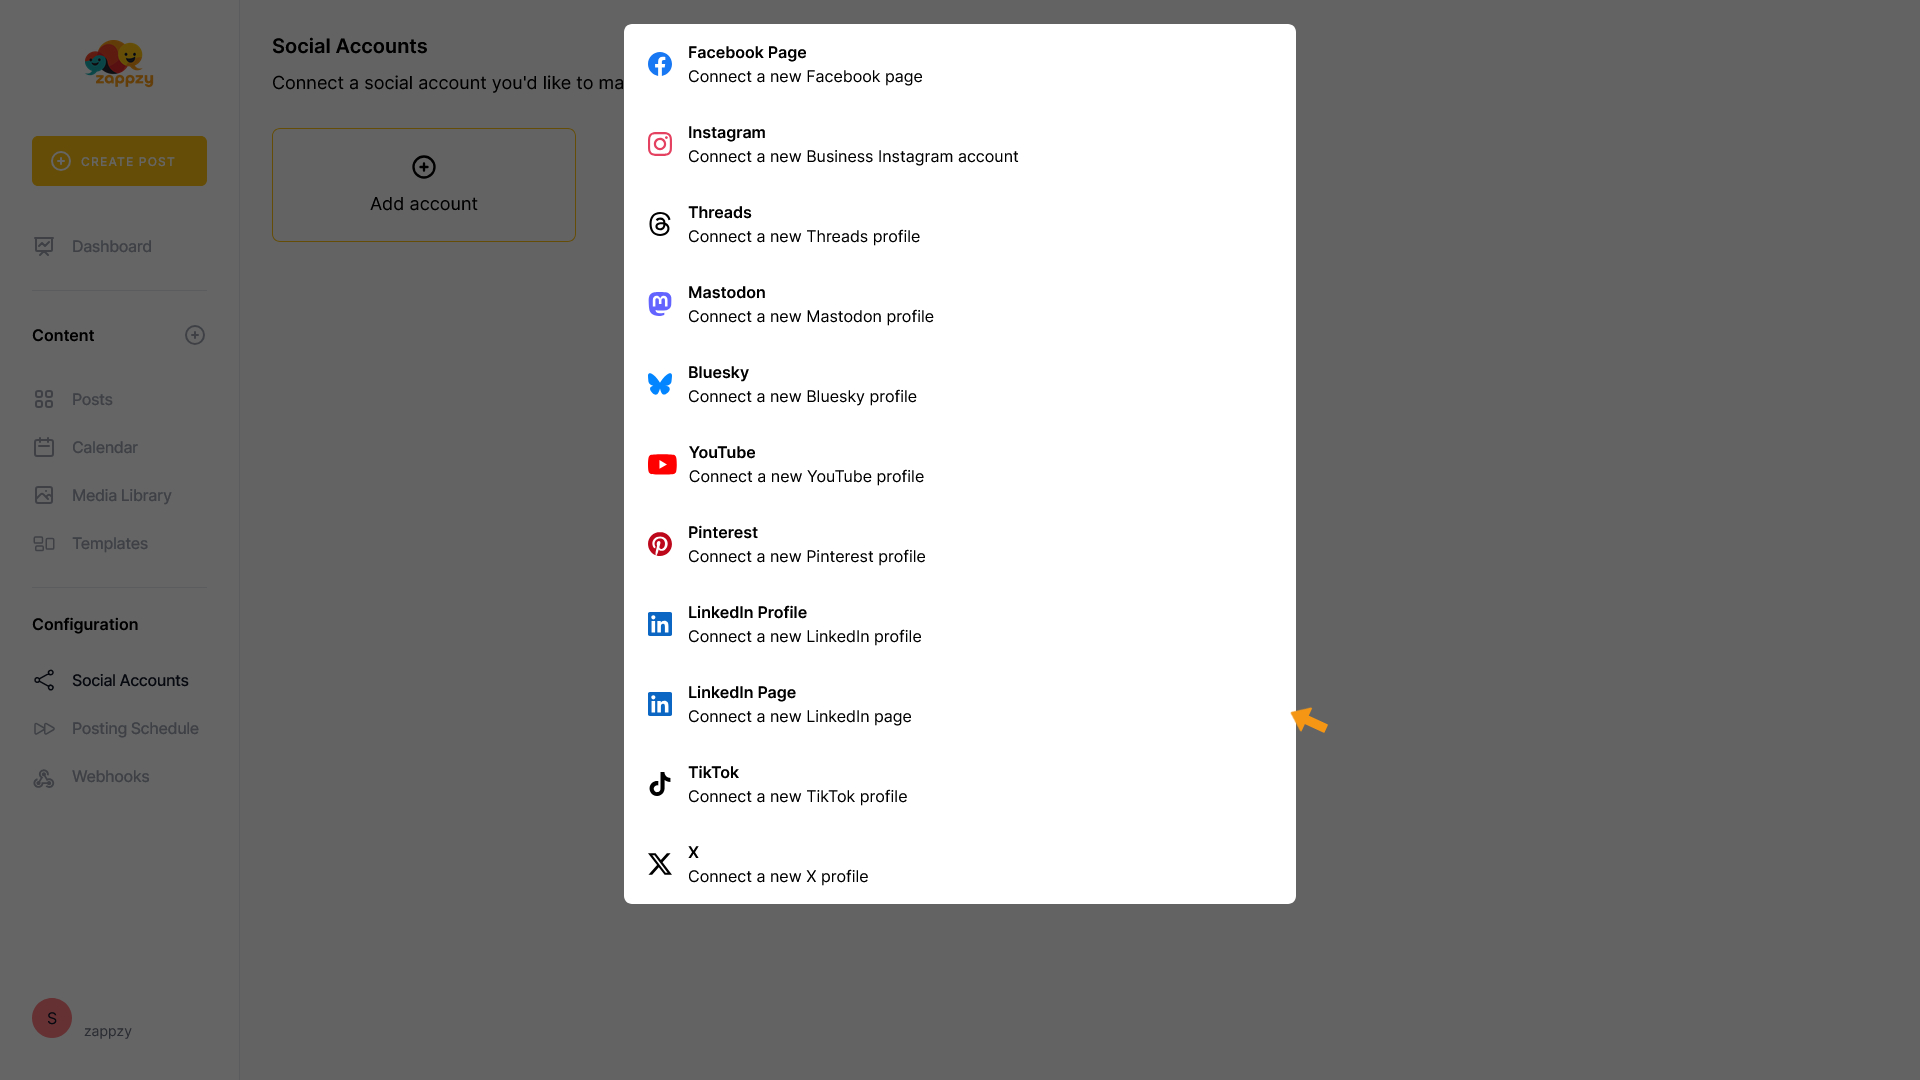
Select Instagram.
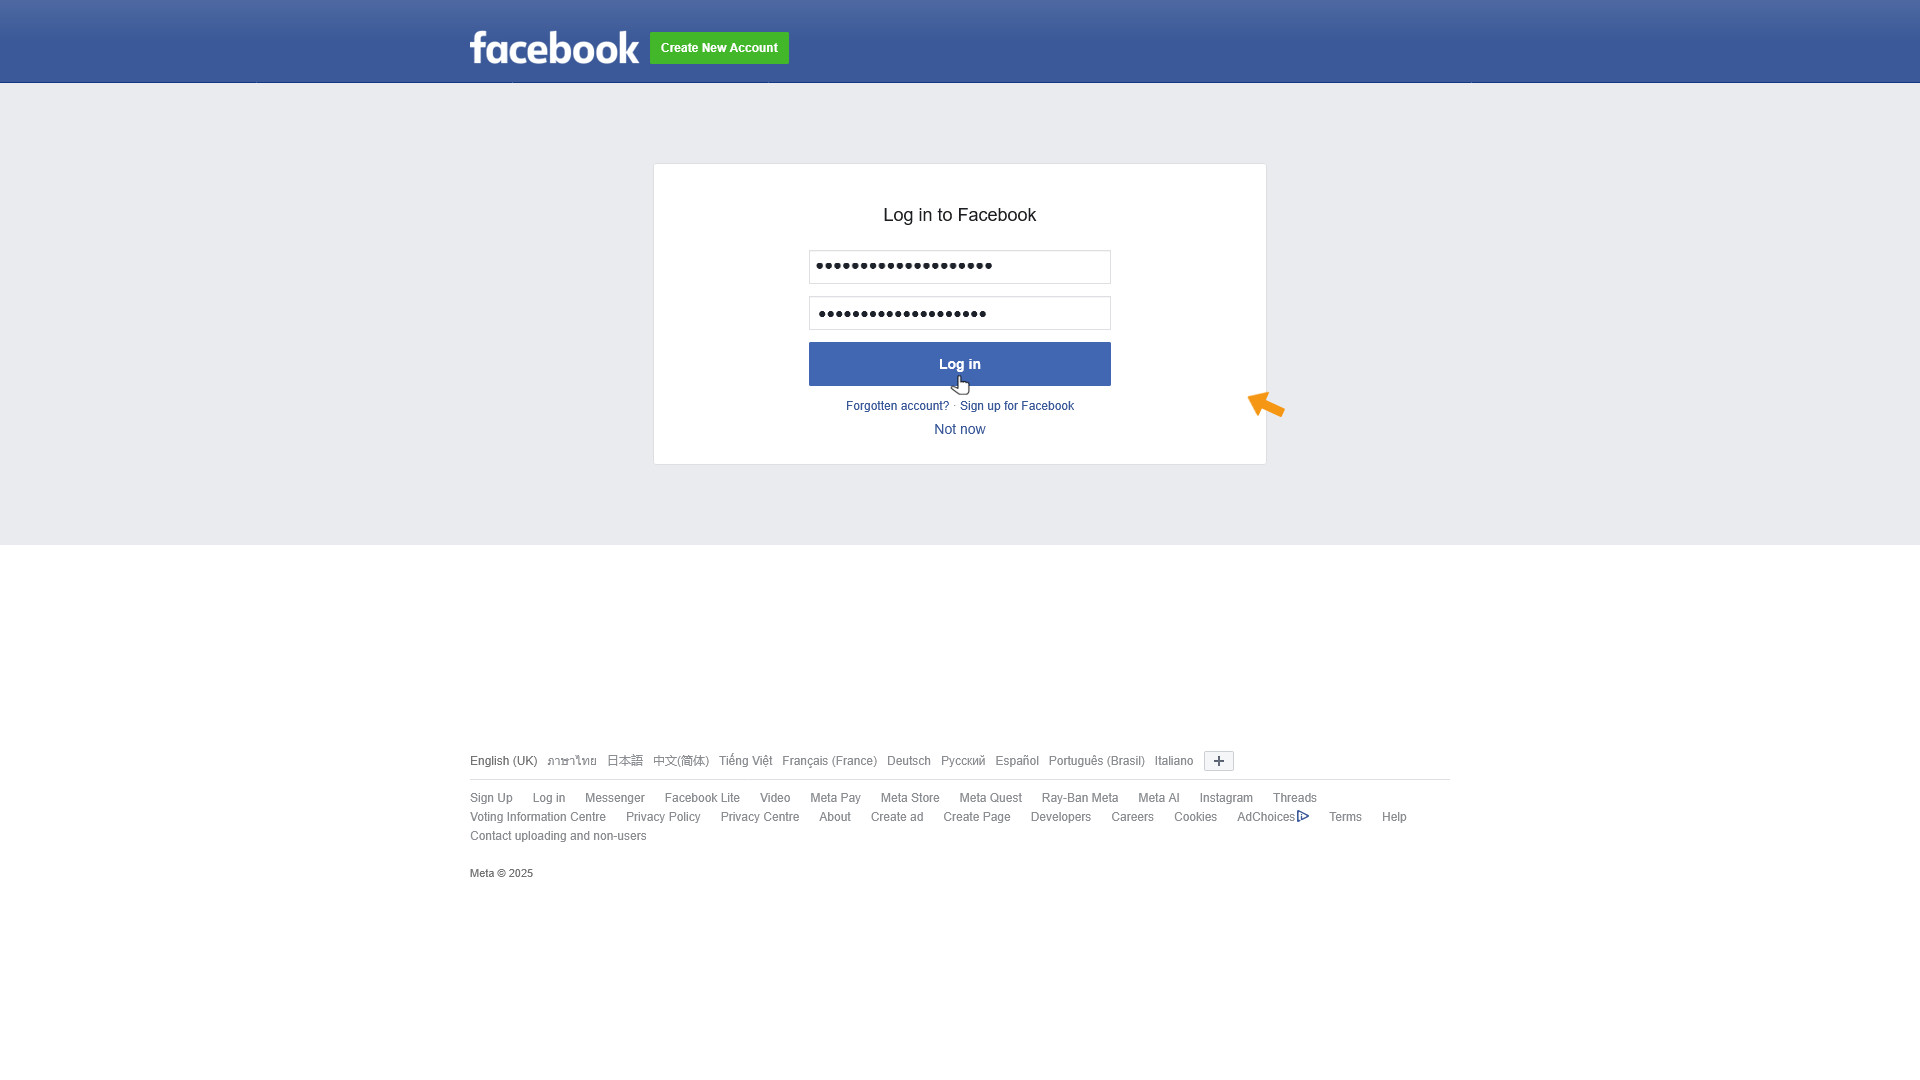
You’ll be taken to the Facebook login page.
Enter the email or phone number and the password of the Facebook account that manages the Facebook Page and Instagram account you want to connect to zappzy. Then click Log in.
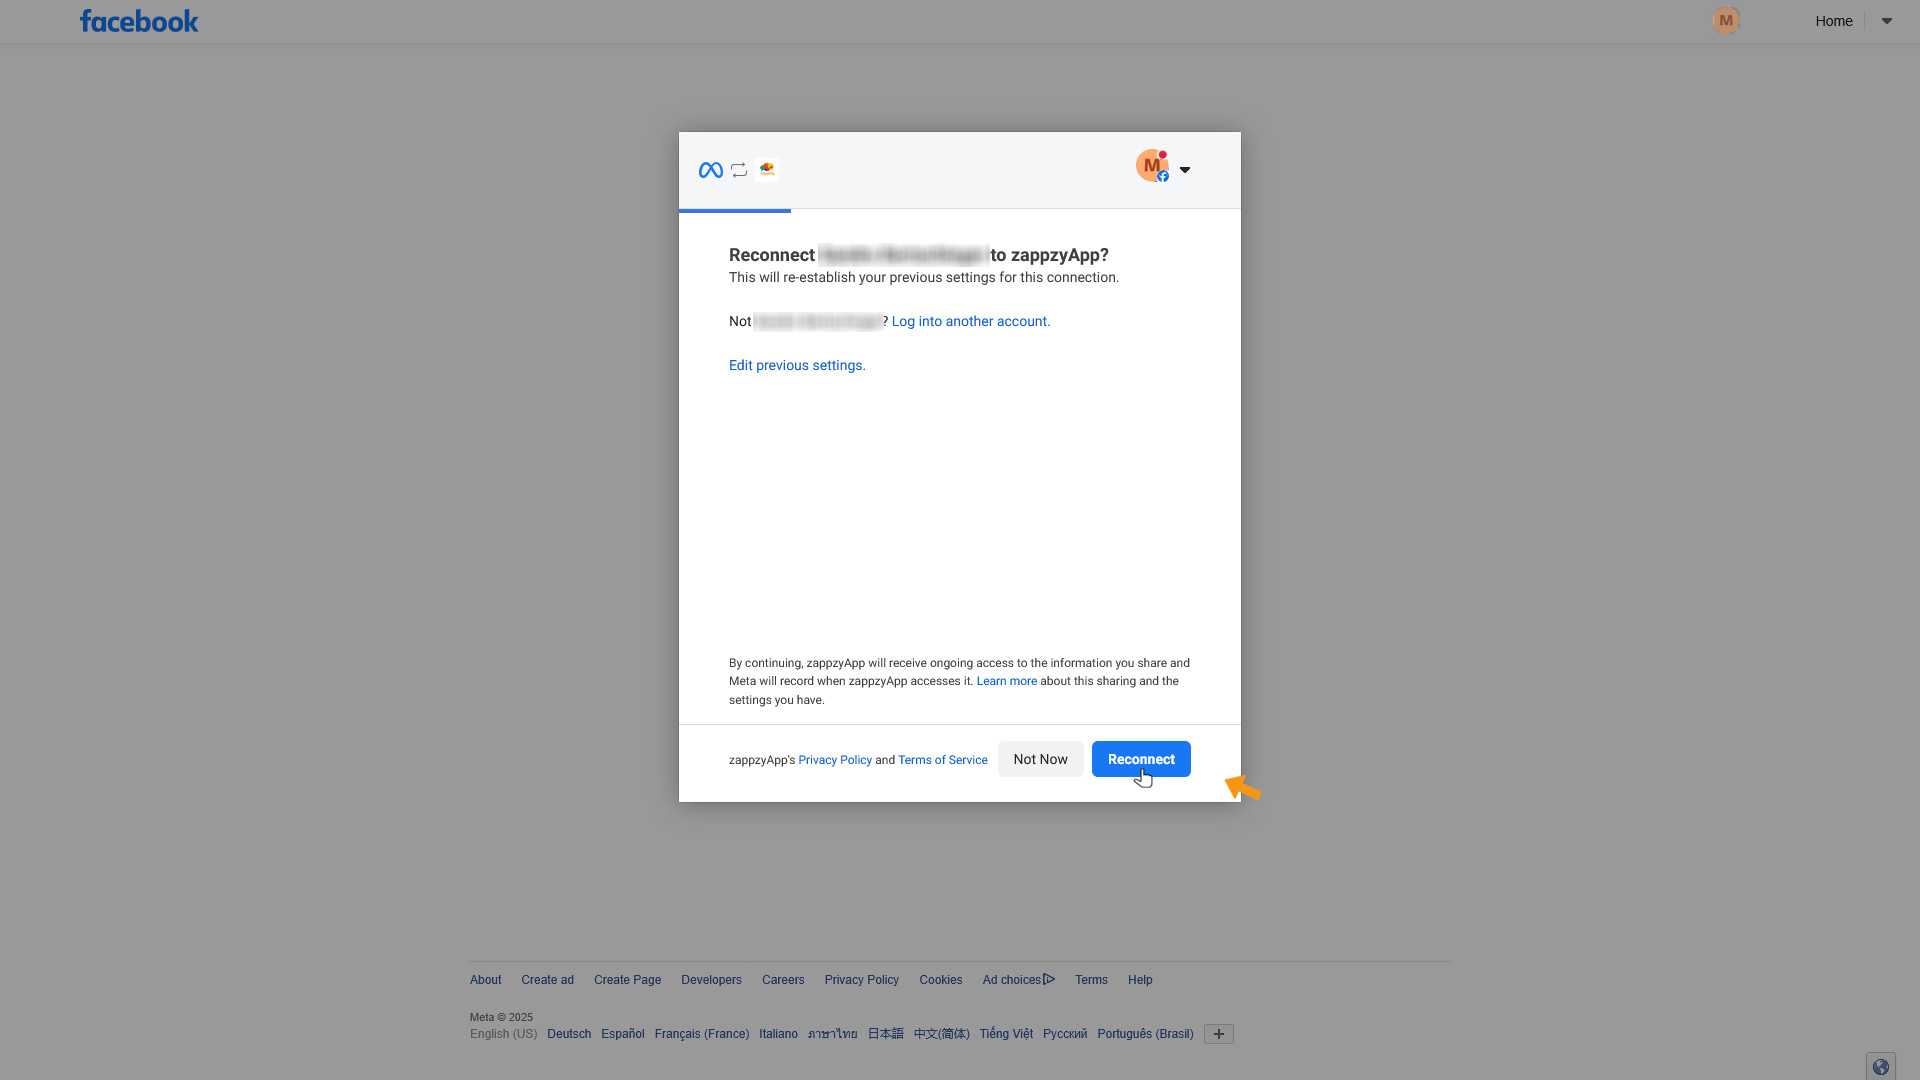
You’ll be taken to Meta’s (Facebook/Instagram) reconnect page.
Since you already set everything up when you added your Facebook Page to zappzy, there’s nothing you need to change here. Just click Reconnect — that’s it.
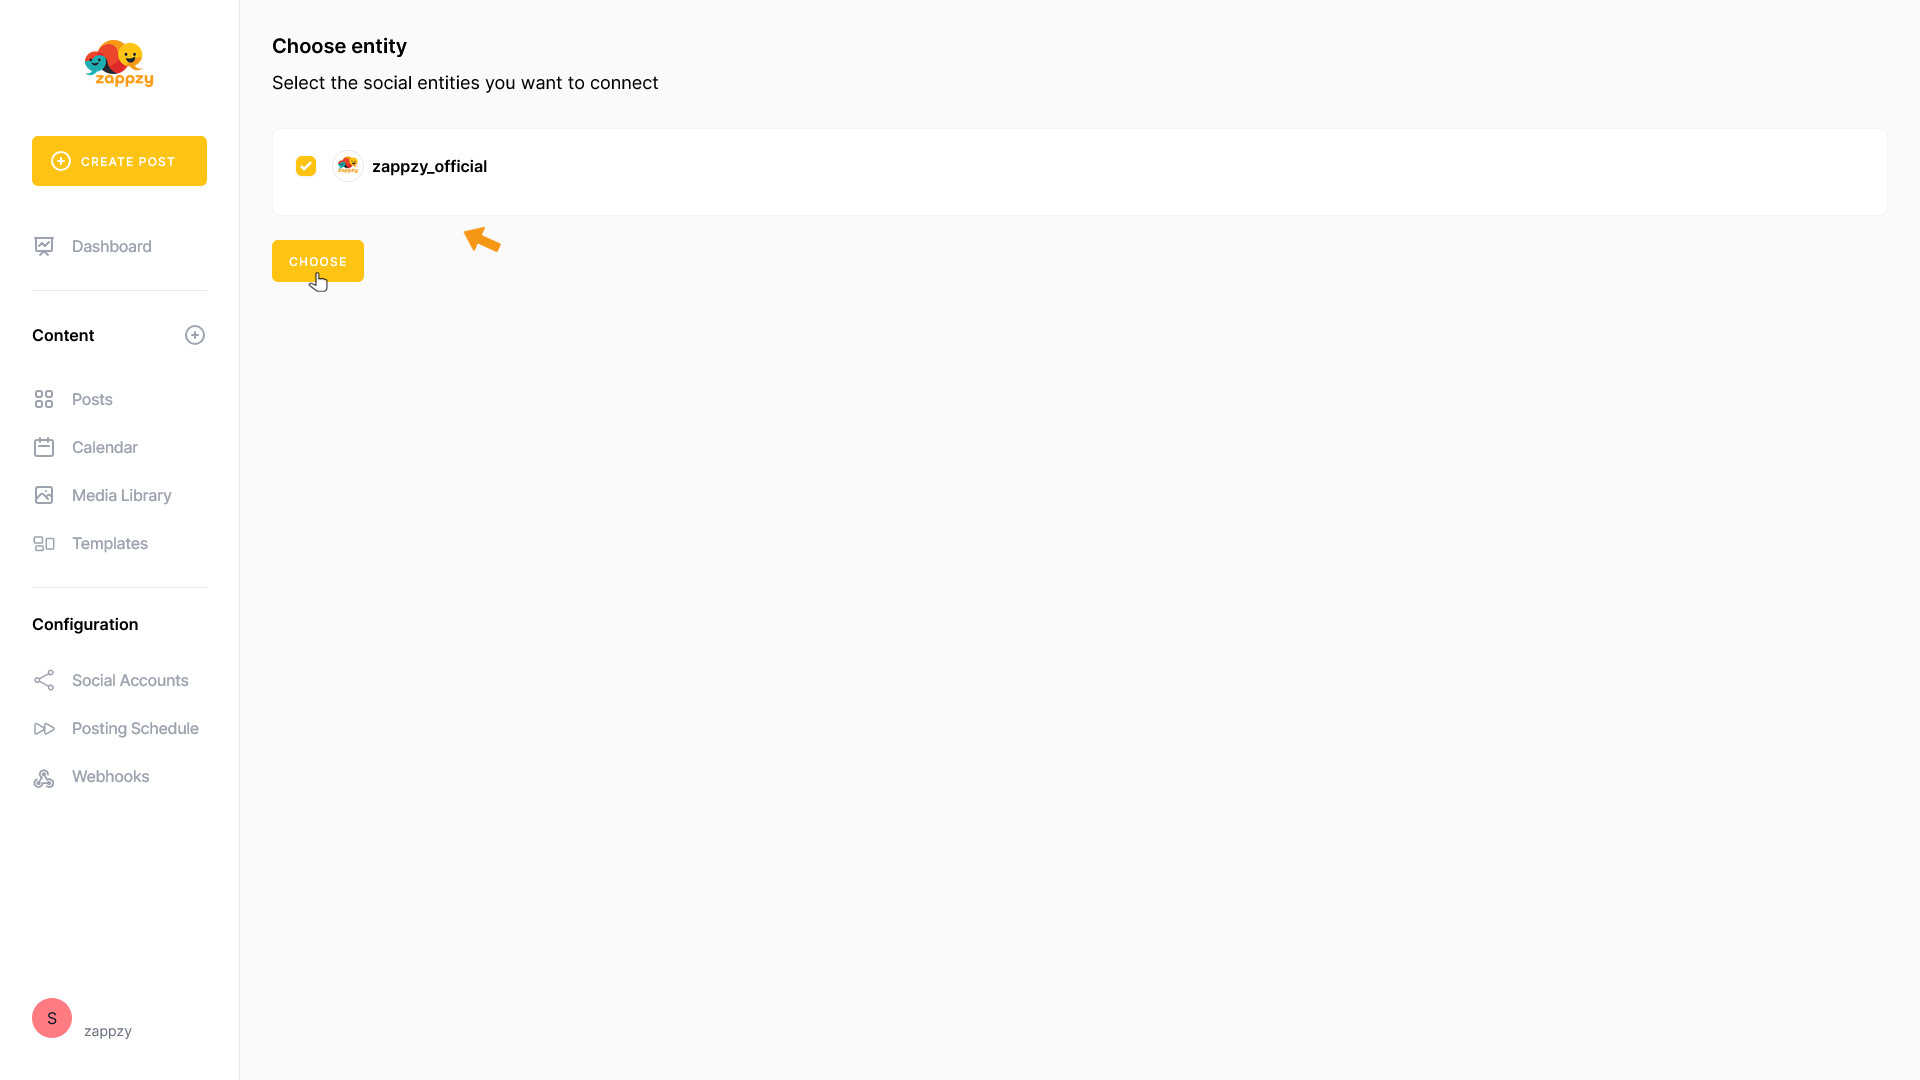
After a few seconds, you’ll be taken back to zappzy. Select the Instagram account you want to connect and click CHOOSE.
If you manage multiple Instagram accounts under your Facebook login, select the one you want to link—you can only connect one Instagram account per zappzy workspace.
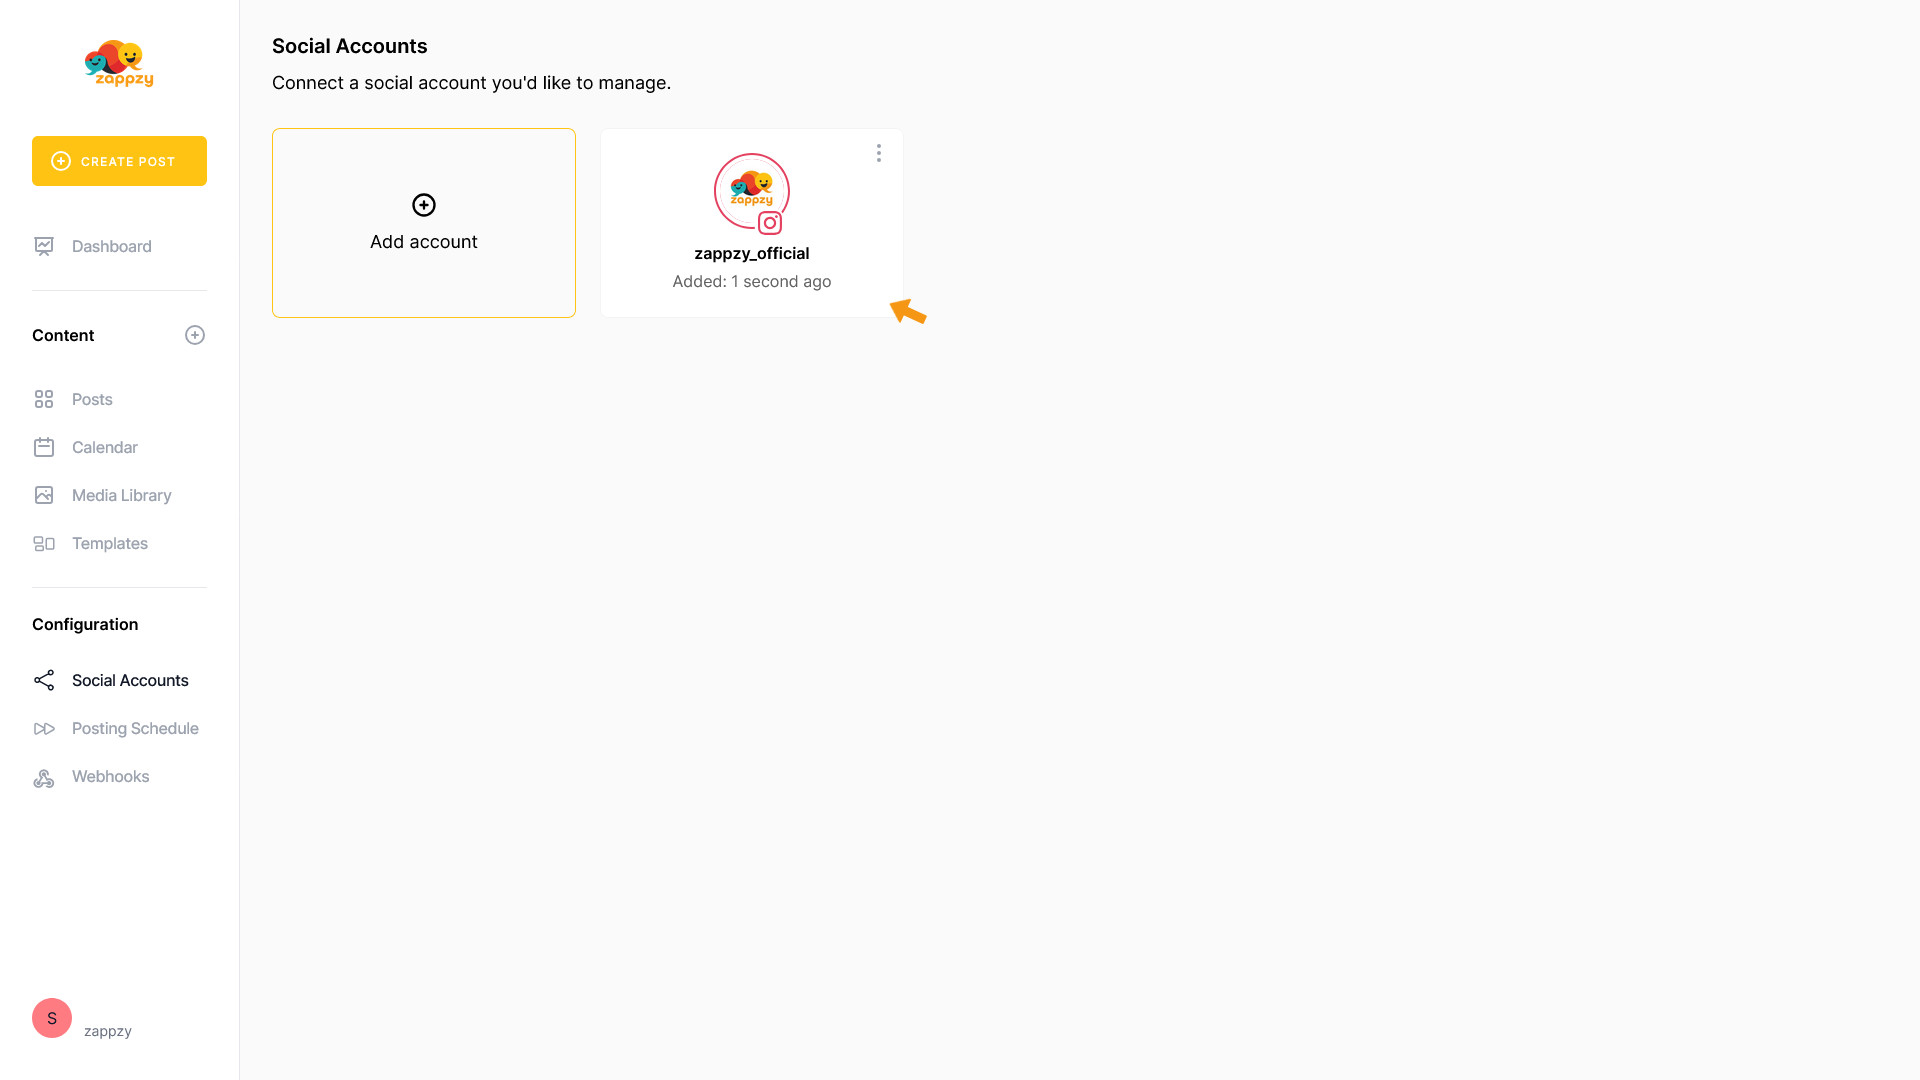
Your Instagram account is now connected.

All done. Post away.
Step-by-step guide
First, log in at zappzy.com, using your email and password.
Click Social Accounts in the left menu.
On the main screen, click the Add account button.
A list of supported social platforms will appear.
Select Instagram.
You’ll be taken to the Facebook login page.
Enter the email or phone number and the password of the Facebook account that manages the Facebook Page and Instagram account you want to connect to zappzy. Then click Log in.
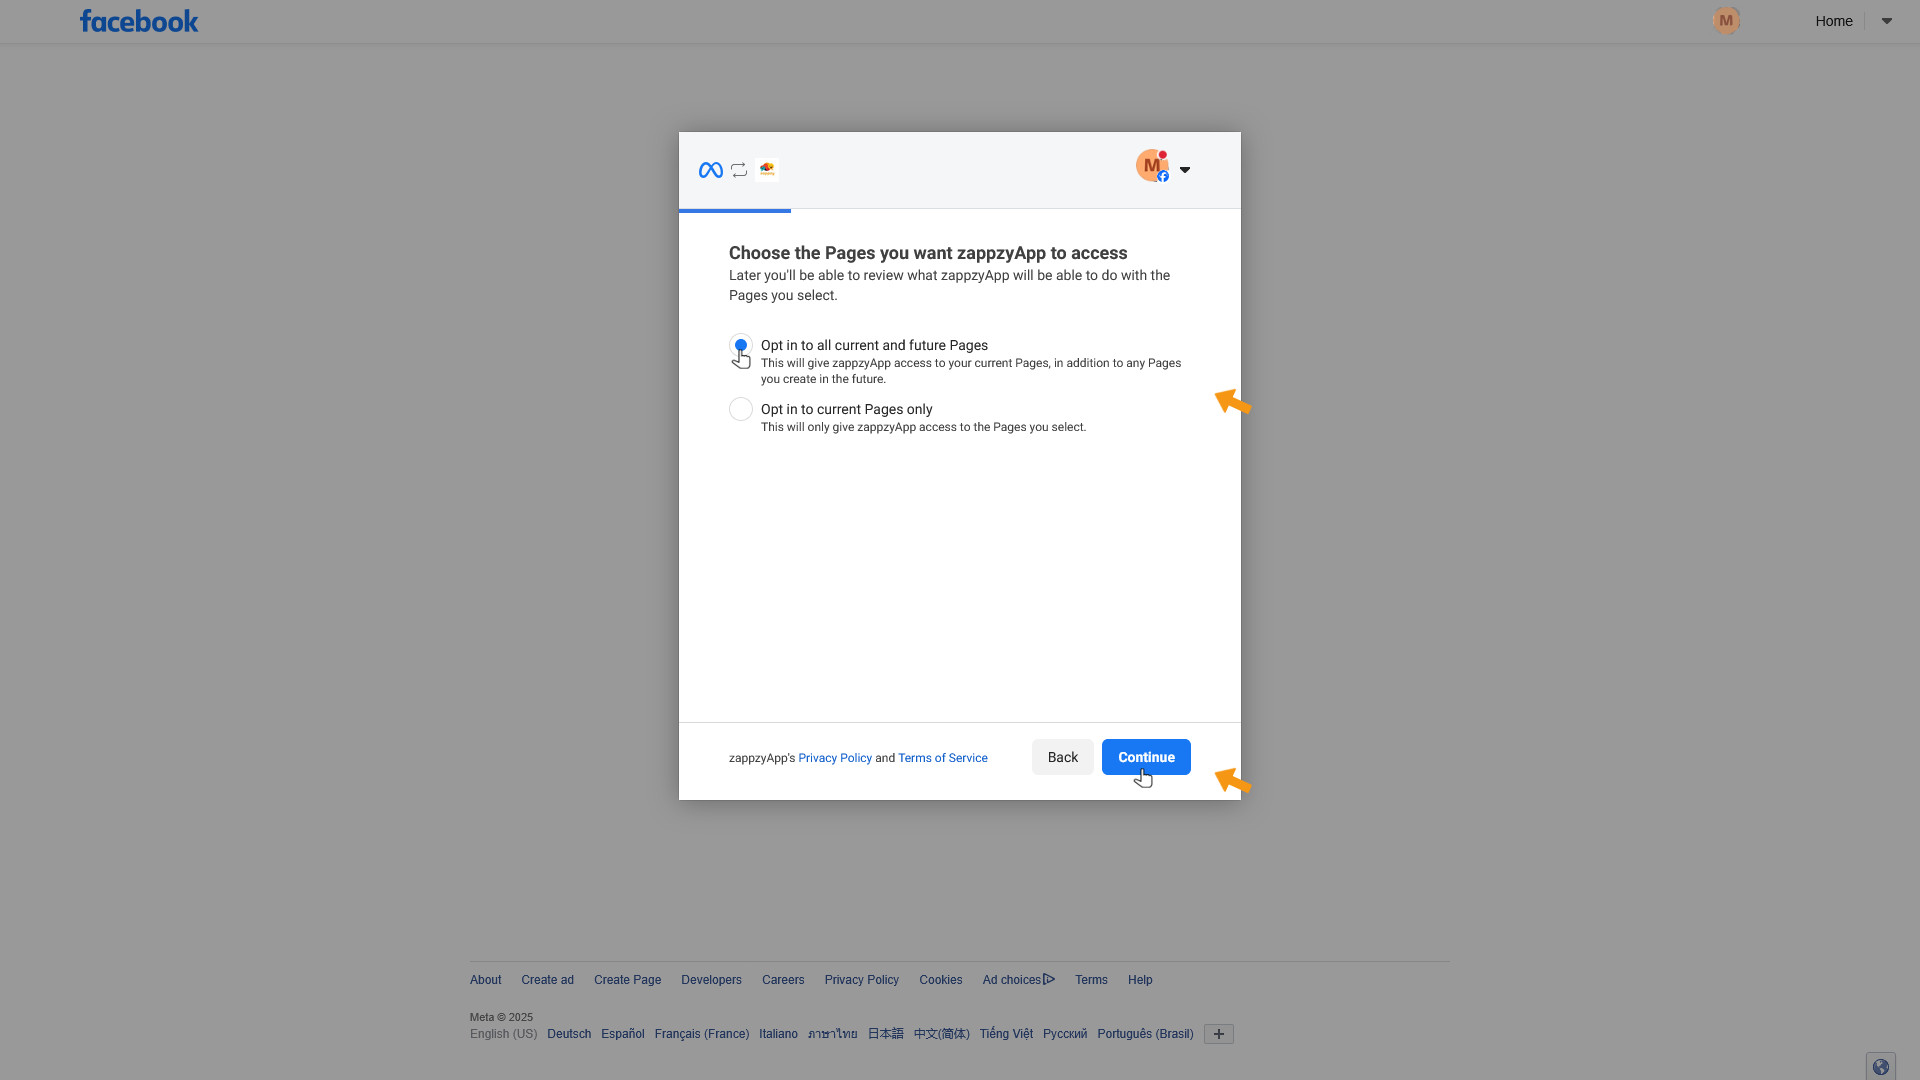
Meta (Facebook) will ask you to authorize Pages access for zappzy. Select Opt in to all current and future Pages and click Continue.
Next, Meta (Facebook) will ask you to authorize Business access for zappzy. Again, select Opt in to all current and future Businesses and click Continue.

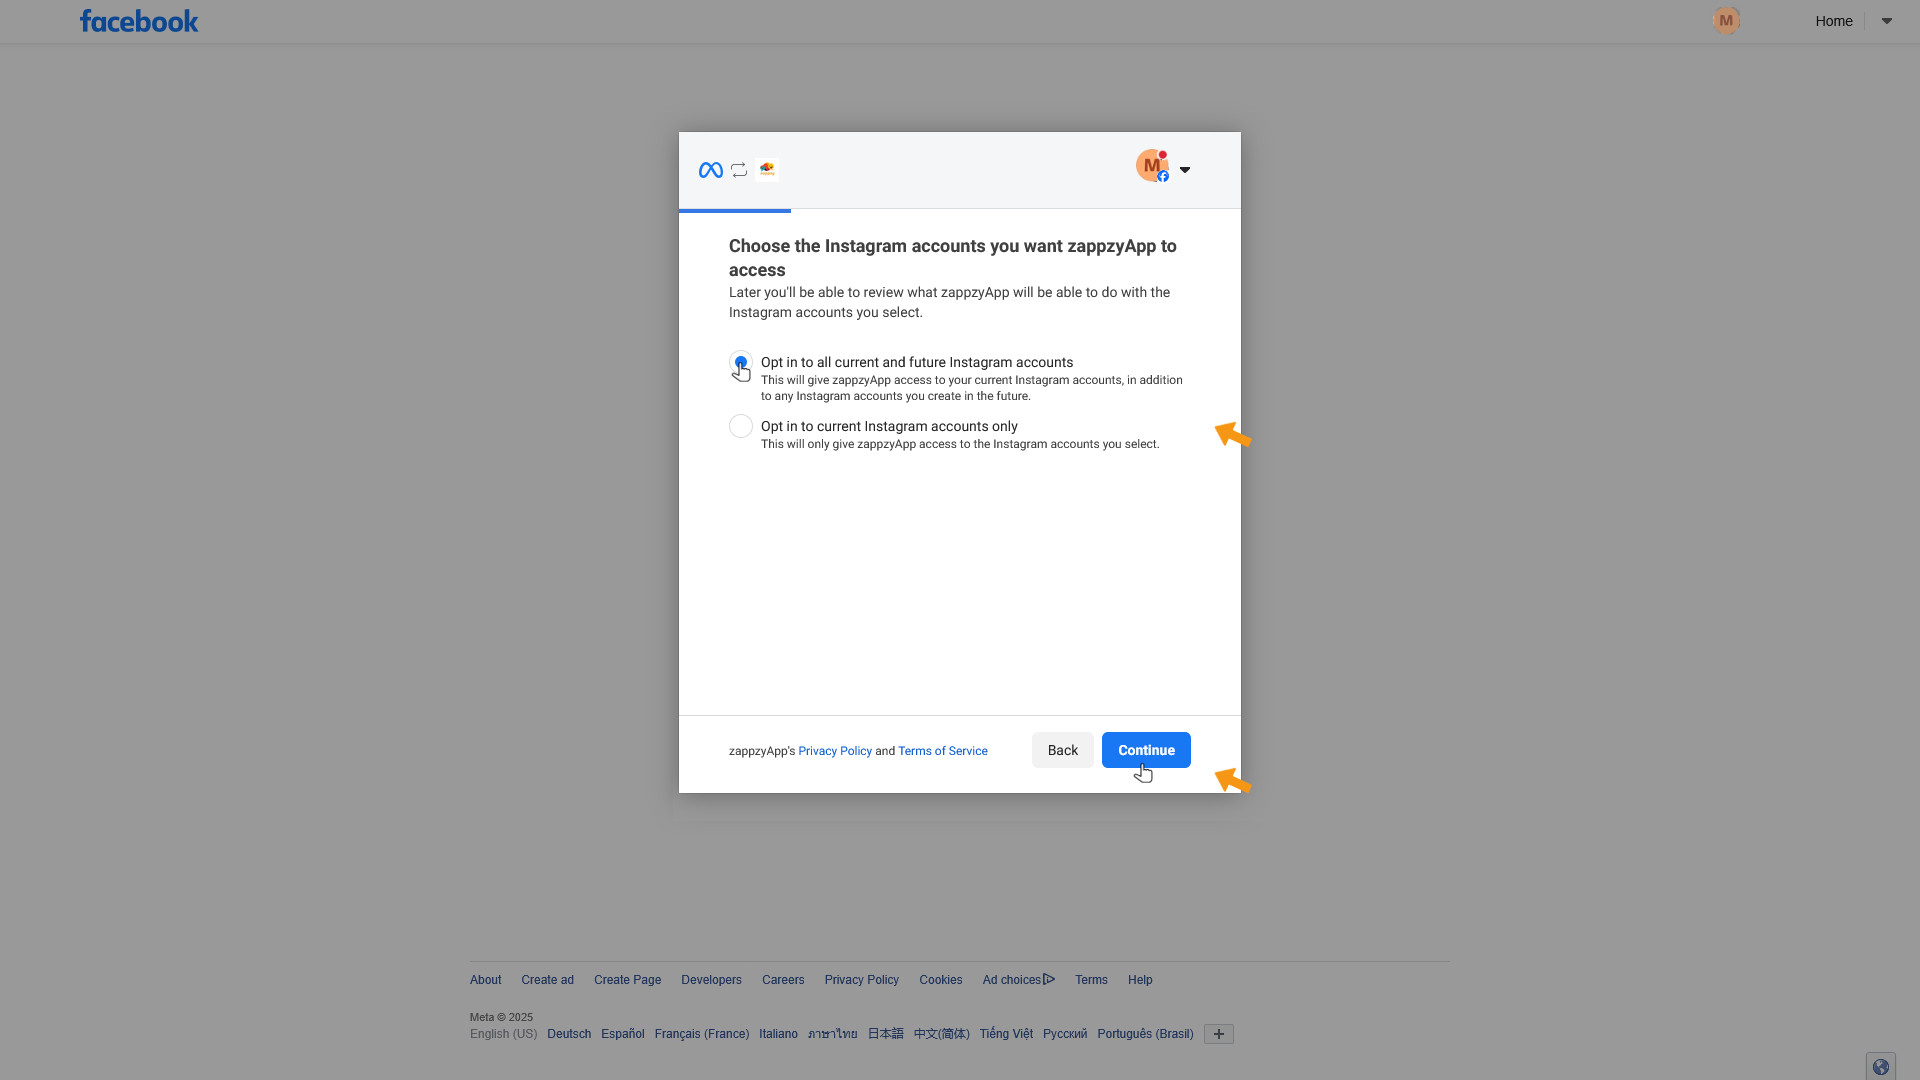
Then, Meta (Instagram) will ask you to authorize Instagram account access for zappzy. Select Opt in to all current and future Instagram accounts and click Continue.
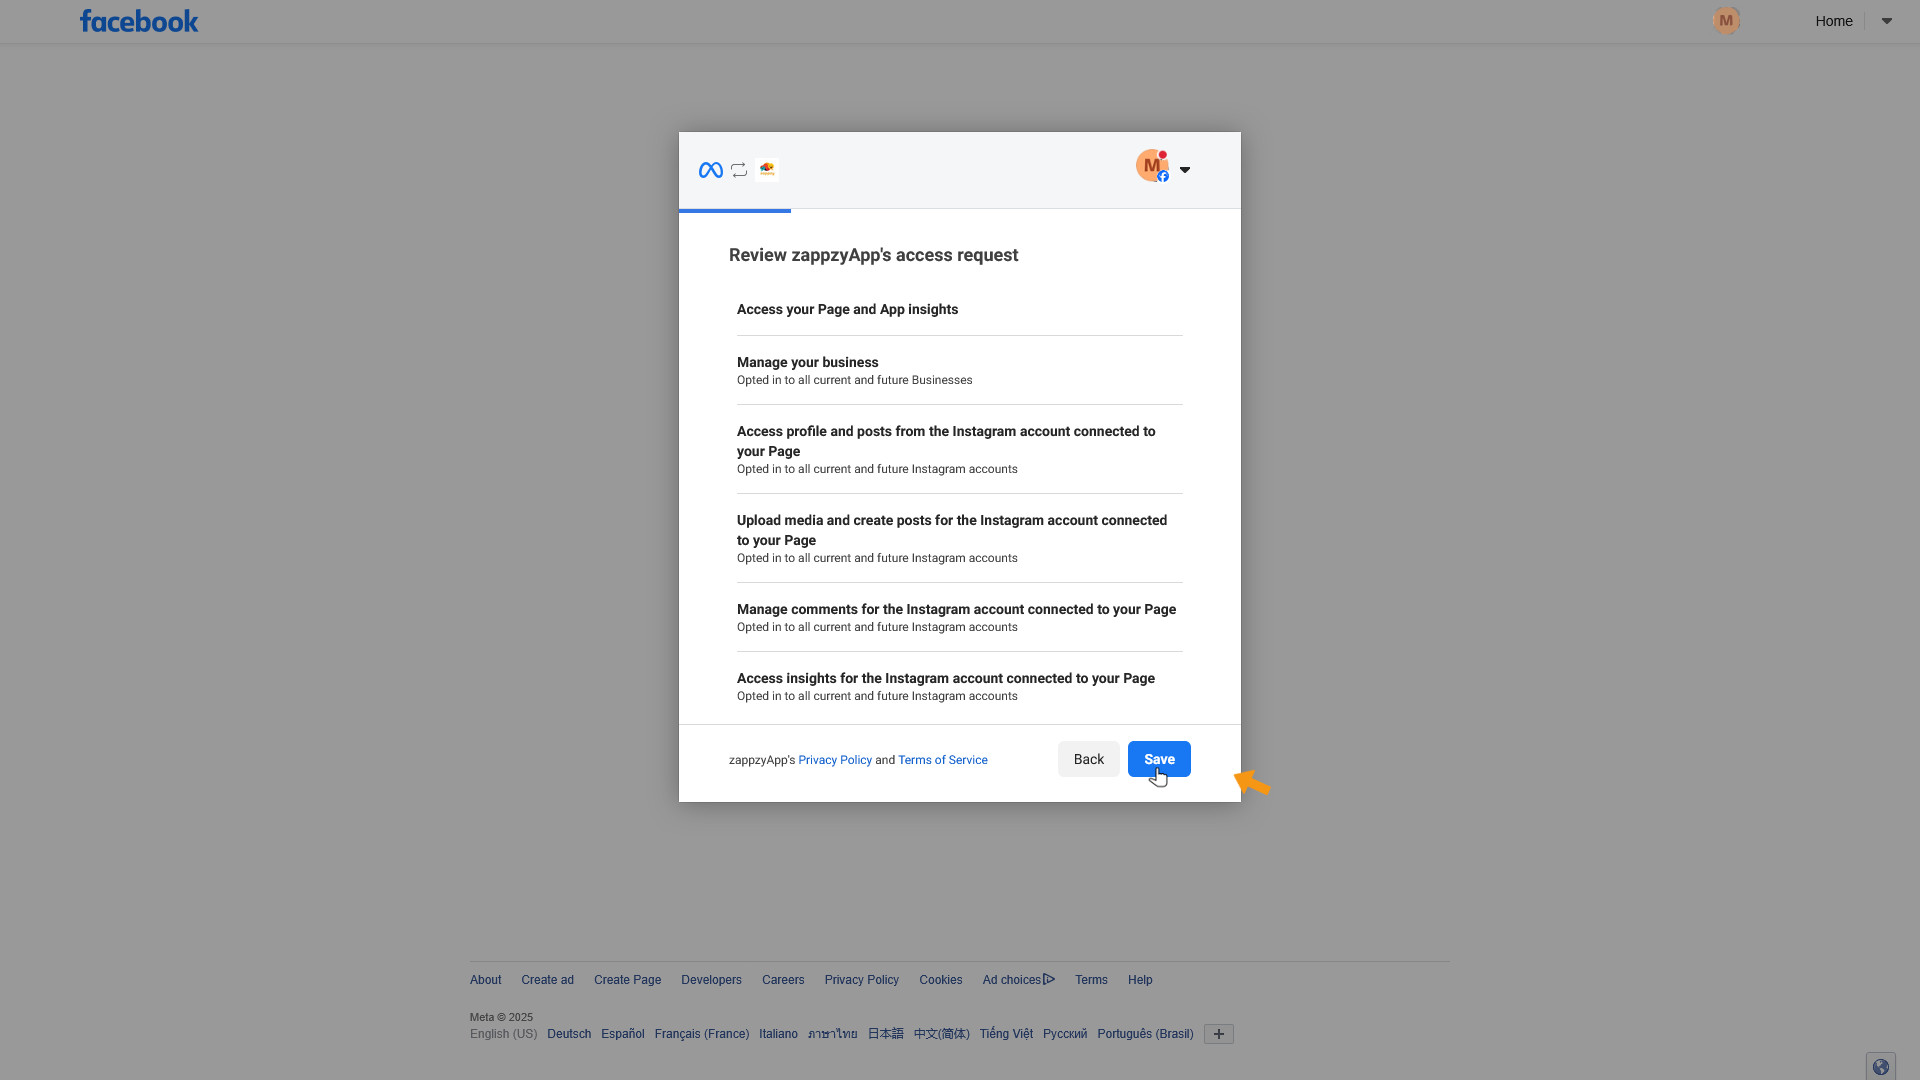
Finally, Meta will show a summary of the permissions granted to zappzy. Click Save to complete the process.
Important: Only select the options we guide you to. If you change the permissions, Meta might disconnect zappzy, and you may have to reconnect your account regularly. This can cause scheduled posts to fail.
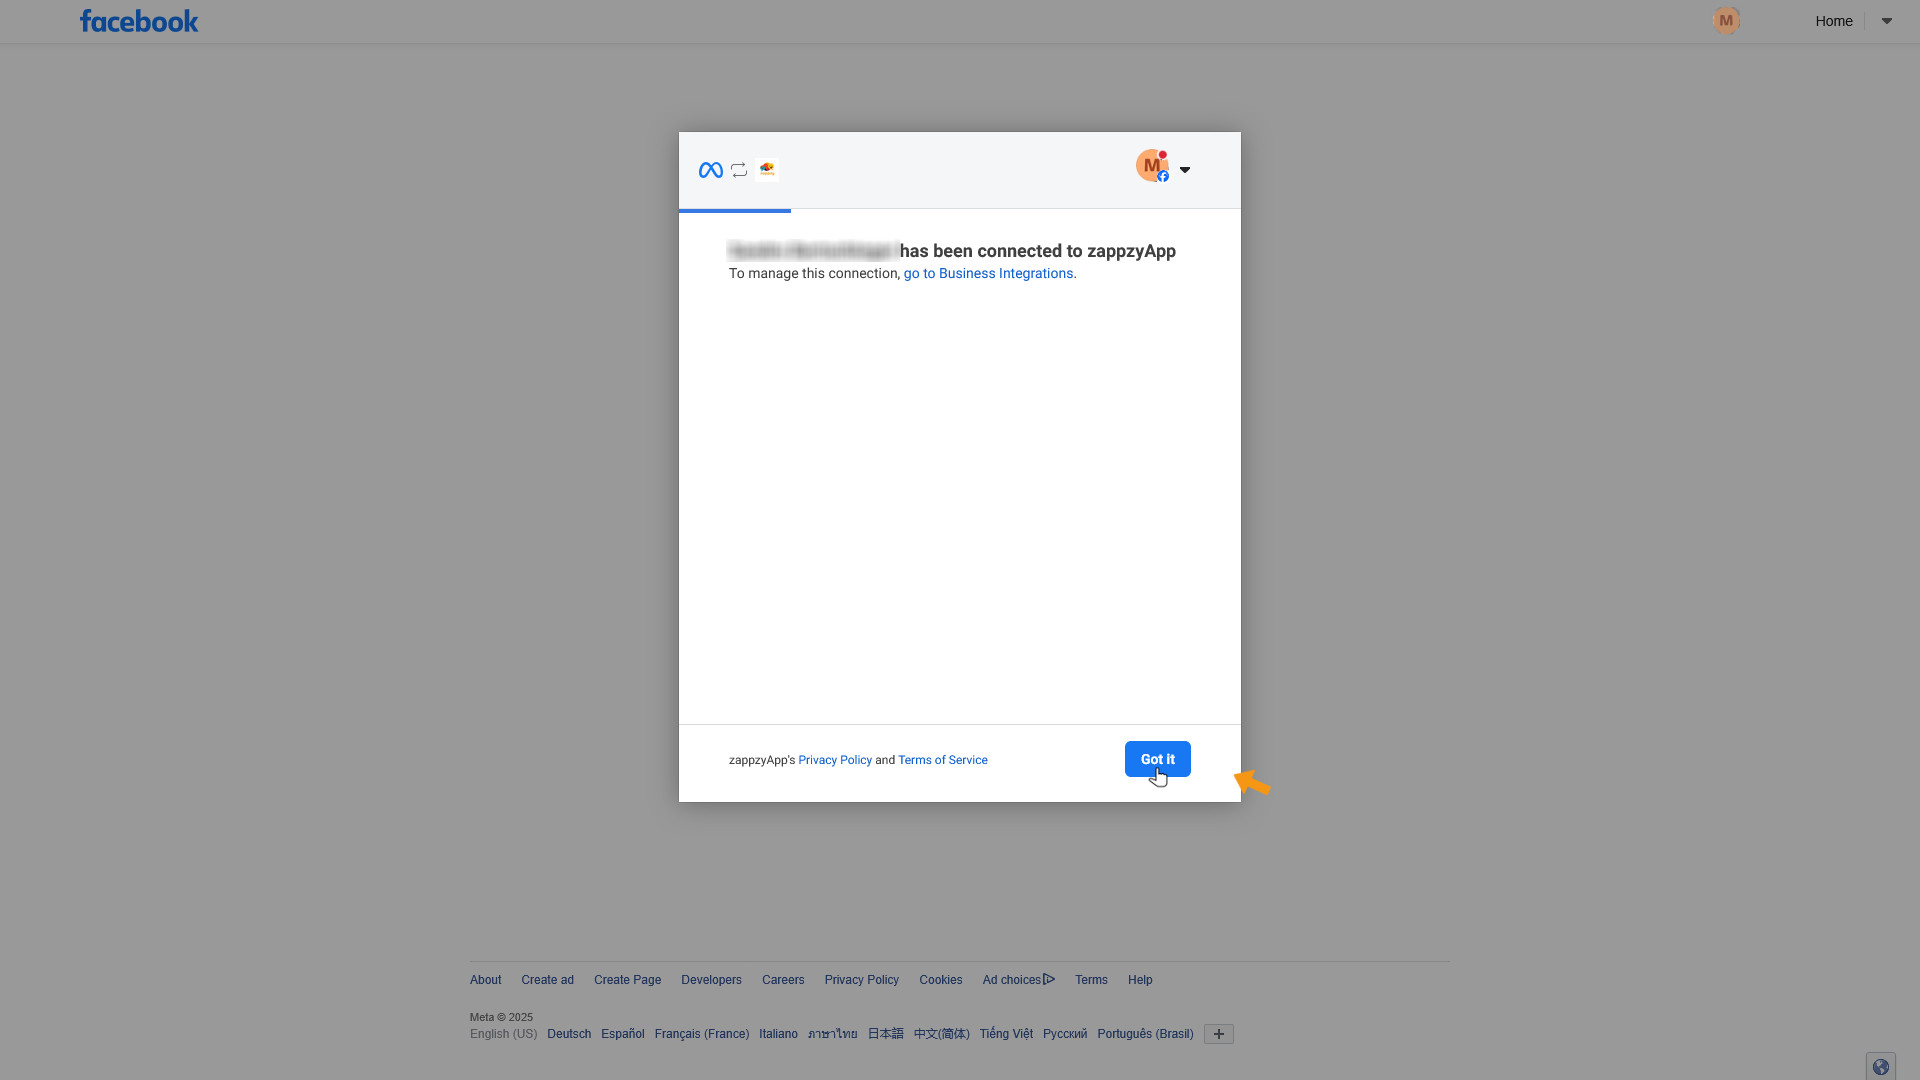
You’ll see a confirmation from Meta that zappzy is connected. Click Got it to finish.
After a few seconds, you’ll be taken back to zappzy. Select the Instagram account you want to connect and click CHOOSE.
If you manage multiple Instagram accounts under your Facebook login, select the one you want to link—you can only connect one Instagram account per zappzy workspace.

Your Instagram account is now connected.
All done. Post away.