zappzy Support Center > Getting started > Add users and manage access rights (zappzy Business only)

Video or step-by-step guide with screenshots. Your choice. Choose what fits you best.
Step-by-step guide
Once you’re logged in to zappzy, click your profile icon in the bottom-left corner.
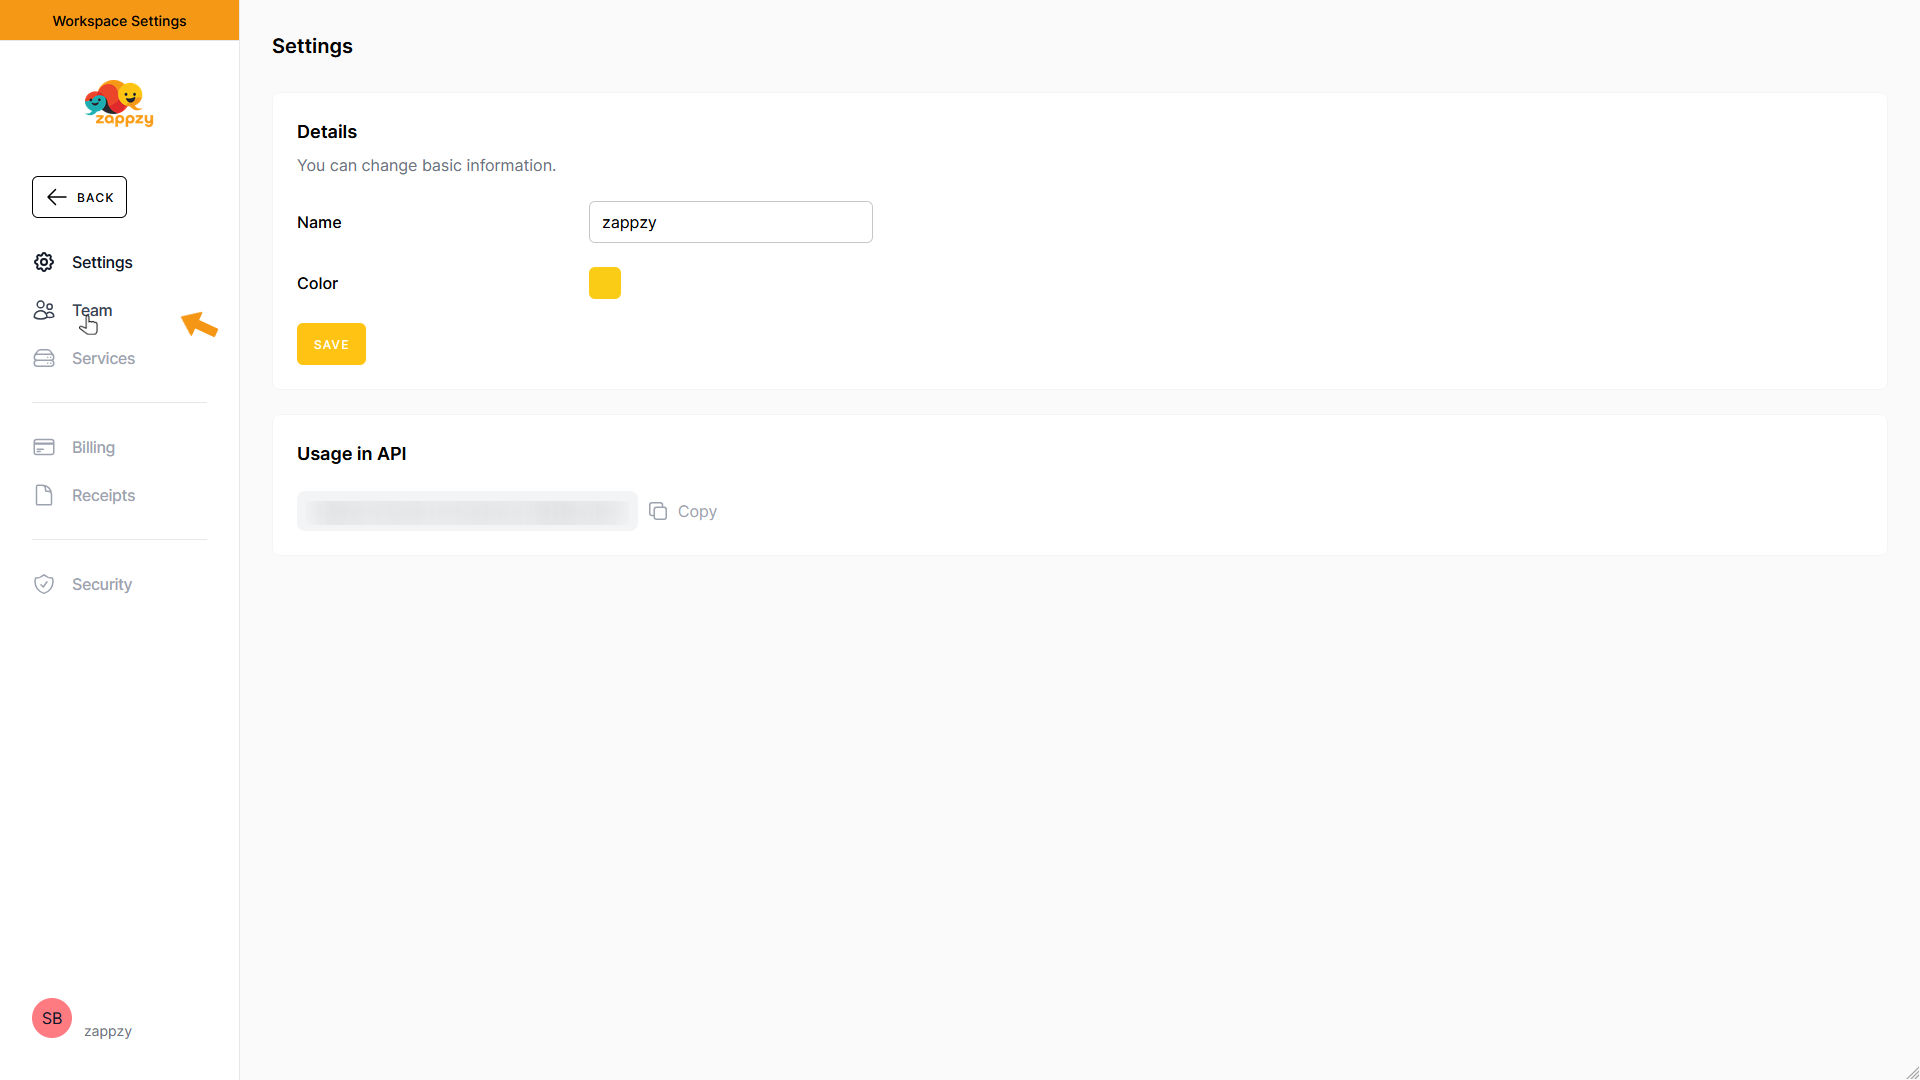
This opens your account menu. From there, click Settings.

The Workspace Settings menu opens. From the menu, click Team.
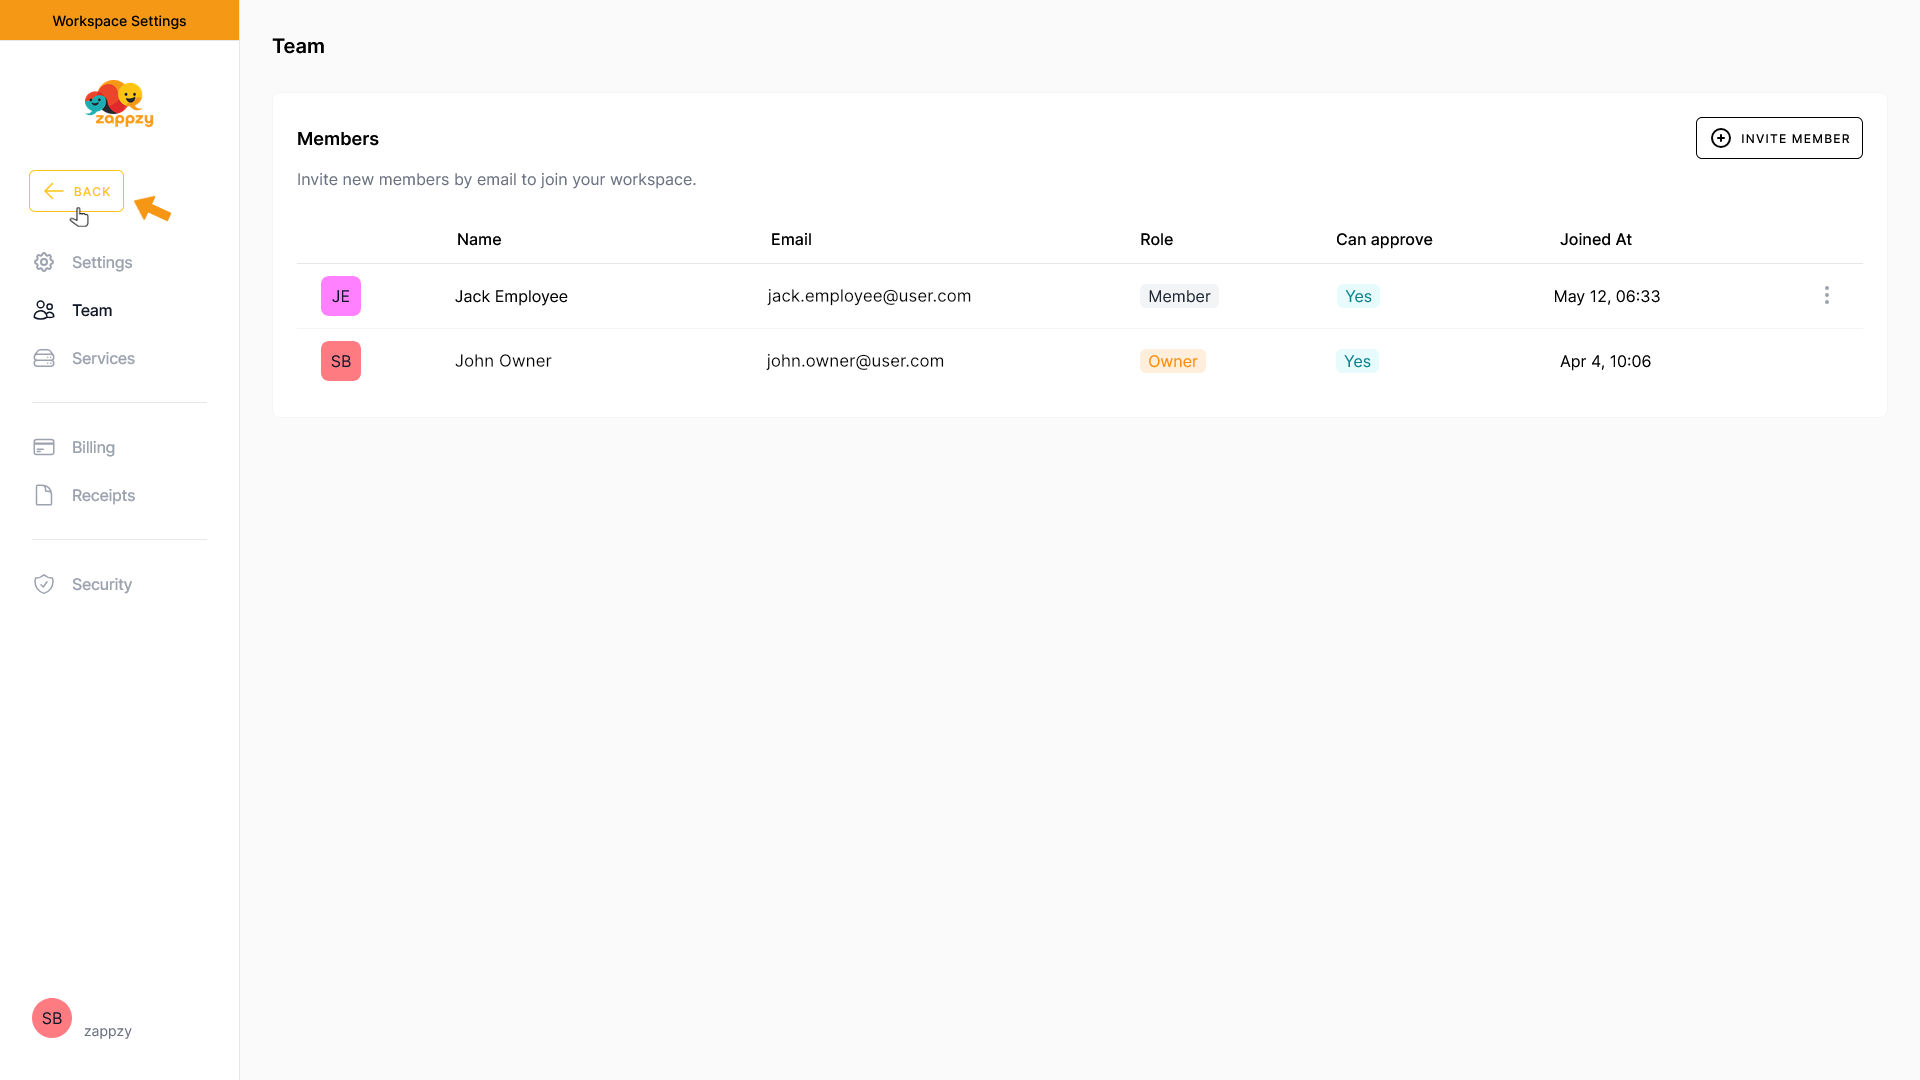
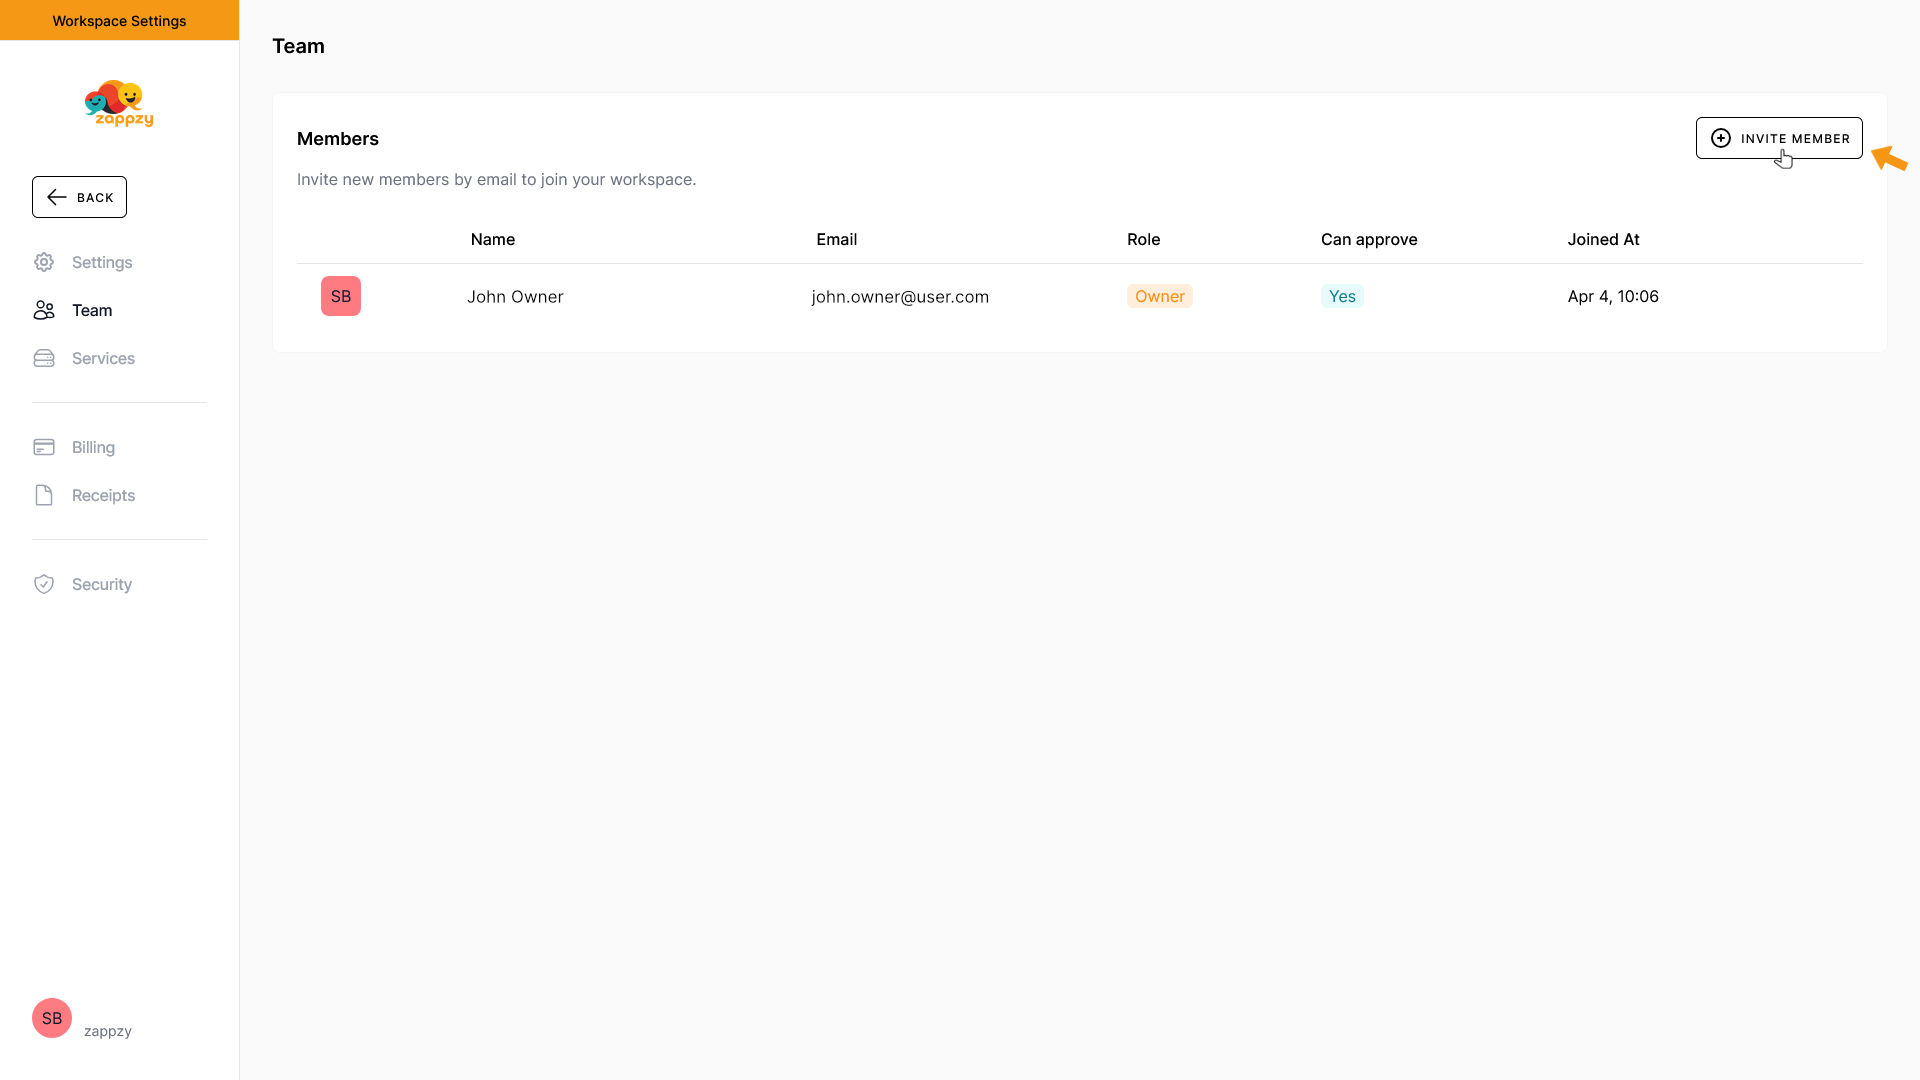
The Team overview will appear on your main screen. Here you'll see who's part of your workspace and their access rights. In our example, only the workspace owner is listed.
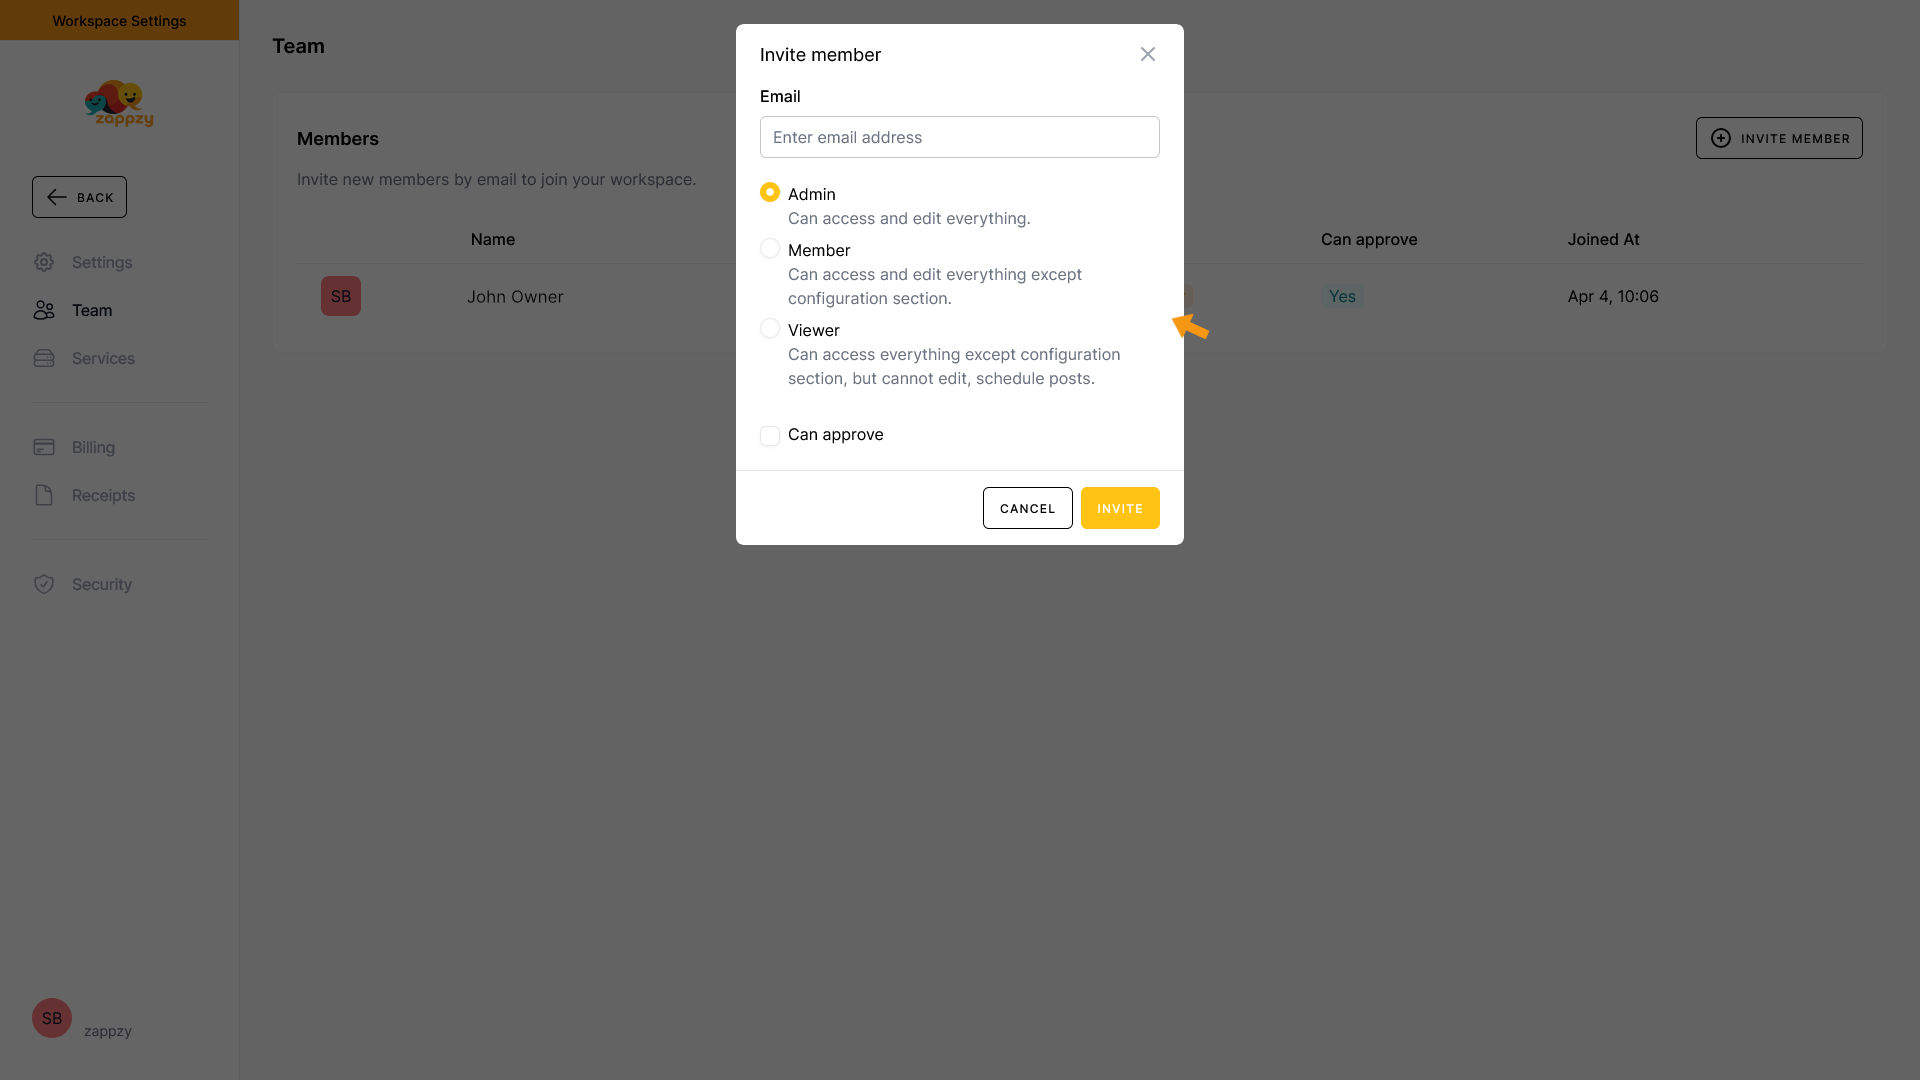
Now let's add a new member. Go to the top-right corner and click the INVITE MEMBER button.
The Invite Member pop-up will appear. Here, you can enter the email address of the person you'd like to invite and select their access rights.
You have three options to choose from:
Lastly, there's the Can approve setting:
When enabled, Members or Viewers can review and approve posts before they're published.
For example, if you're the workspace owner and CEO, you might prefer to have final approval yourself. In that case, you would disable Can approve for team members. They’ll still be able to create and schedule posts—but these posts won't go live until you've approved them. If you're an agency, you might give your client (a Viewer) approval rights, so they can ensure posts meet their expectations.
You can enable or disable this option anytime.
In short: If Can approve is disabled, that person can't publish posts directly—they always need approval.
Important: Approval rights can't be removed from the workspace owner.
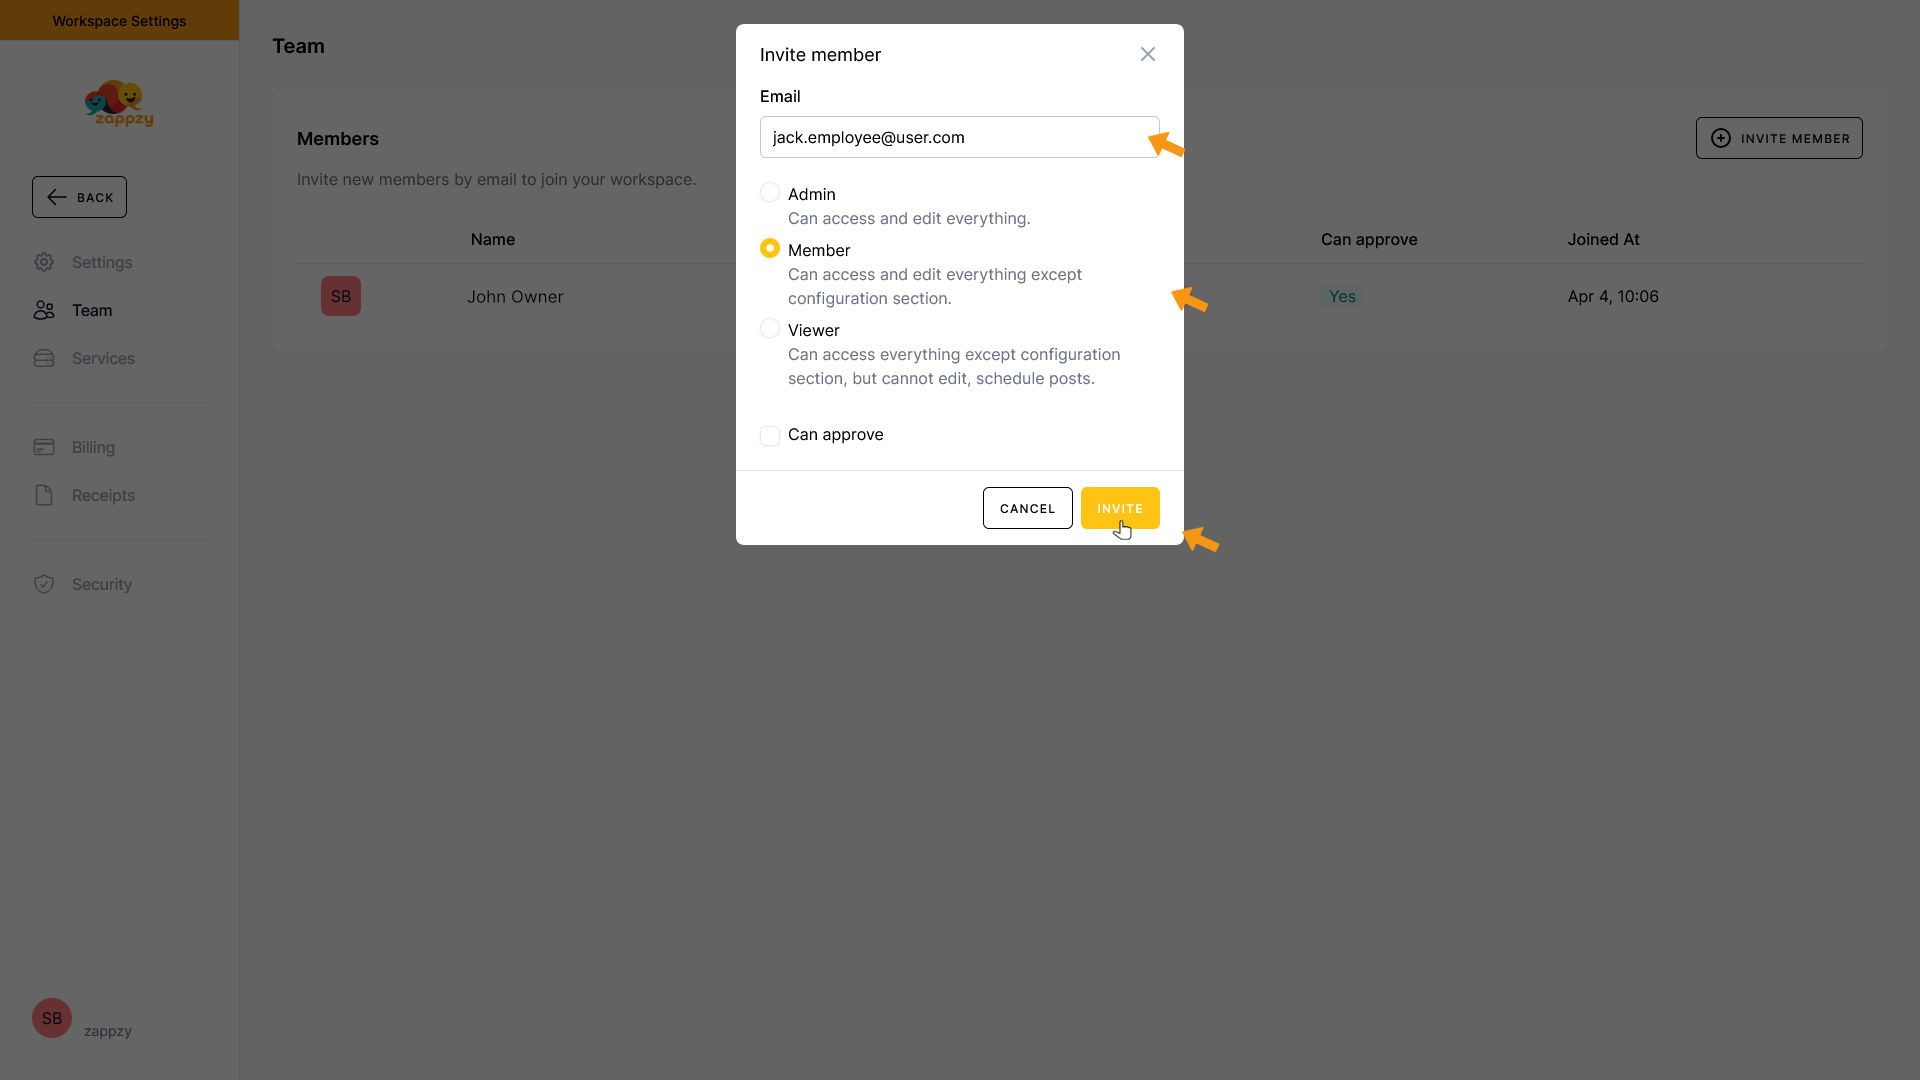
Now enter the email address of the person you want to invite, select one of the three access rights, and set the Can approve option. Then click INVITE.
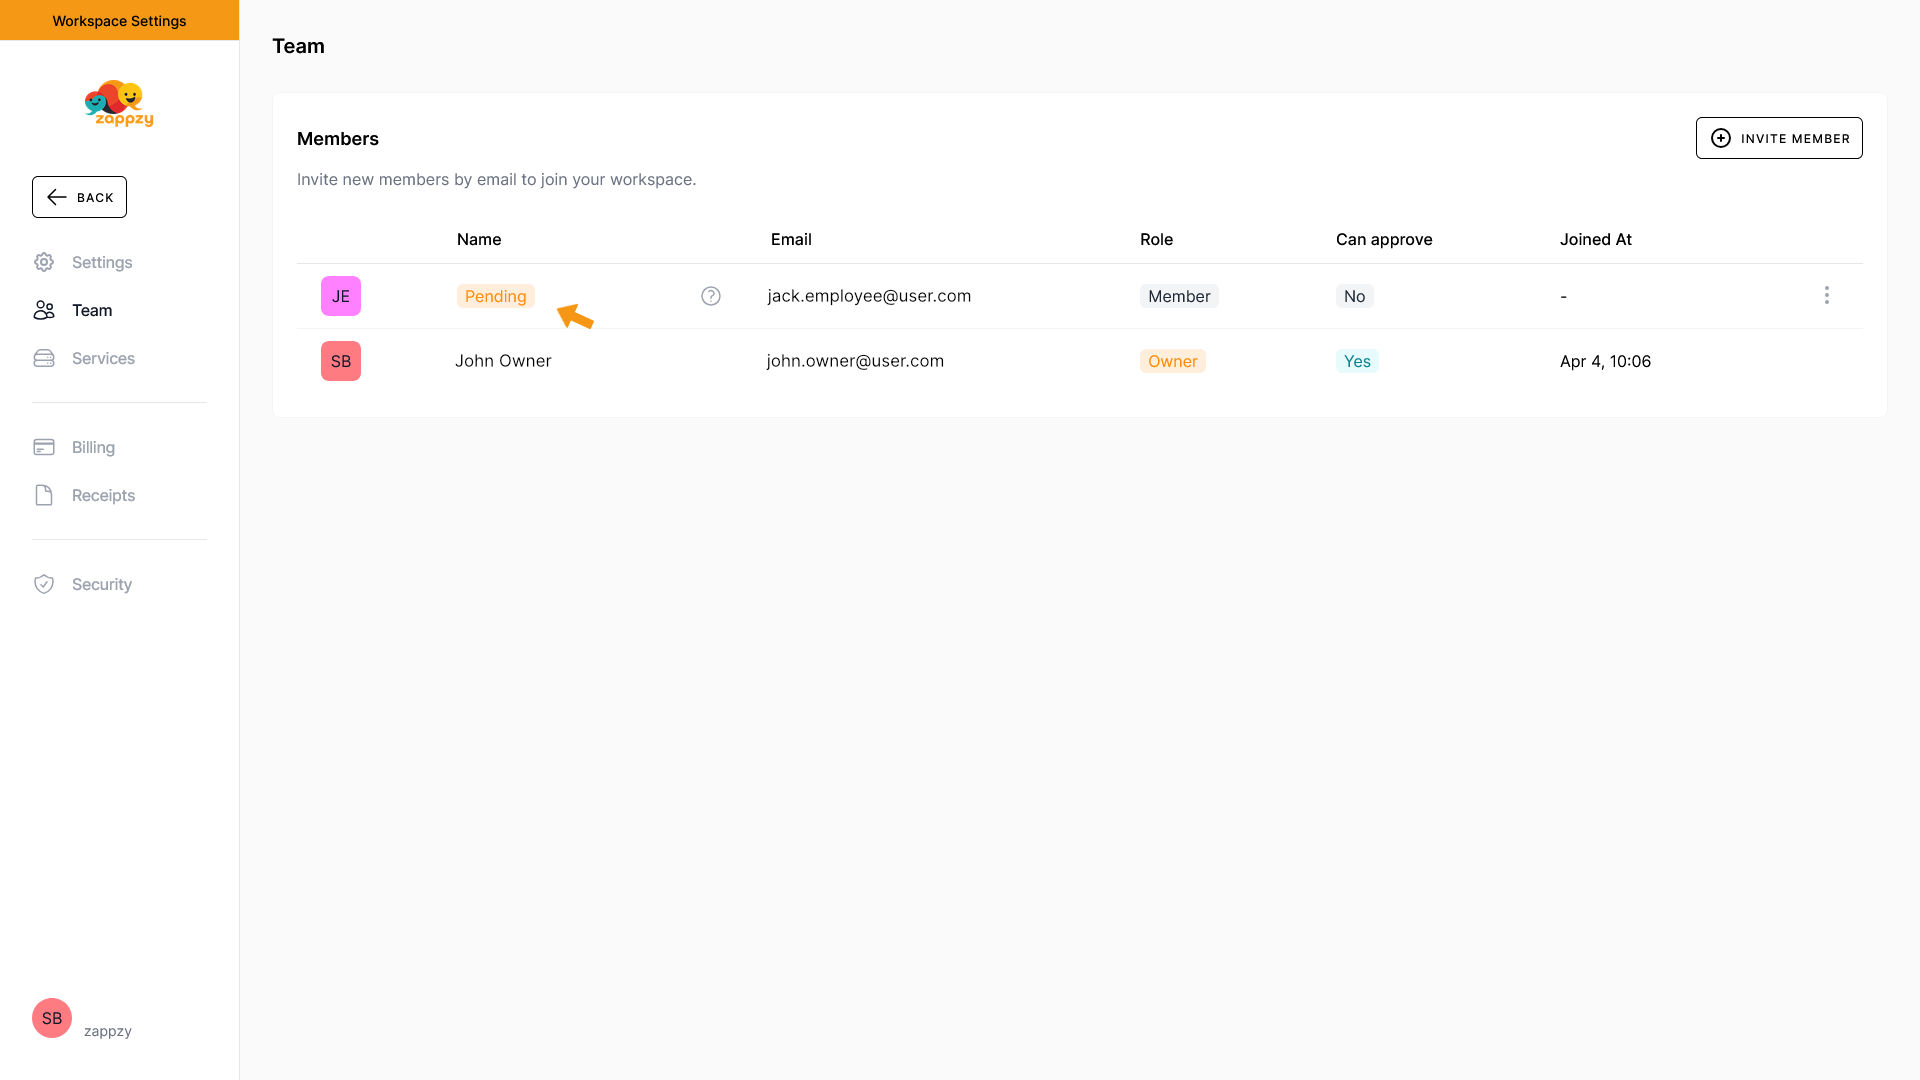
You'll return to the Team overview. You'll now see the invitation marked as Pending. That means the invited person will receive an email invitation from zappzy to join your workspace.
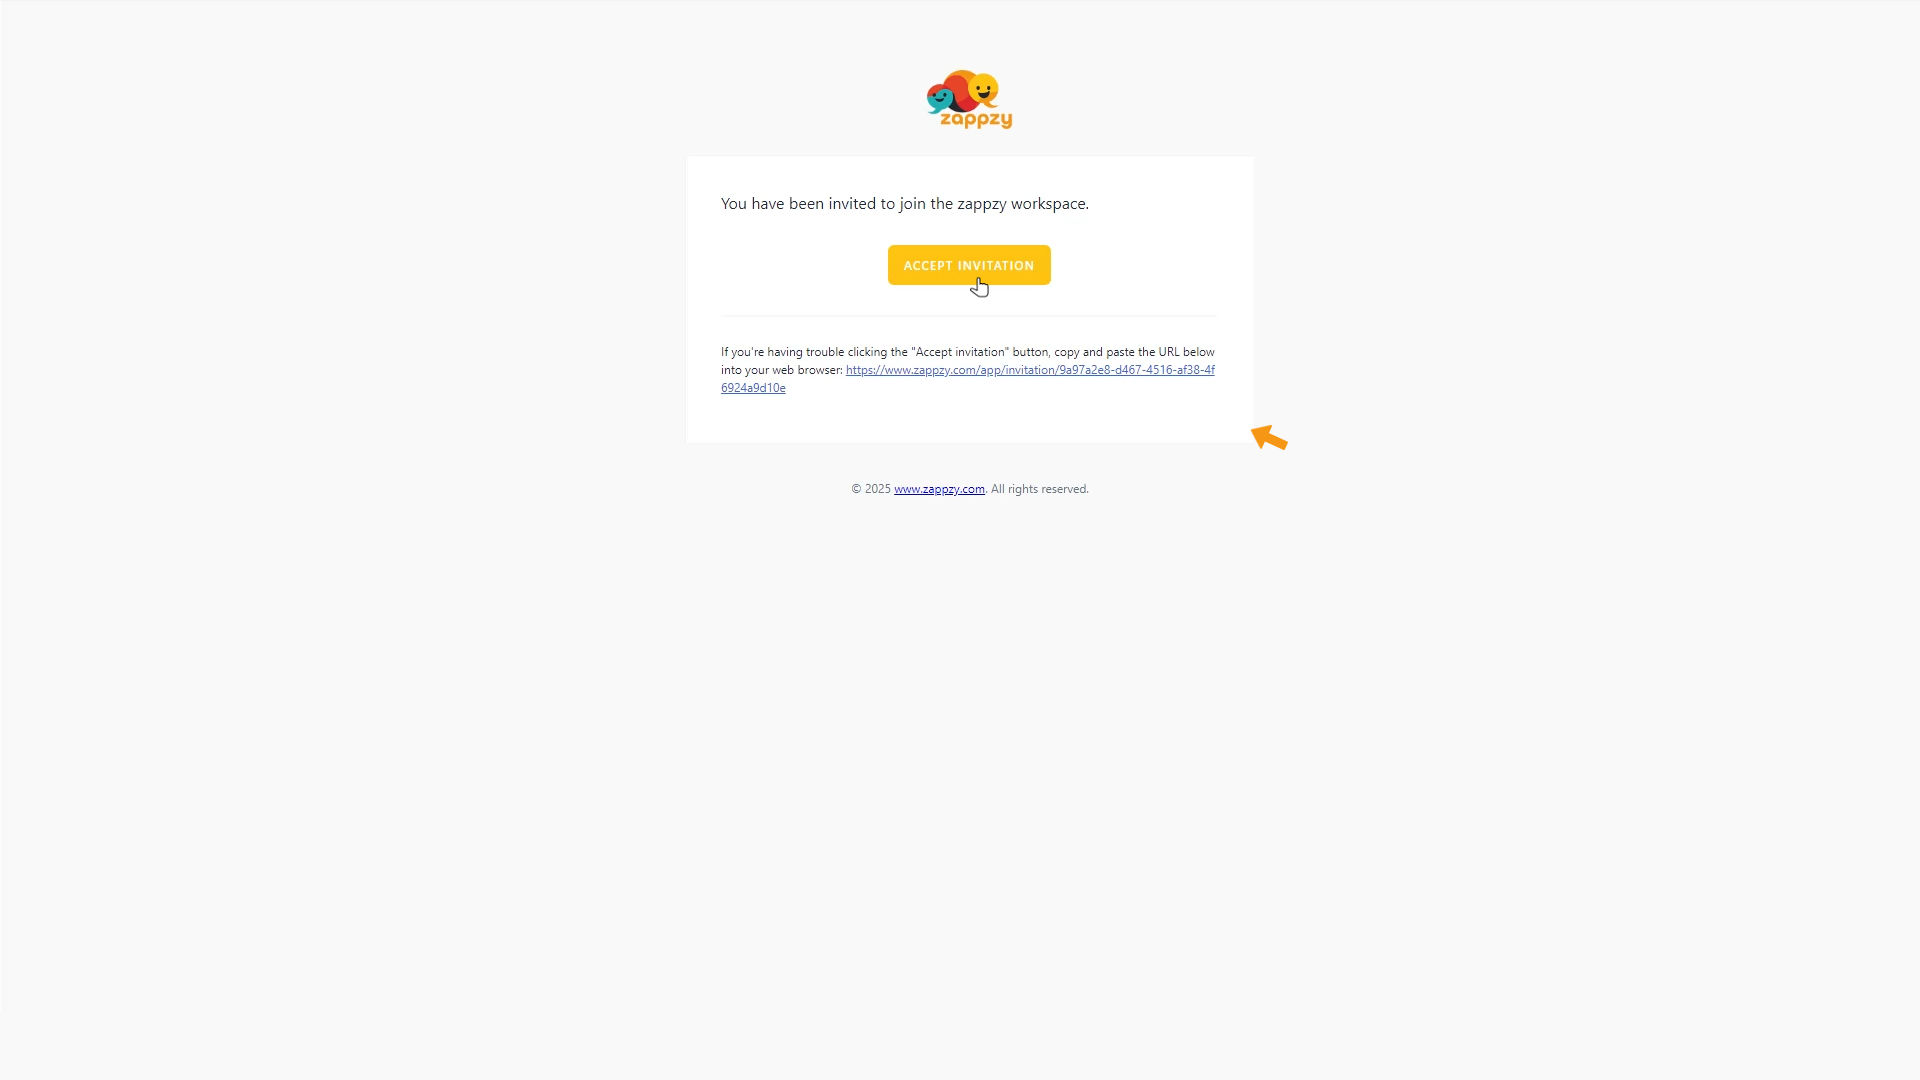
Let's switch to the invited person's view.
They'll receive an email from zappzy shortly, asking them to accept the invitation to your workspace. To get started, they click the ACCEPT INVITATION button — this will take them to the signup process.
They'll be redirected to the registration page.
The email address you entered will already be filled in — and it's important that they don't change it. If they do, the connection to your workspace won't work!
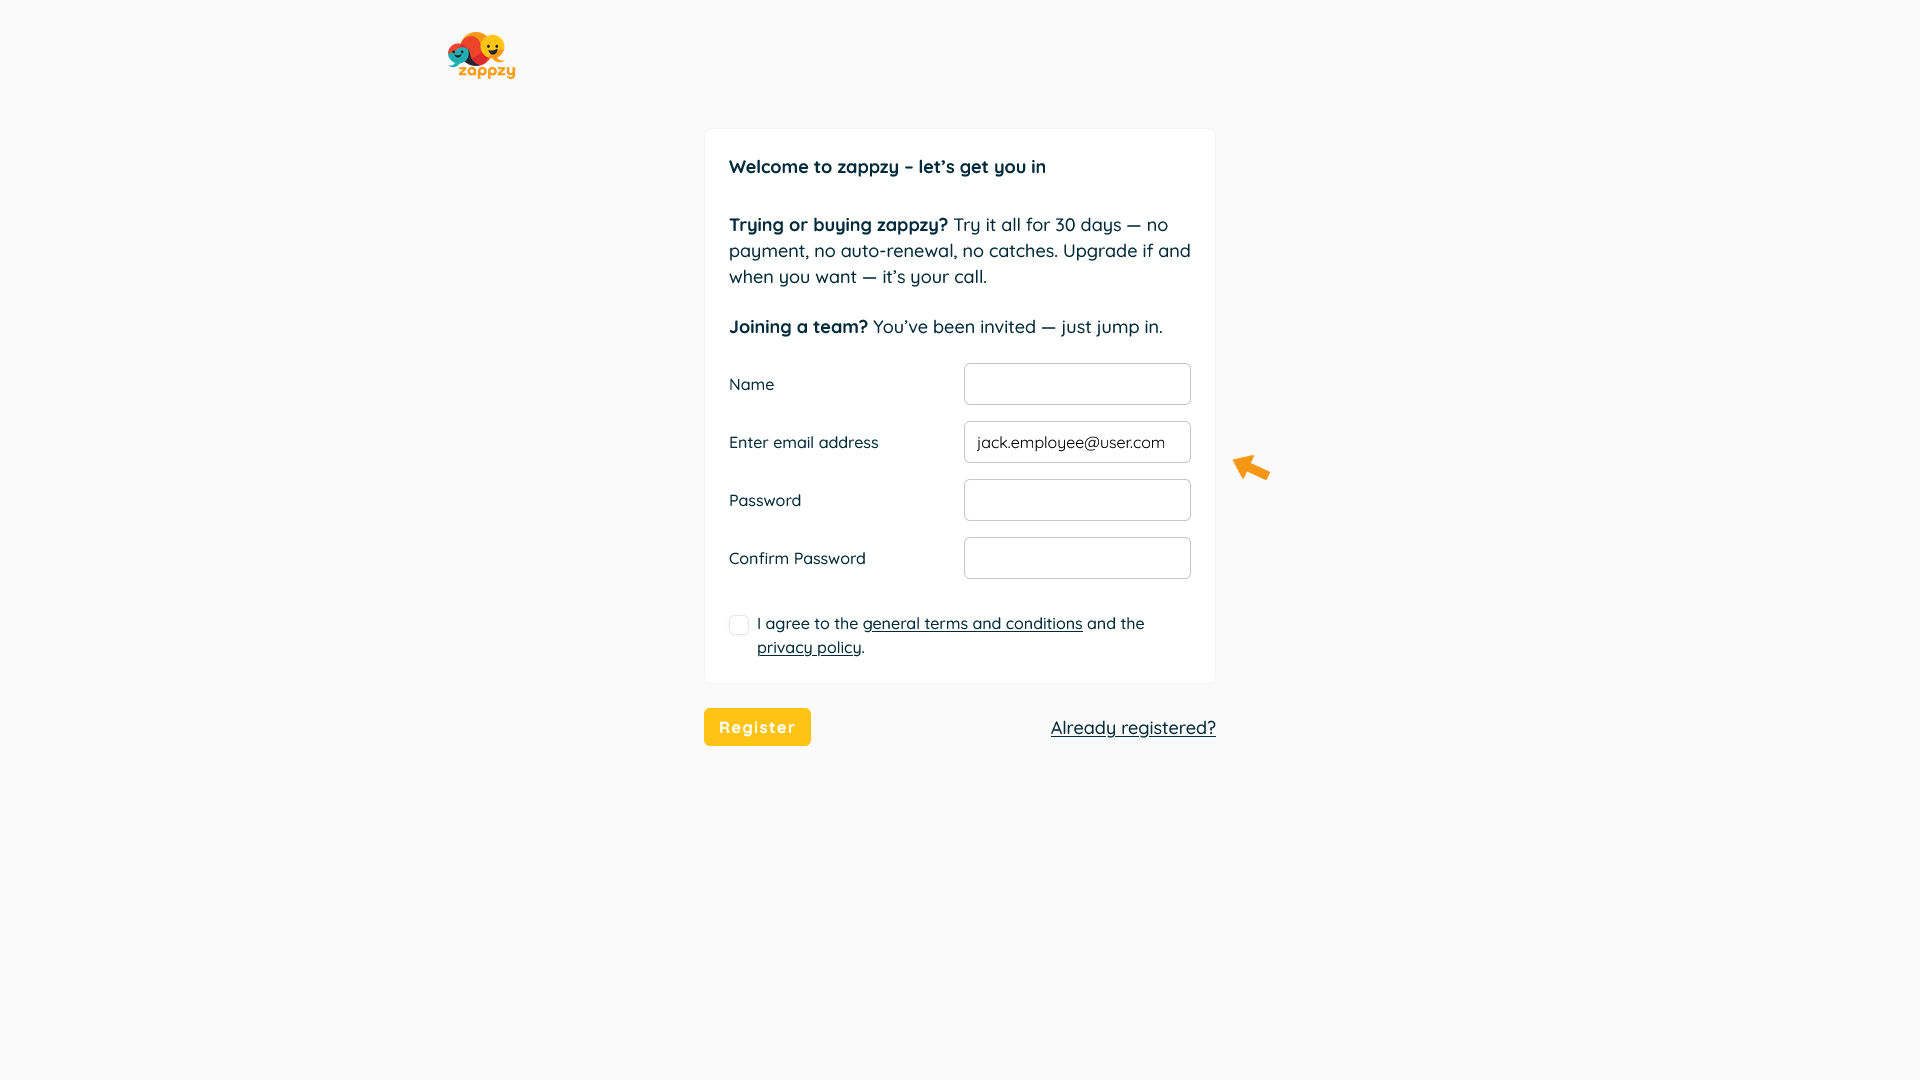
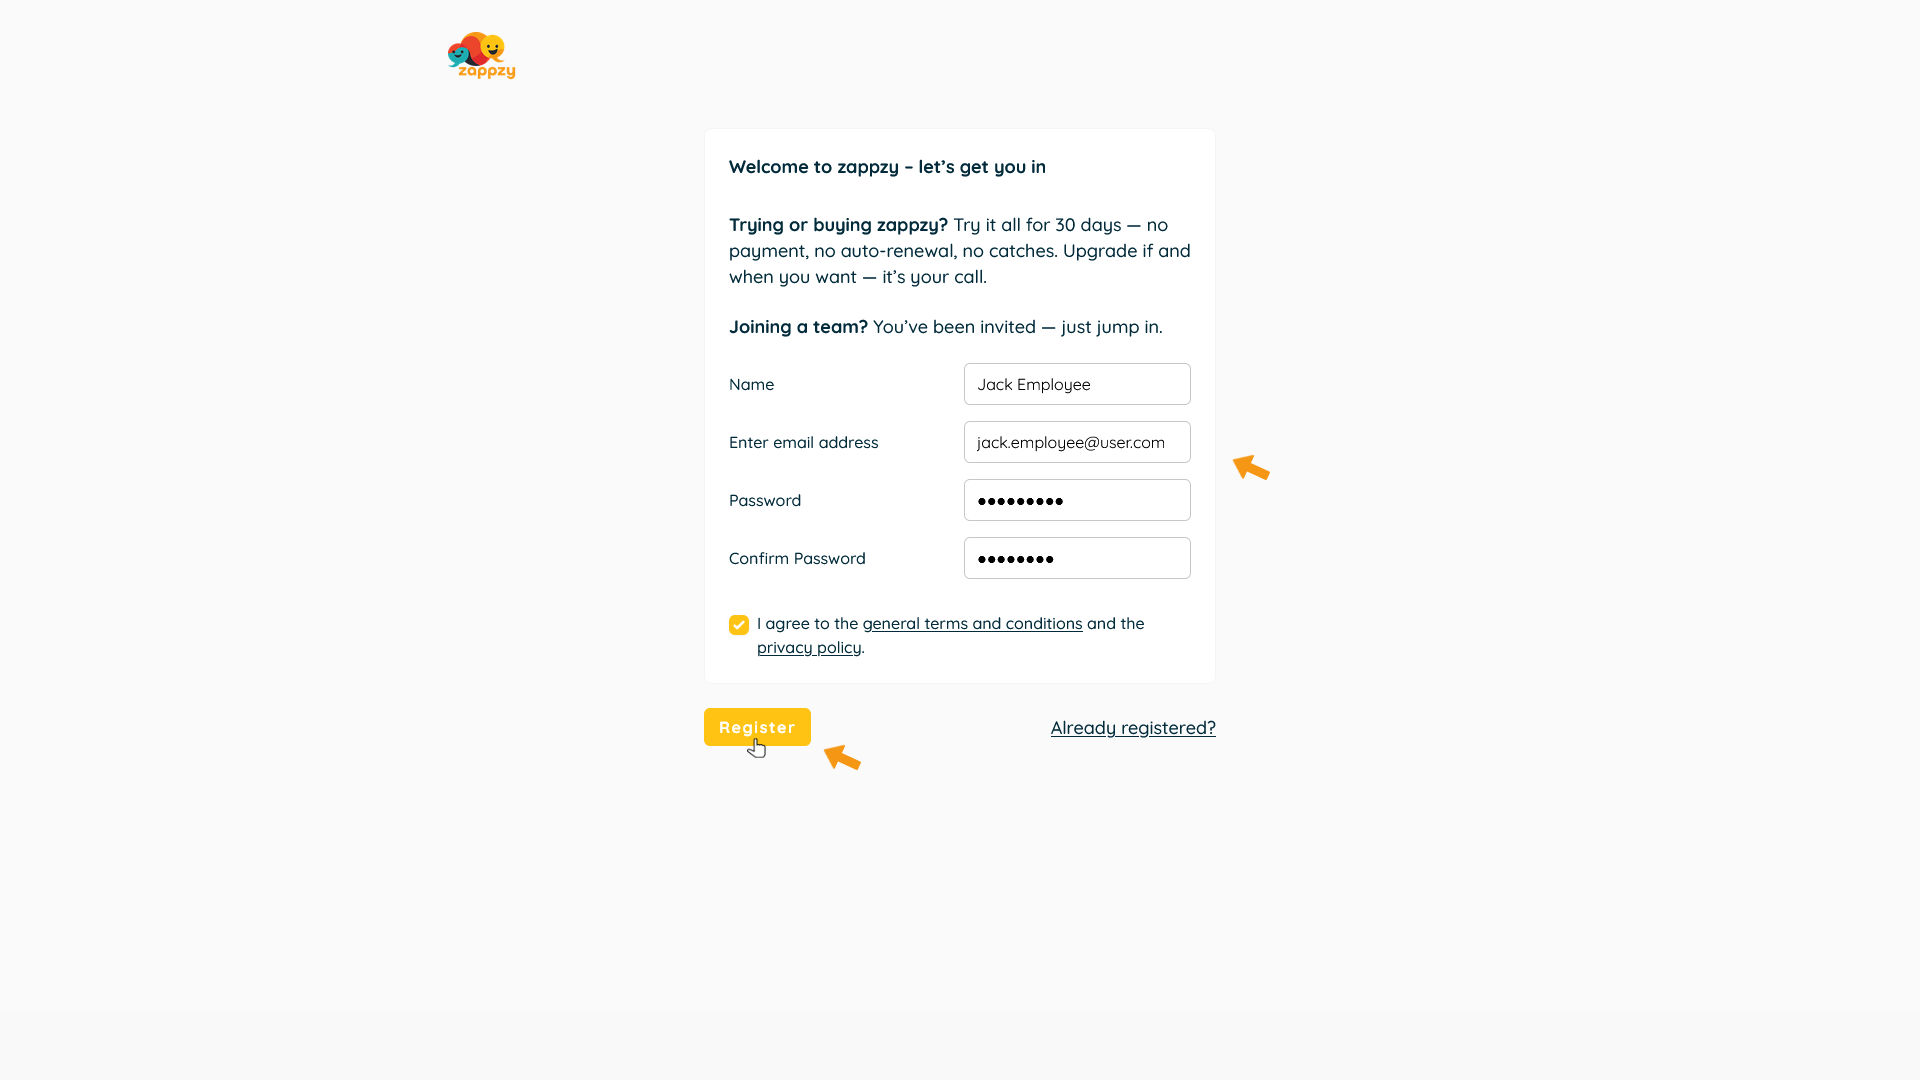
Next, they enter their name and choose a password — entered twice to confirm. They’ll also need to check the box to agree to the general terms and conditions and the privacy policy. Then they click REGISTER to complete the signup.
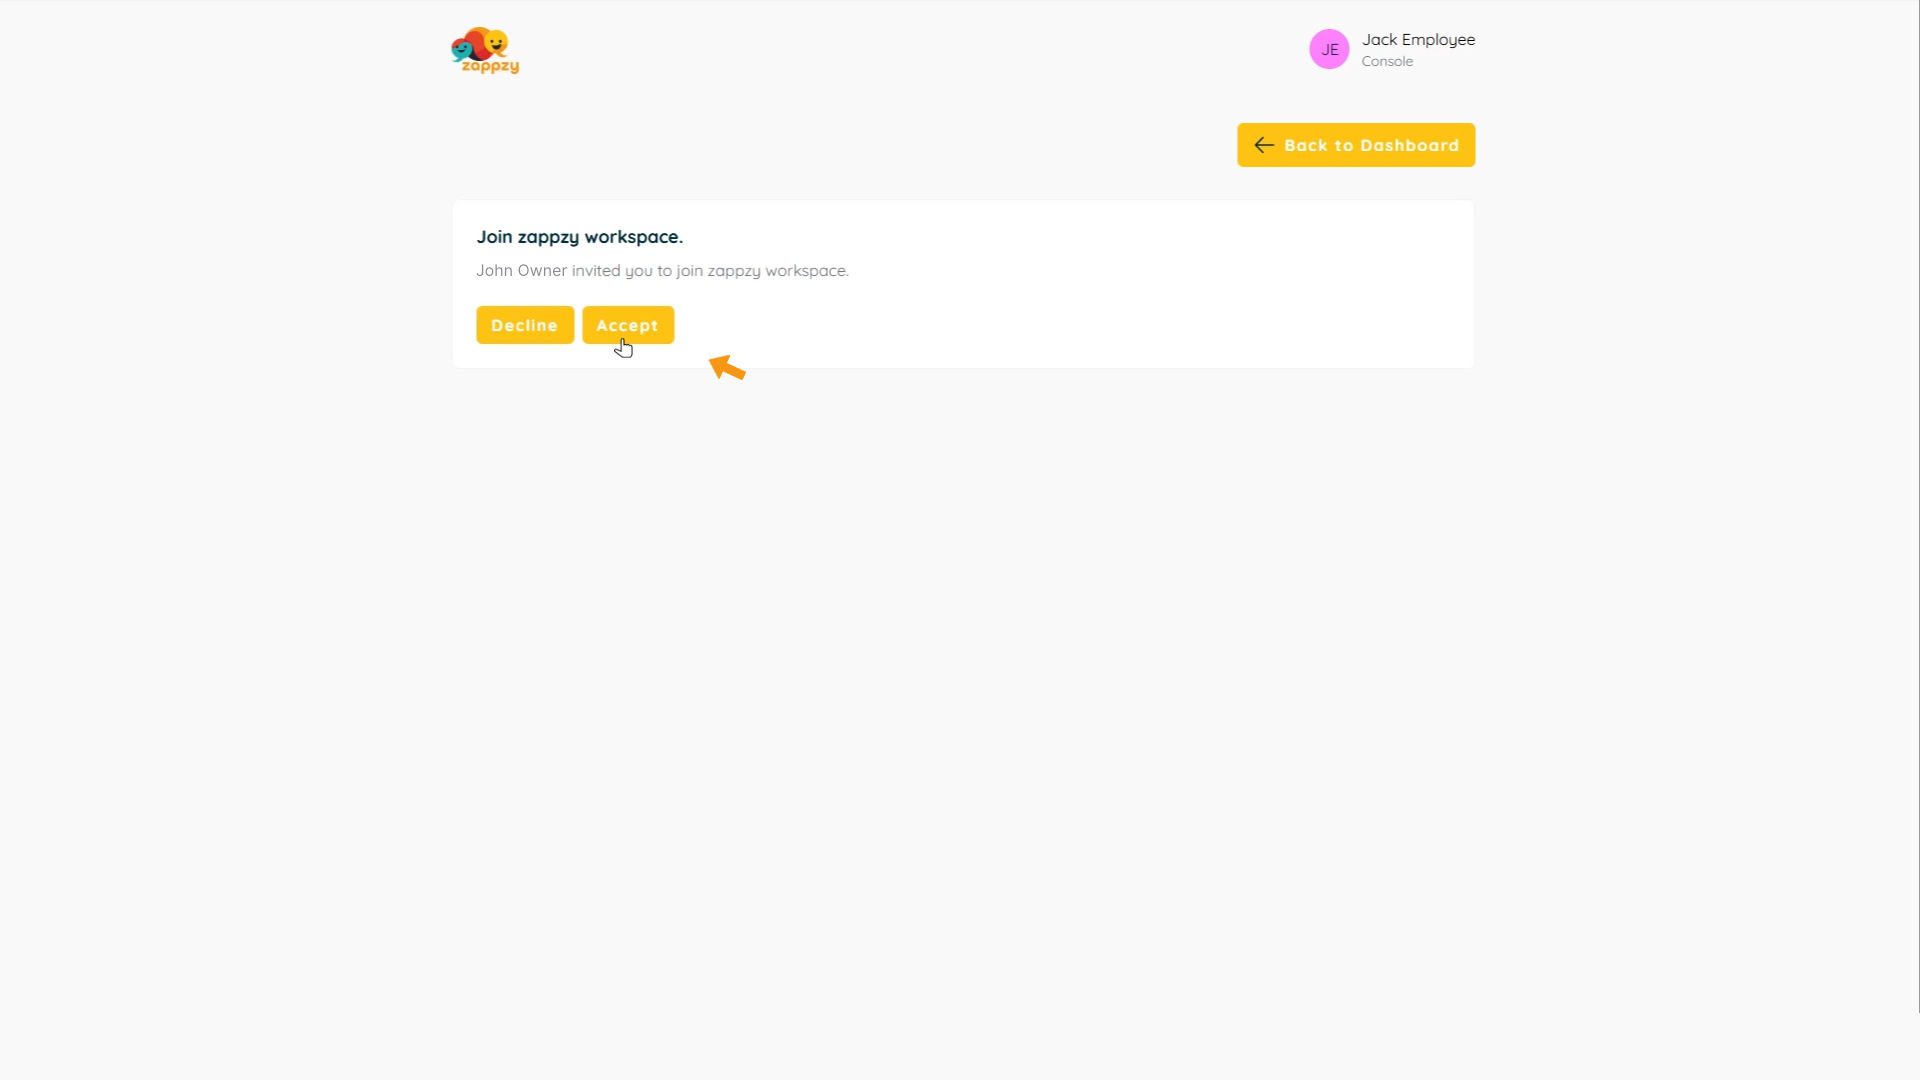
At the end, they’ll be asked to confirm joining your workspace. To do that, they simply click ACCEPT.
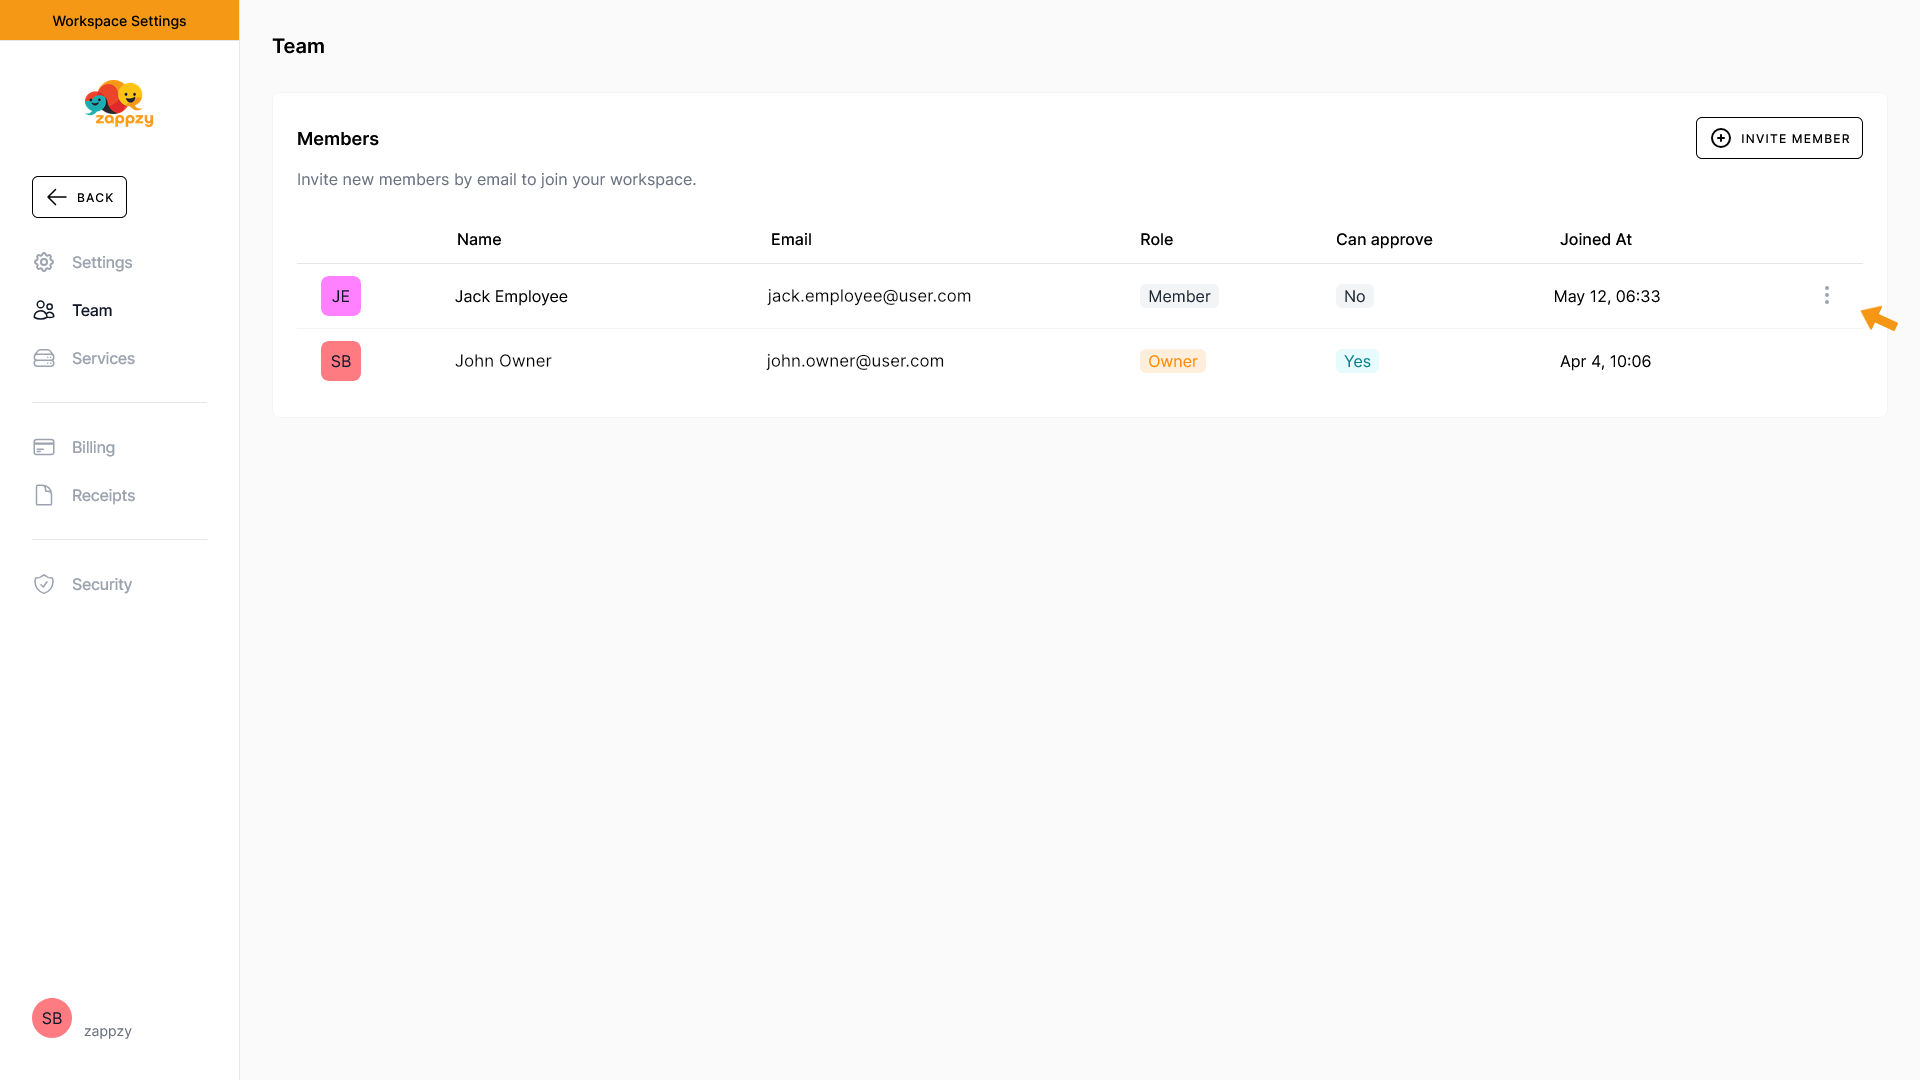
The person is now a member of your workspace. You'll see this when you return to the Team Overview. The Pending status is gone — you'll now see their name and the date they joined your workspace.
Now they can start collaborating and working in your workspace.
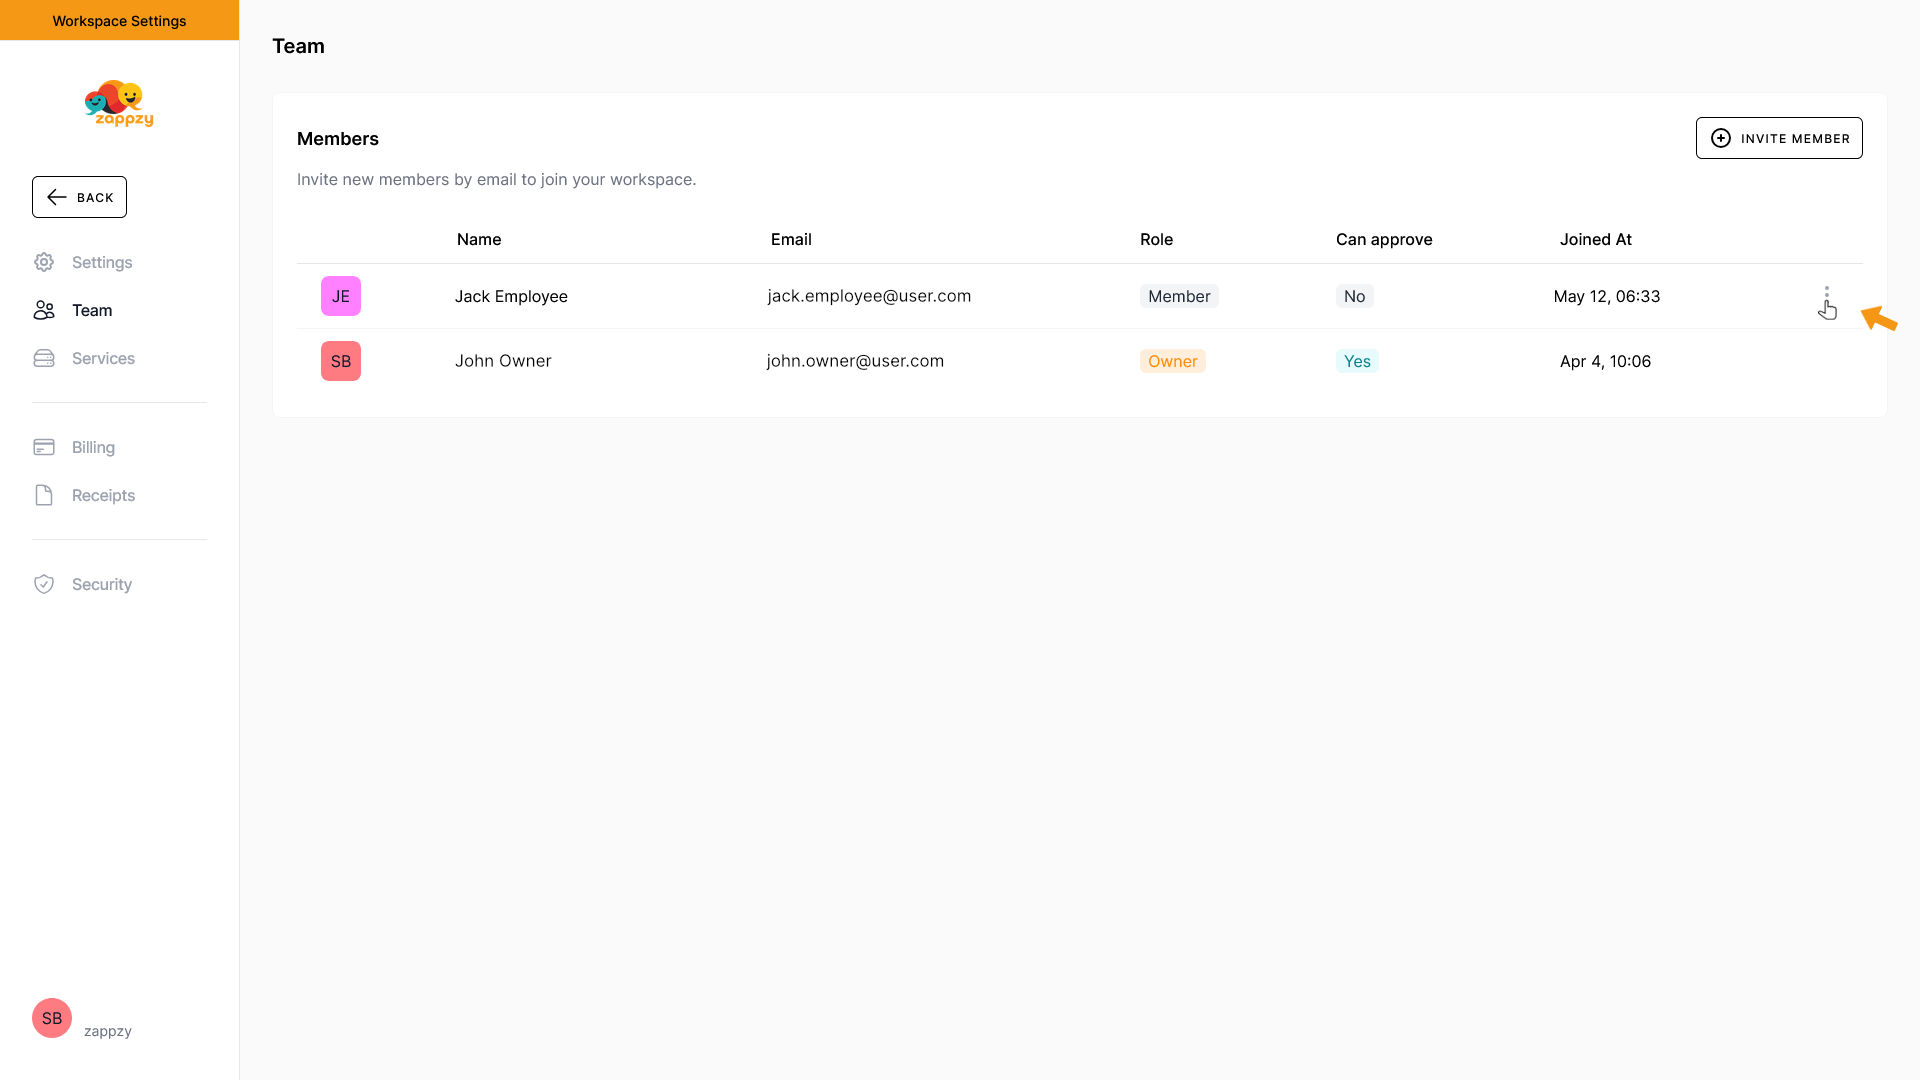
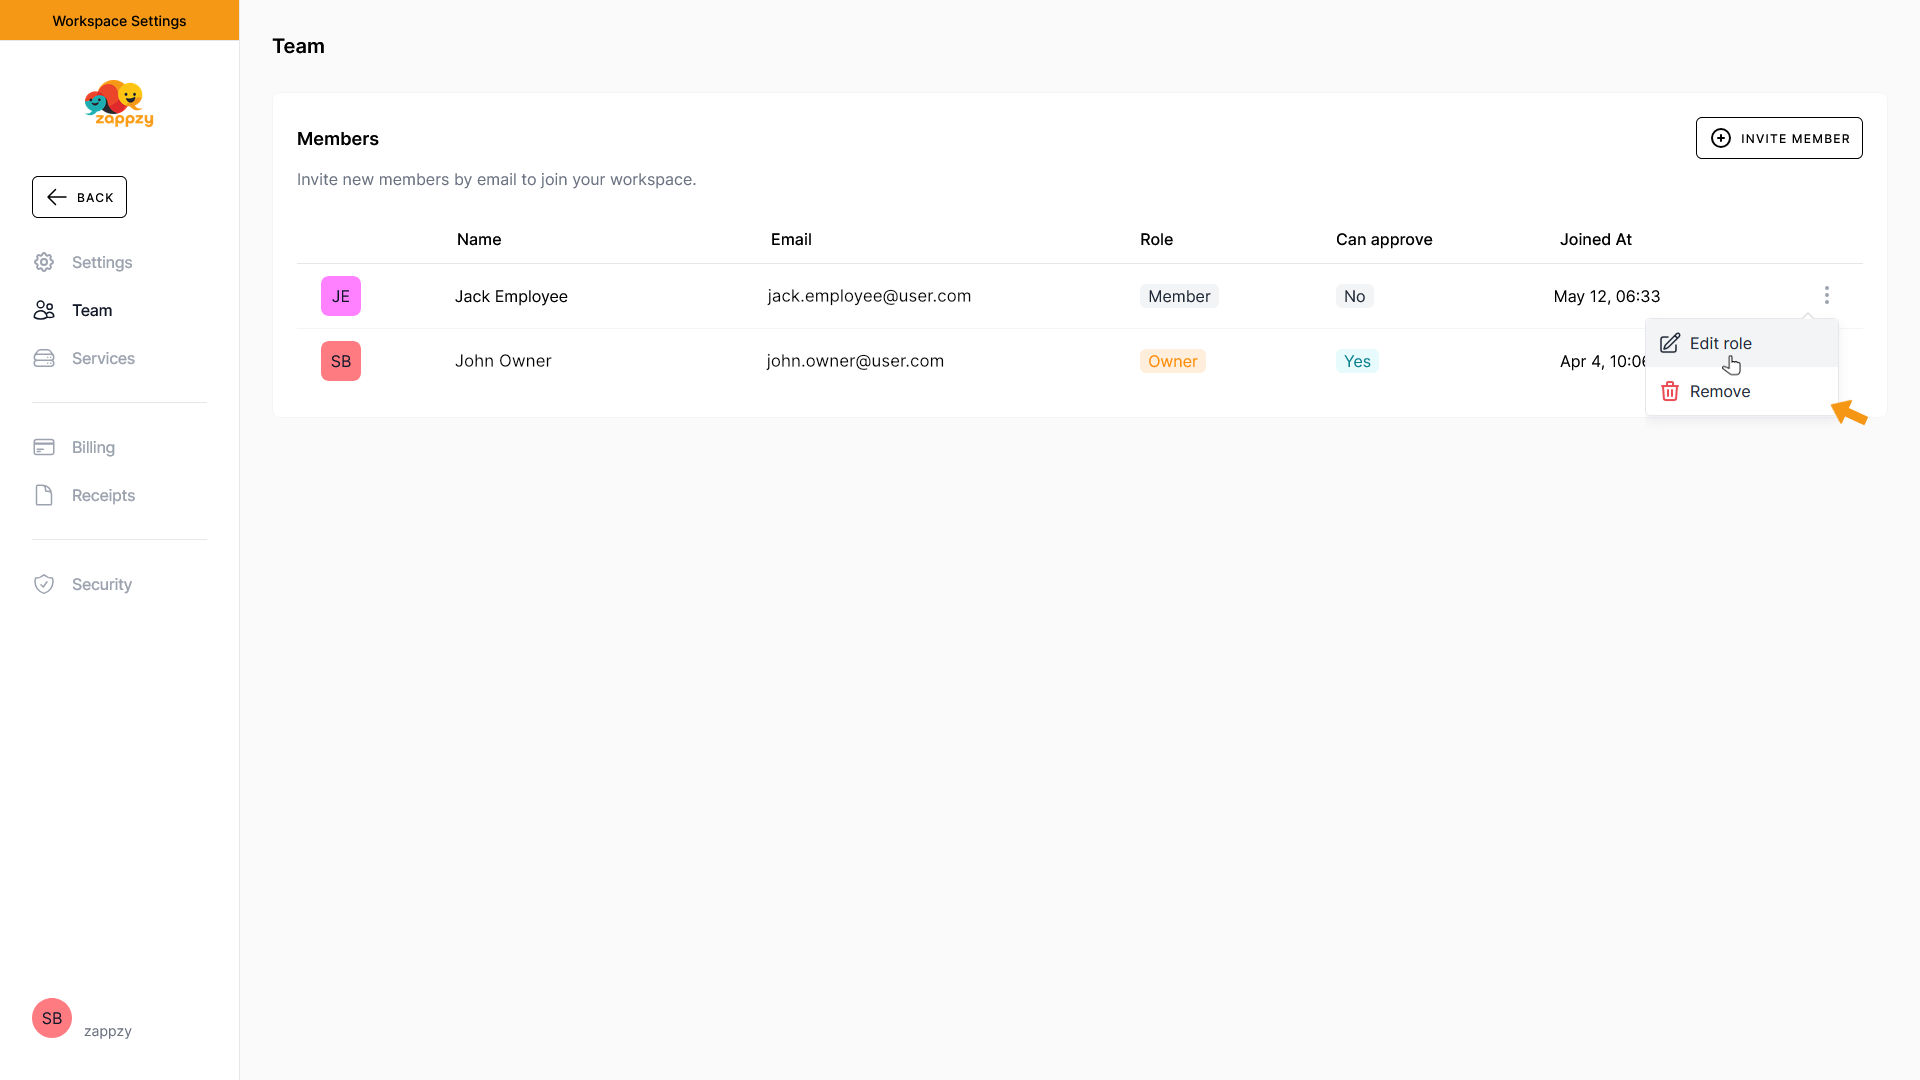
You can change and adjust a member's access rights anytime. To do this, click the three vertical dots at the far right of the member's row.
A menu will open. Click Edit role.
The pop-up Edit role for… will open. Here you can make the necessary changes as explained earlier.

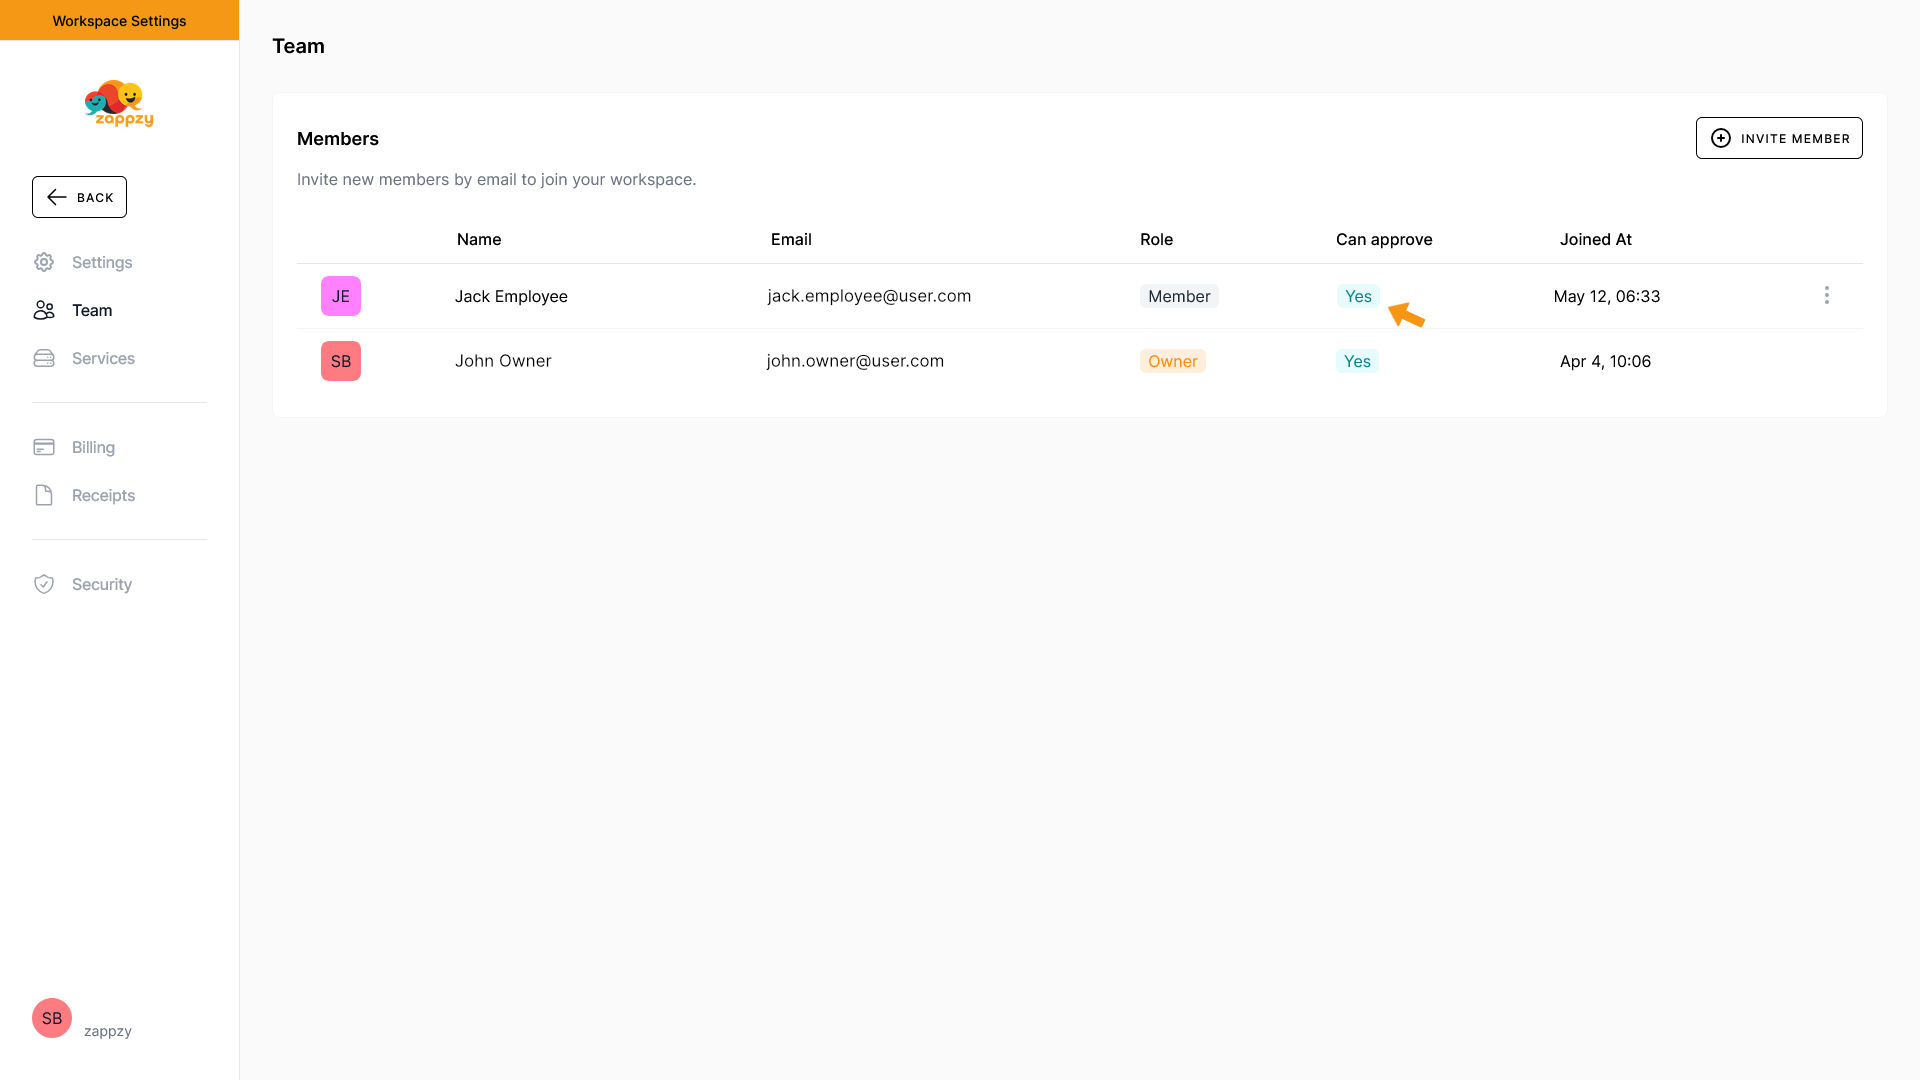
In our example, we give the member Can approve rights. Then click UPDATE.

You'll now see in the Team overview that the Can approve status for the member has changed from No to Yes.
When you've completed all settings, click the Back button in the Workspace Settings menu on the left to return to your workspace.