zappzy Support Center > Content > Create posts > Hashtag Manager: Create groups, insert tags, and manage your hashtag strategy

Video or step-by-step guide with screenshots. Your choice. Start how you like.
Step-by-step guide
The Hashtag Manager gives you full control over your hashtags—so you can stop scrambling every time you post and start focusing on what actually matters: creating killer content.
Once you're logged in to zappzy, you'll see an orange CREATE POST button in the left menu. Click on it.
The Your post overview will appear on your main screen.
Note: We're focusing on hashtags here, not post creation. For step-by-step guidance on creating a post, see the Create a post articles.

The Hashtag Manager is always accessible right where you need it—inside the post editor. This keeps your workflow smooth and puts the hashtags exactly where it makes sense: when you're creating or editing a post.
Click the # icon at the bottom of the post window where you're writing your content.

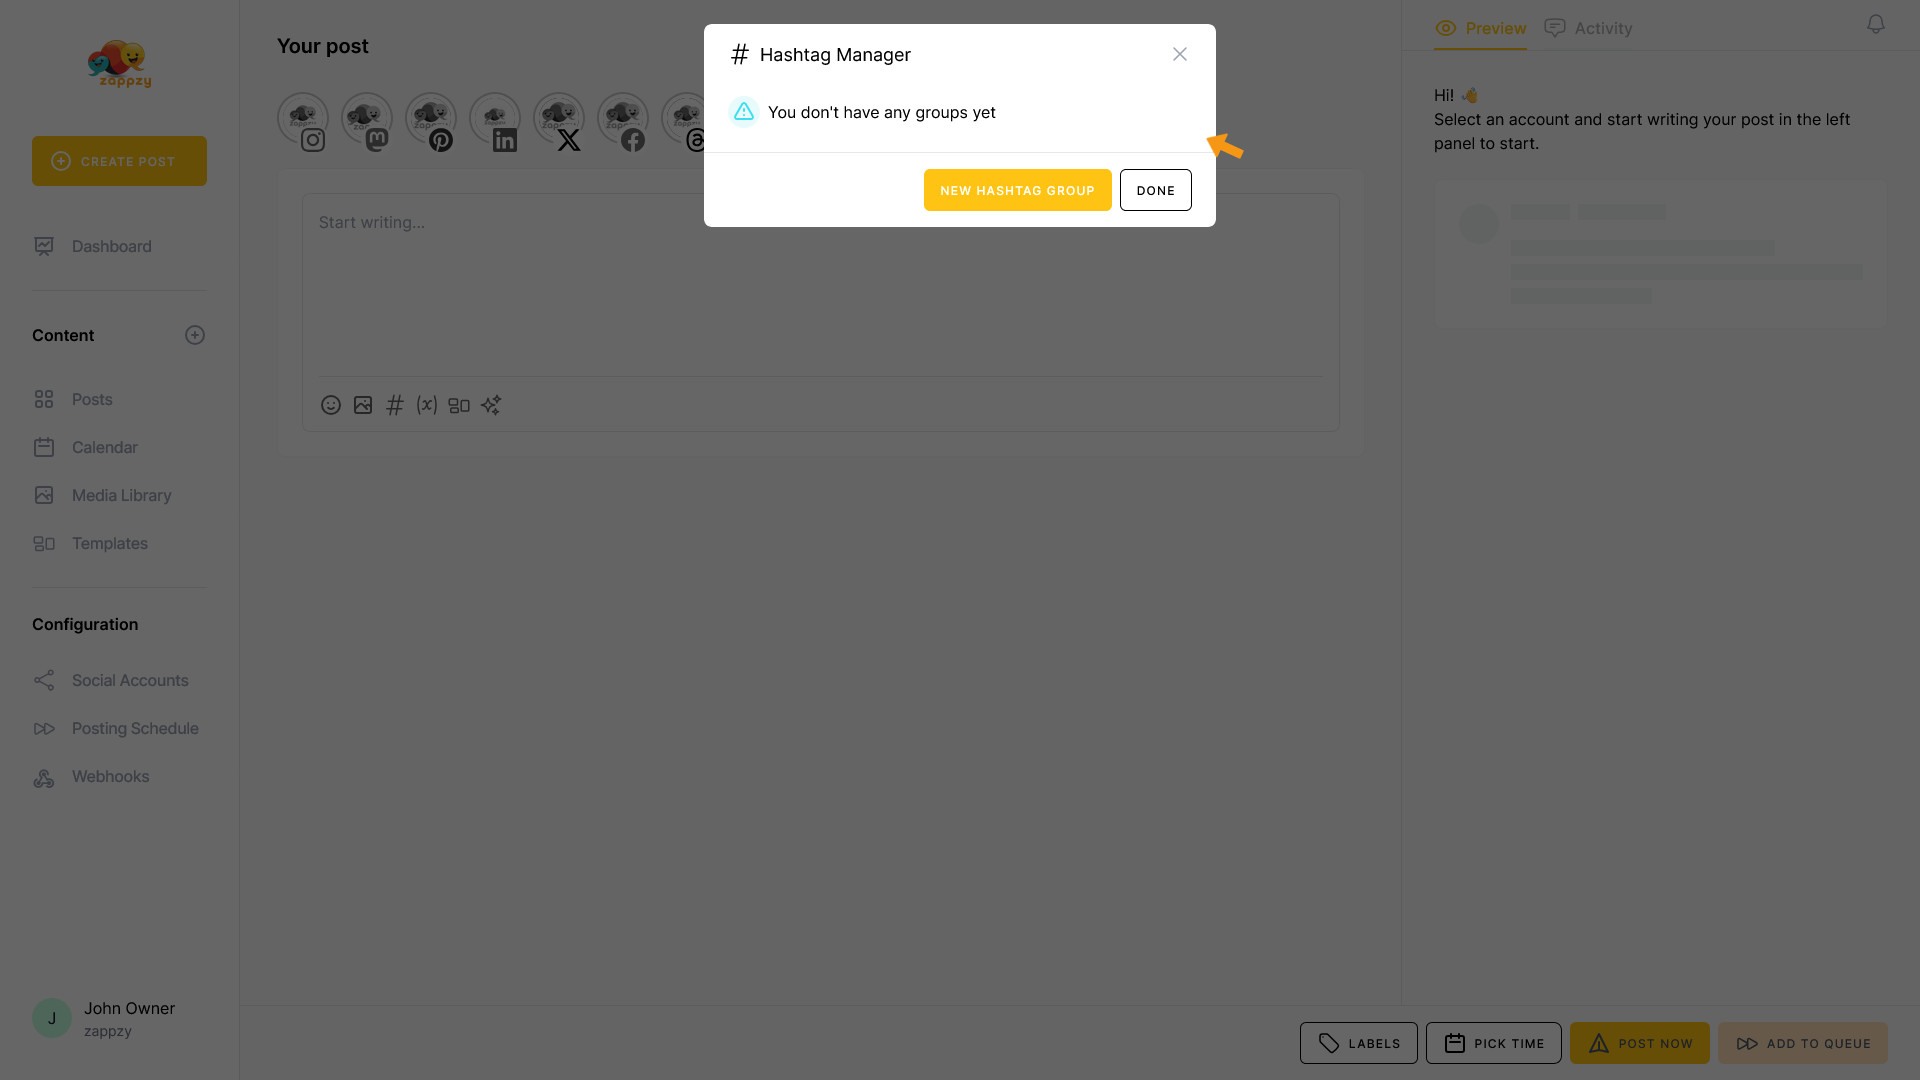
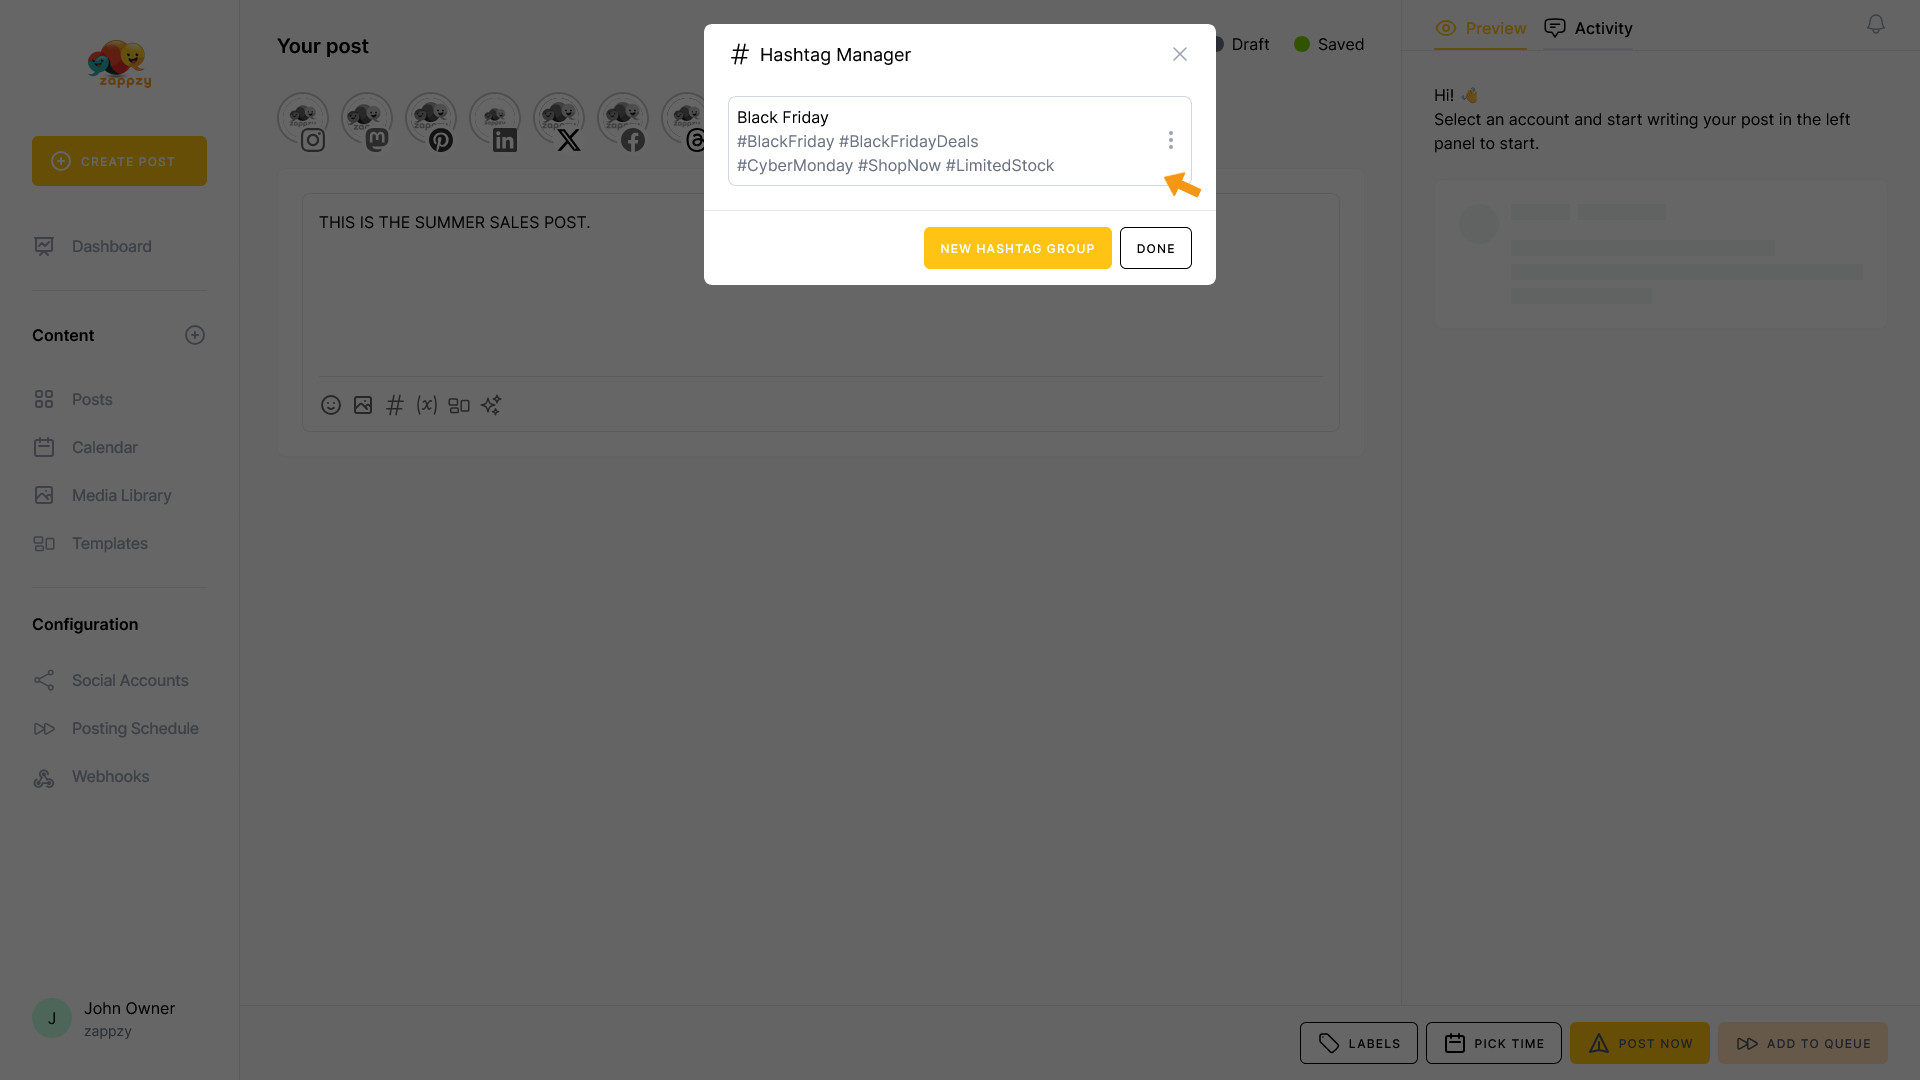
The Hashtag Manager pop-up opens where you can create a hashtag group and add the corresponding hashtags.
When you open The Hashtag Manager for the first time, everything will be empty. So let's create your first hashtag group.
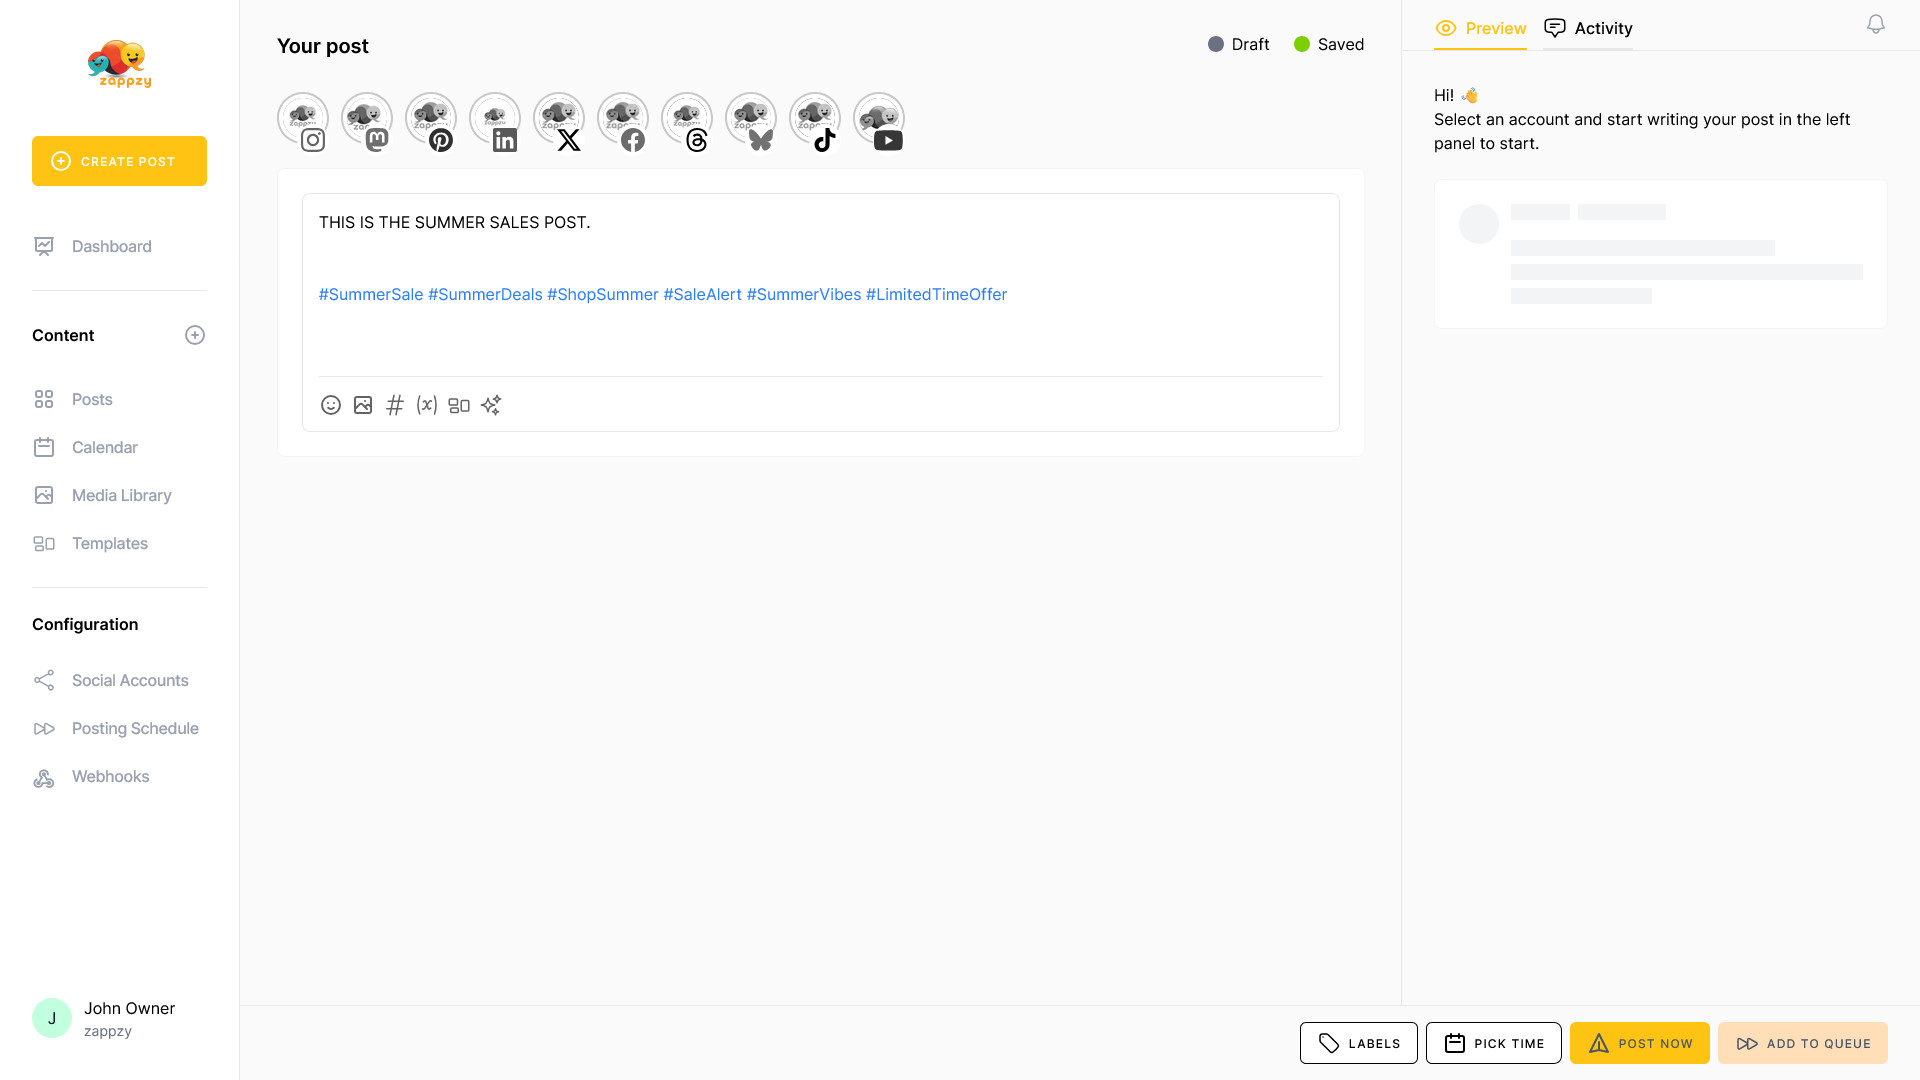
Instead of manually typing hashtags into every single post, you create hashtag groups for your campaigns, themes, or content types. Want to run a summer sale? Create a group called “Summer Sale” and add hashtags like #SummerSale, #SummerDeals, #ShopSummer, #SaleAlert, #SummerVibes, and #LimitedTimeOffer. Now every summer sale post gets the same optimized hashtag set with one click.
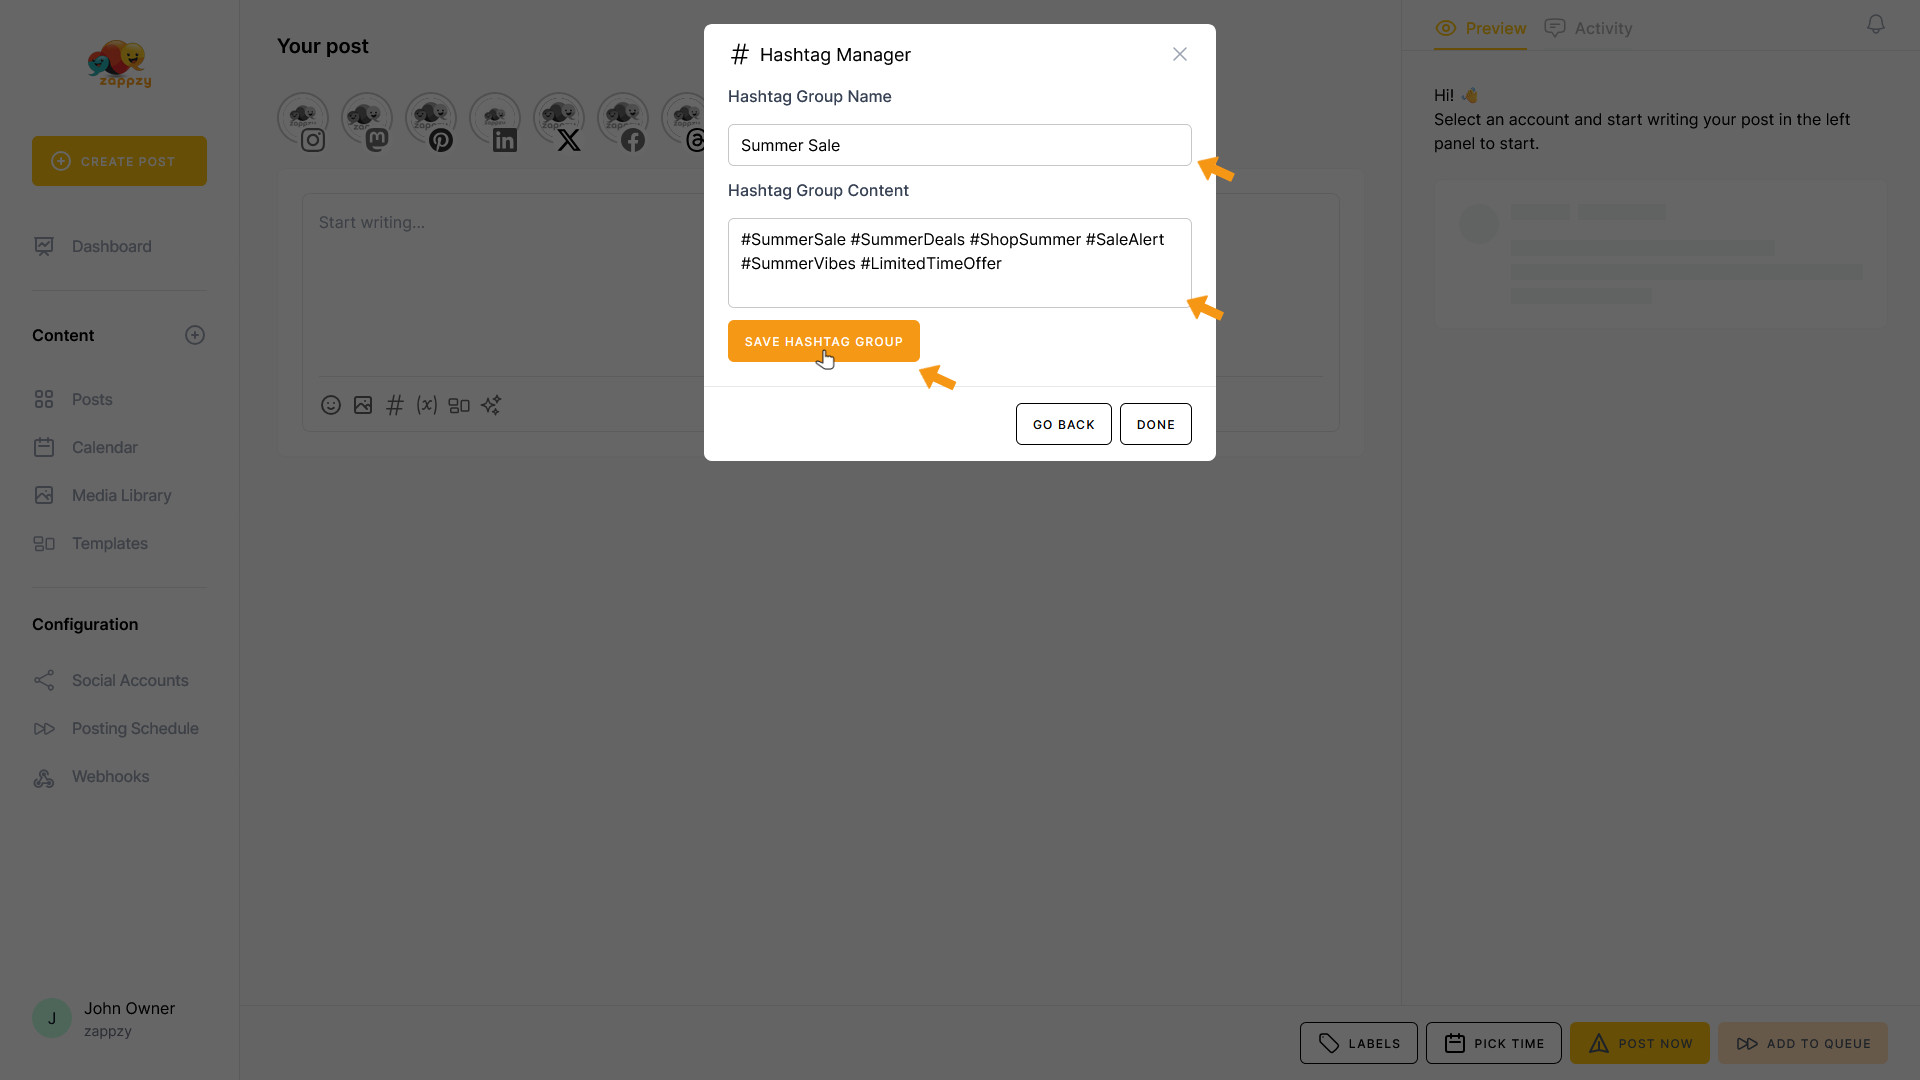
Click the NEW HASHTAG GROUP button.

Now you can create a hashtag group and add the corresponding hashtags.
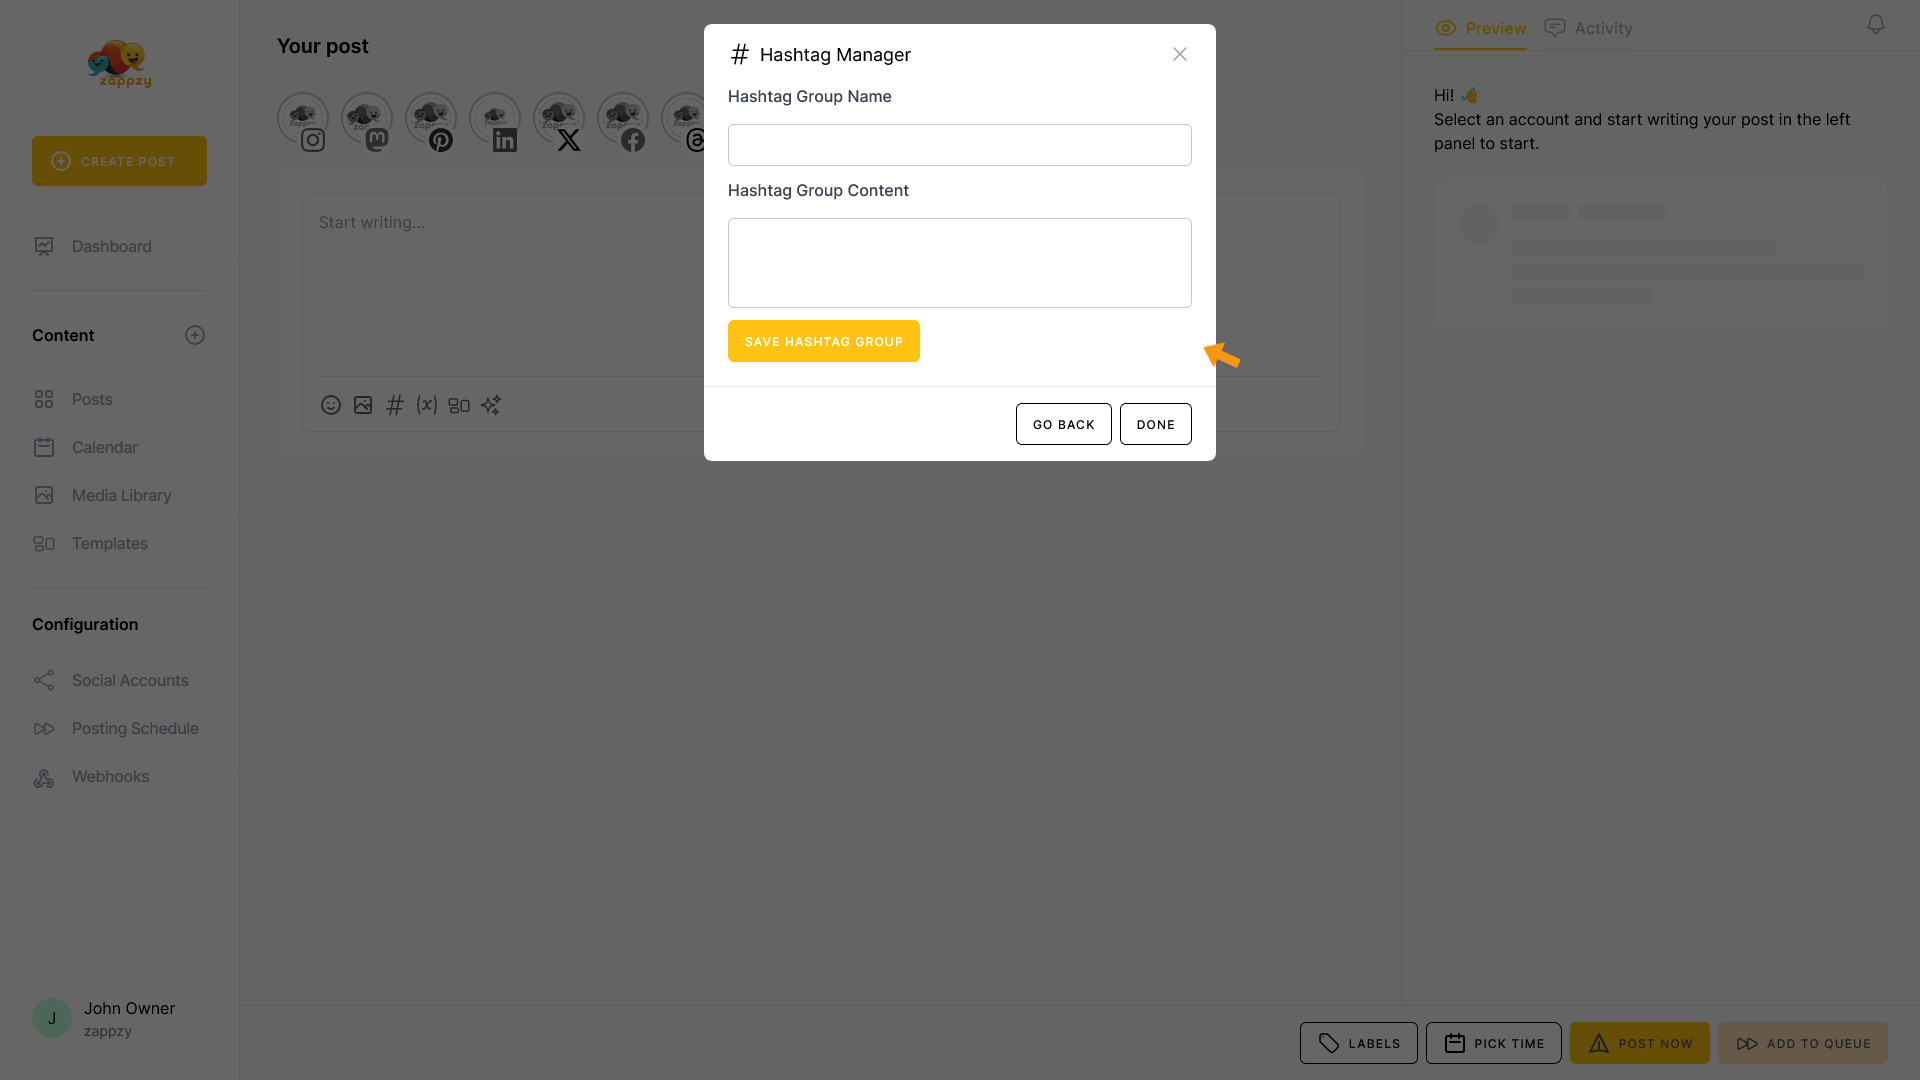
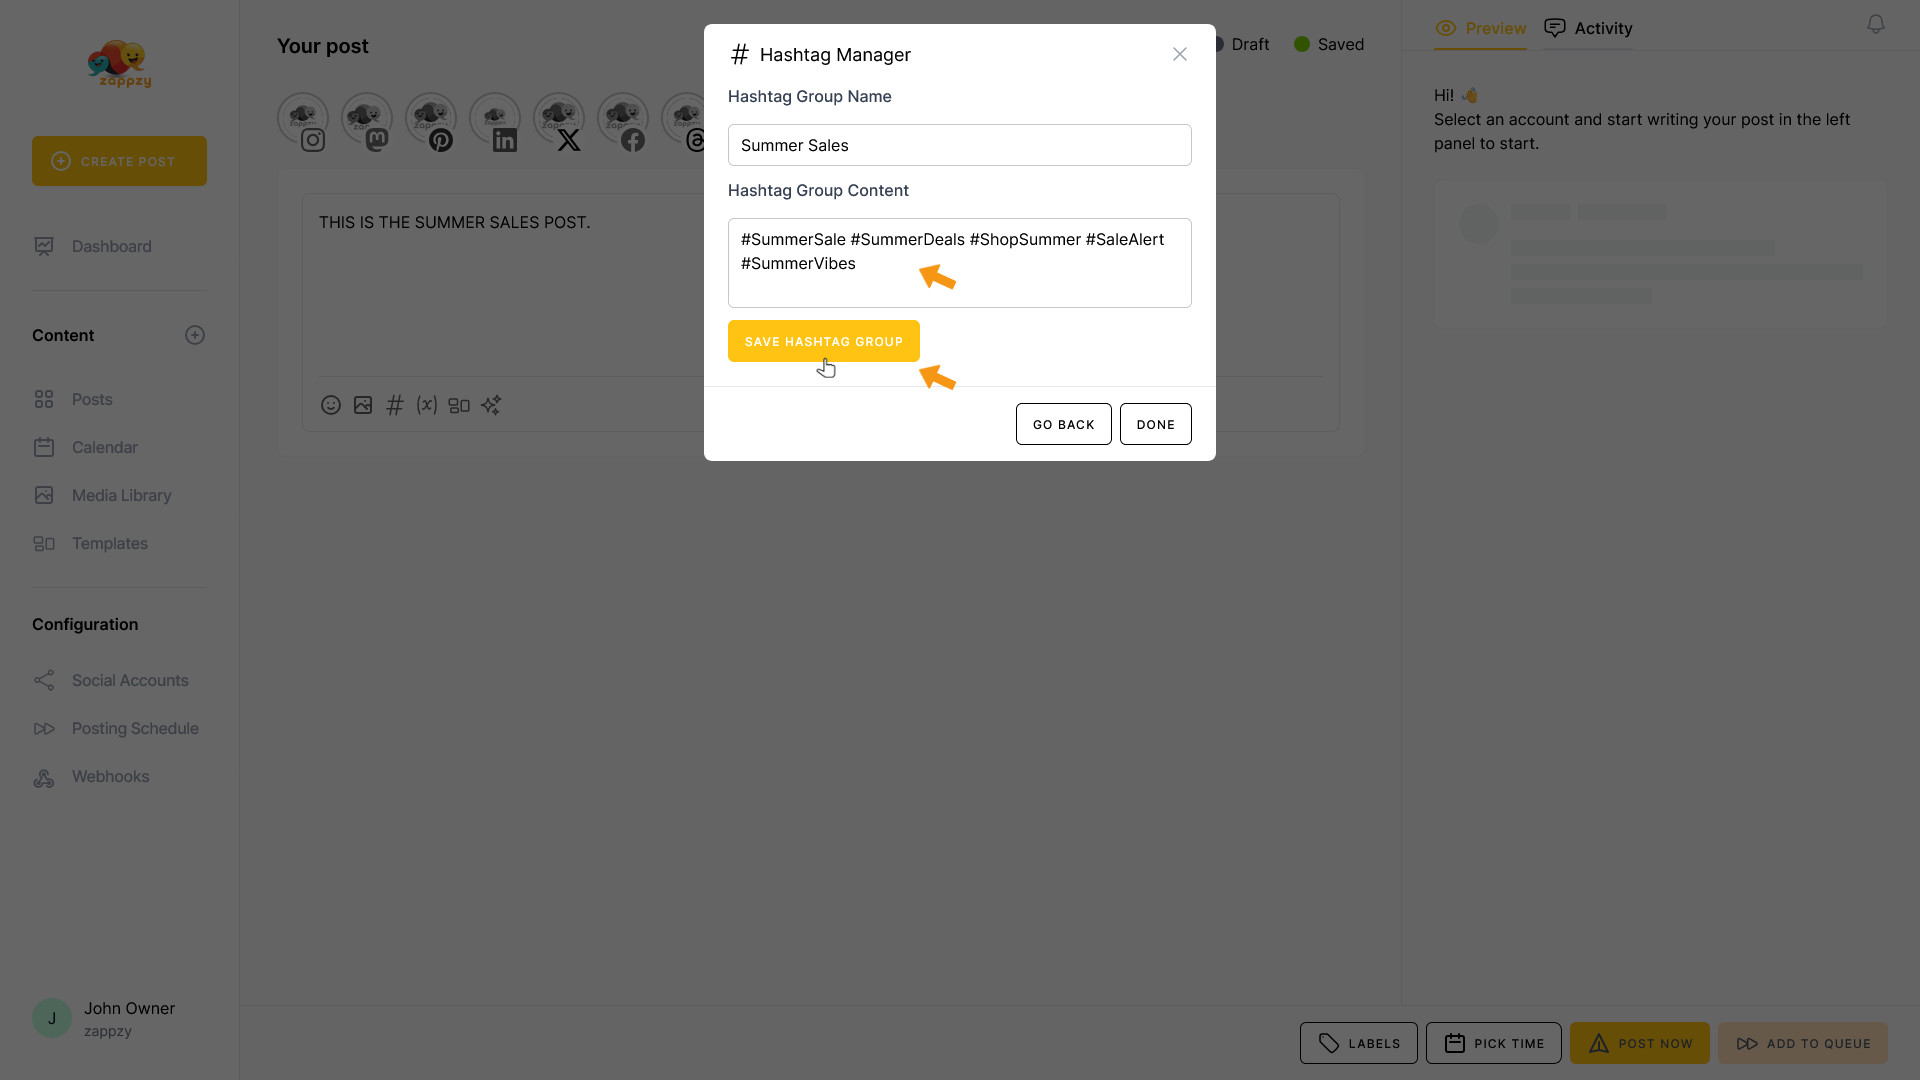
Enter your hashtag group name in the field below—in this case, “Summer Sale”. In the Hashtag Group Content field, add your hashtags—in this case: “#SummerSale, #SummerDeals, #ShopSummer, #SaleAlert, #SummerVibes, and #LimitedTimeOffer”.
When you're done, click the SAVE HASHTAG GROUP button.
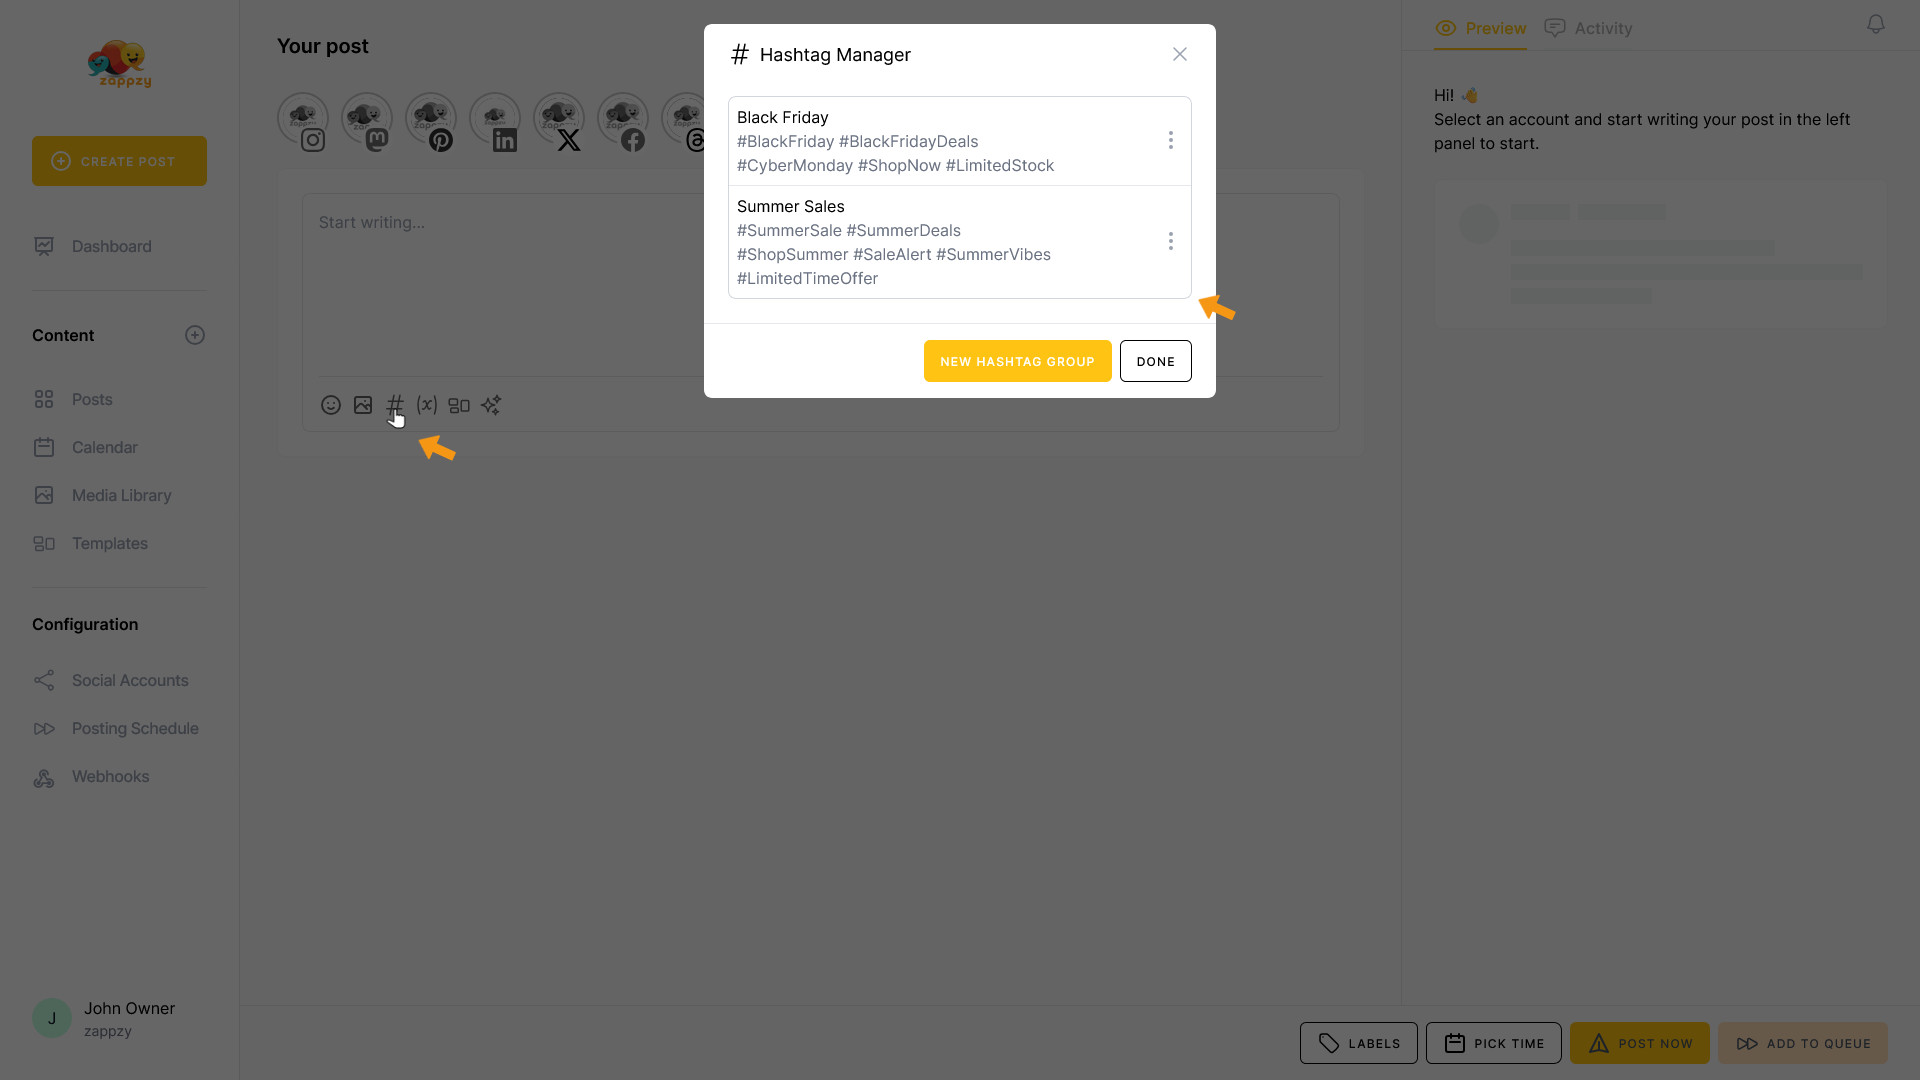
Your hashtag group with the corresponding hashtags has been created. Click the DONE button.

When you create a post about your Summer Sale, click the # icon as explained earlier. The pop-up opens, and you'll see your created hashtag group—or multiple groups if you've set up more than one.
Hover over the hashtag group that fits your post—in this case, Summer Sale—and click the INSERT button that appears.
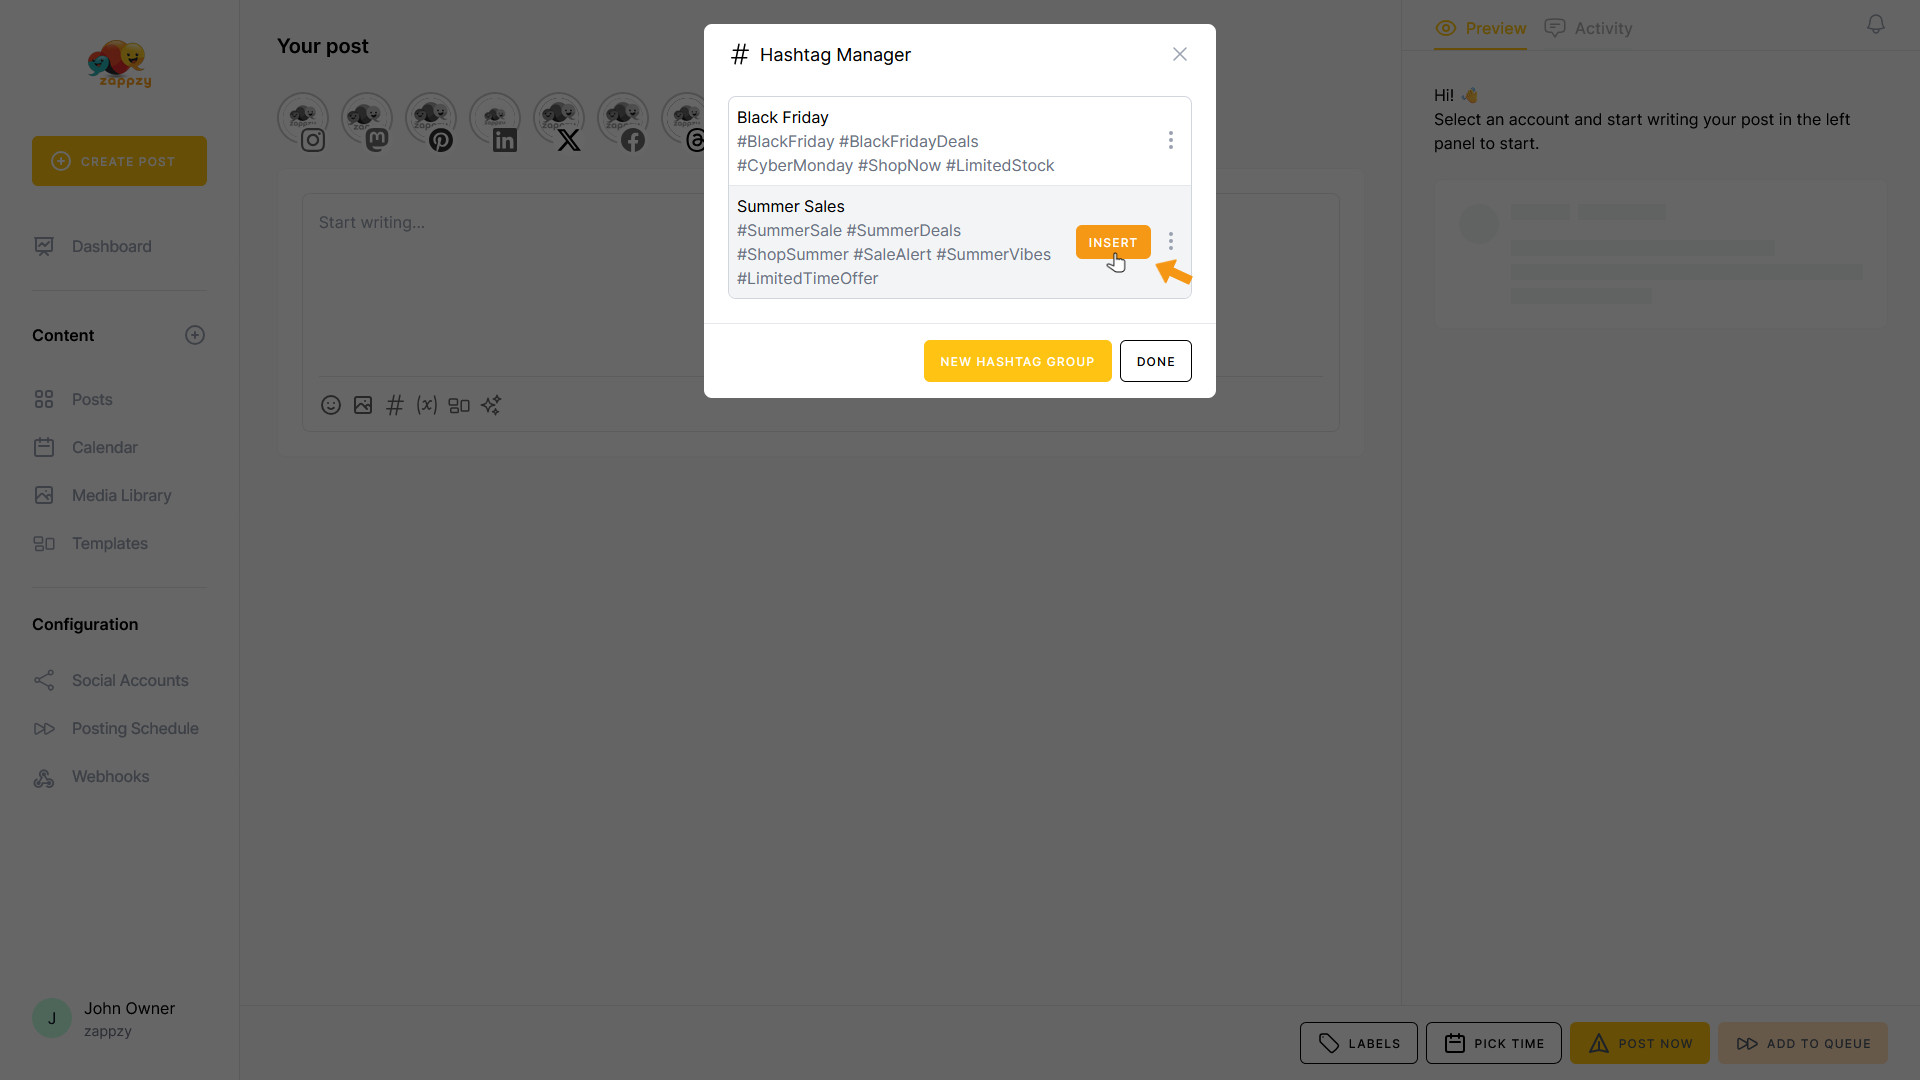
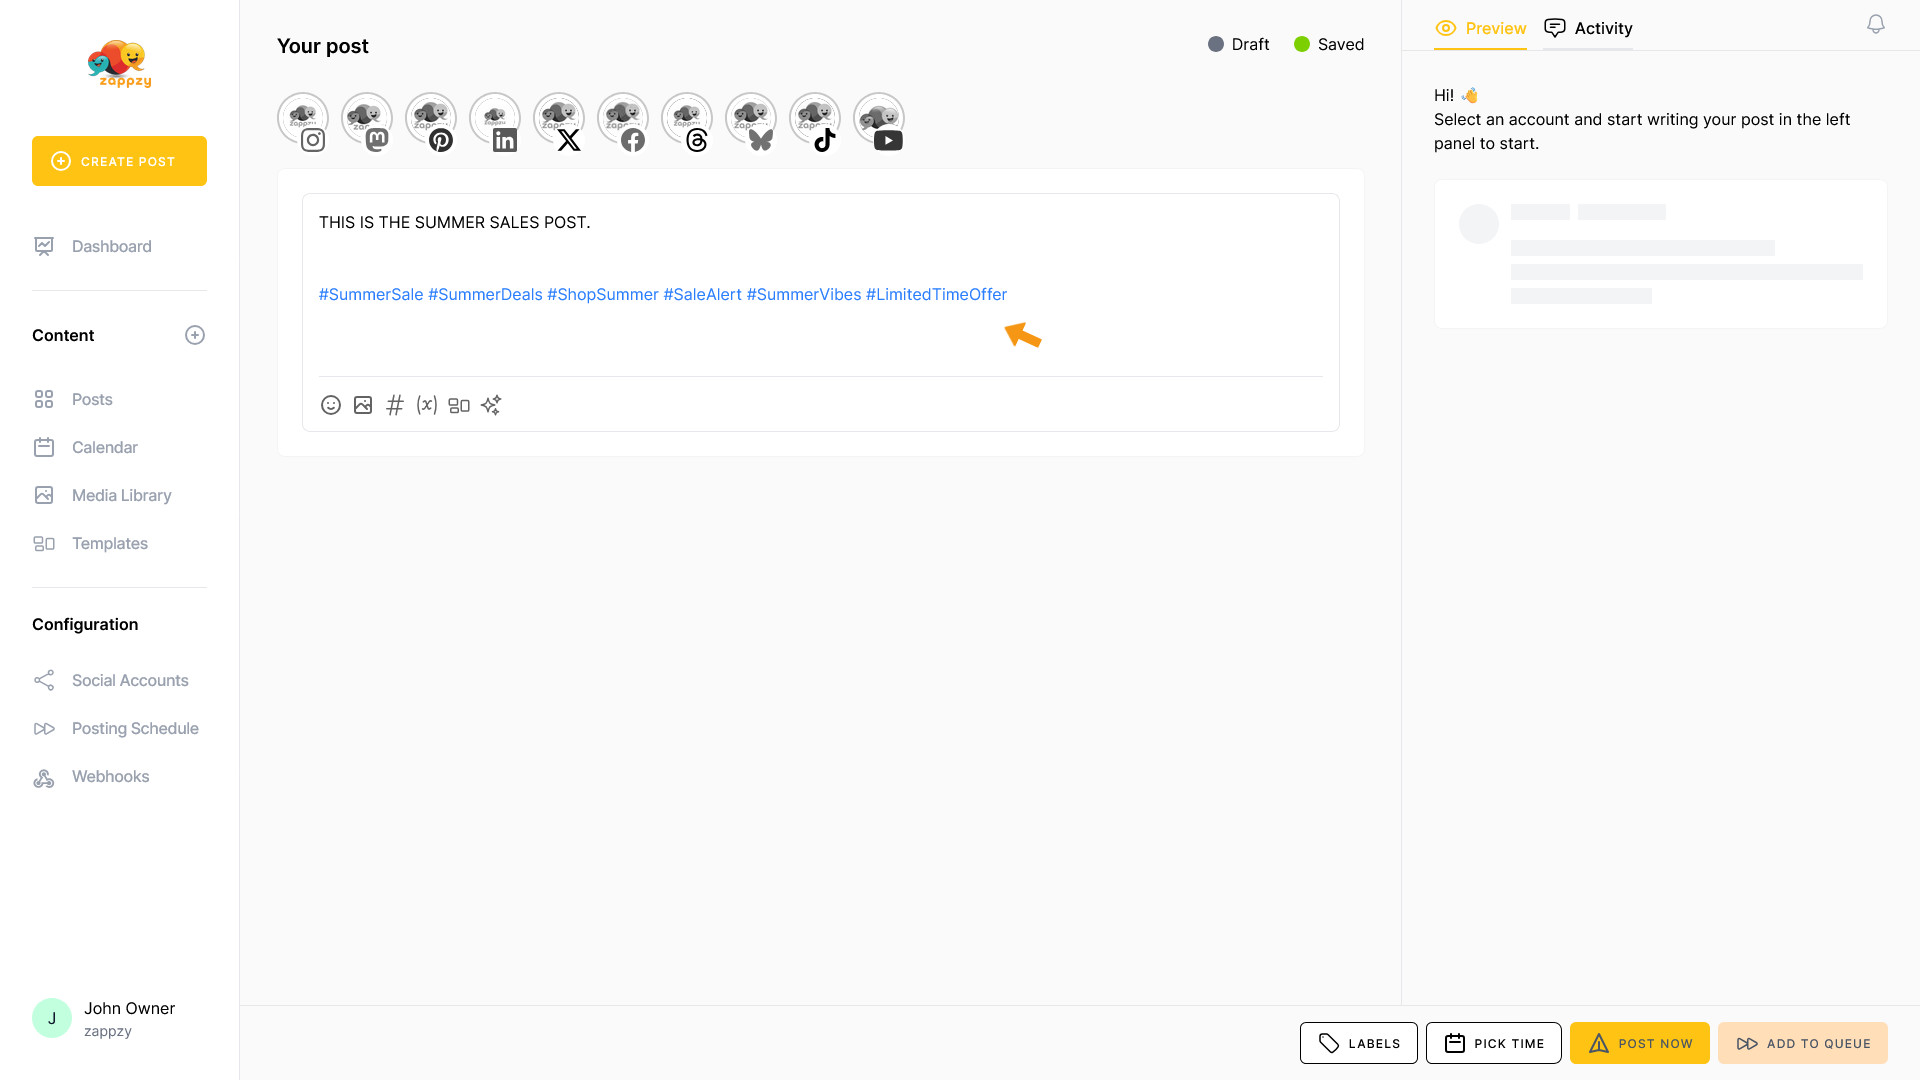
Your hashtags have been added to your post.
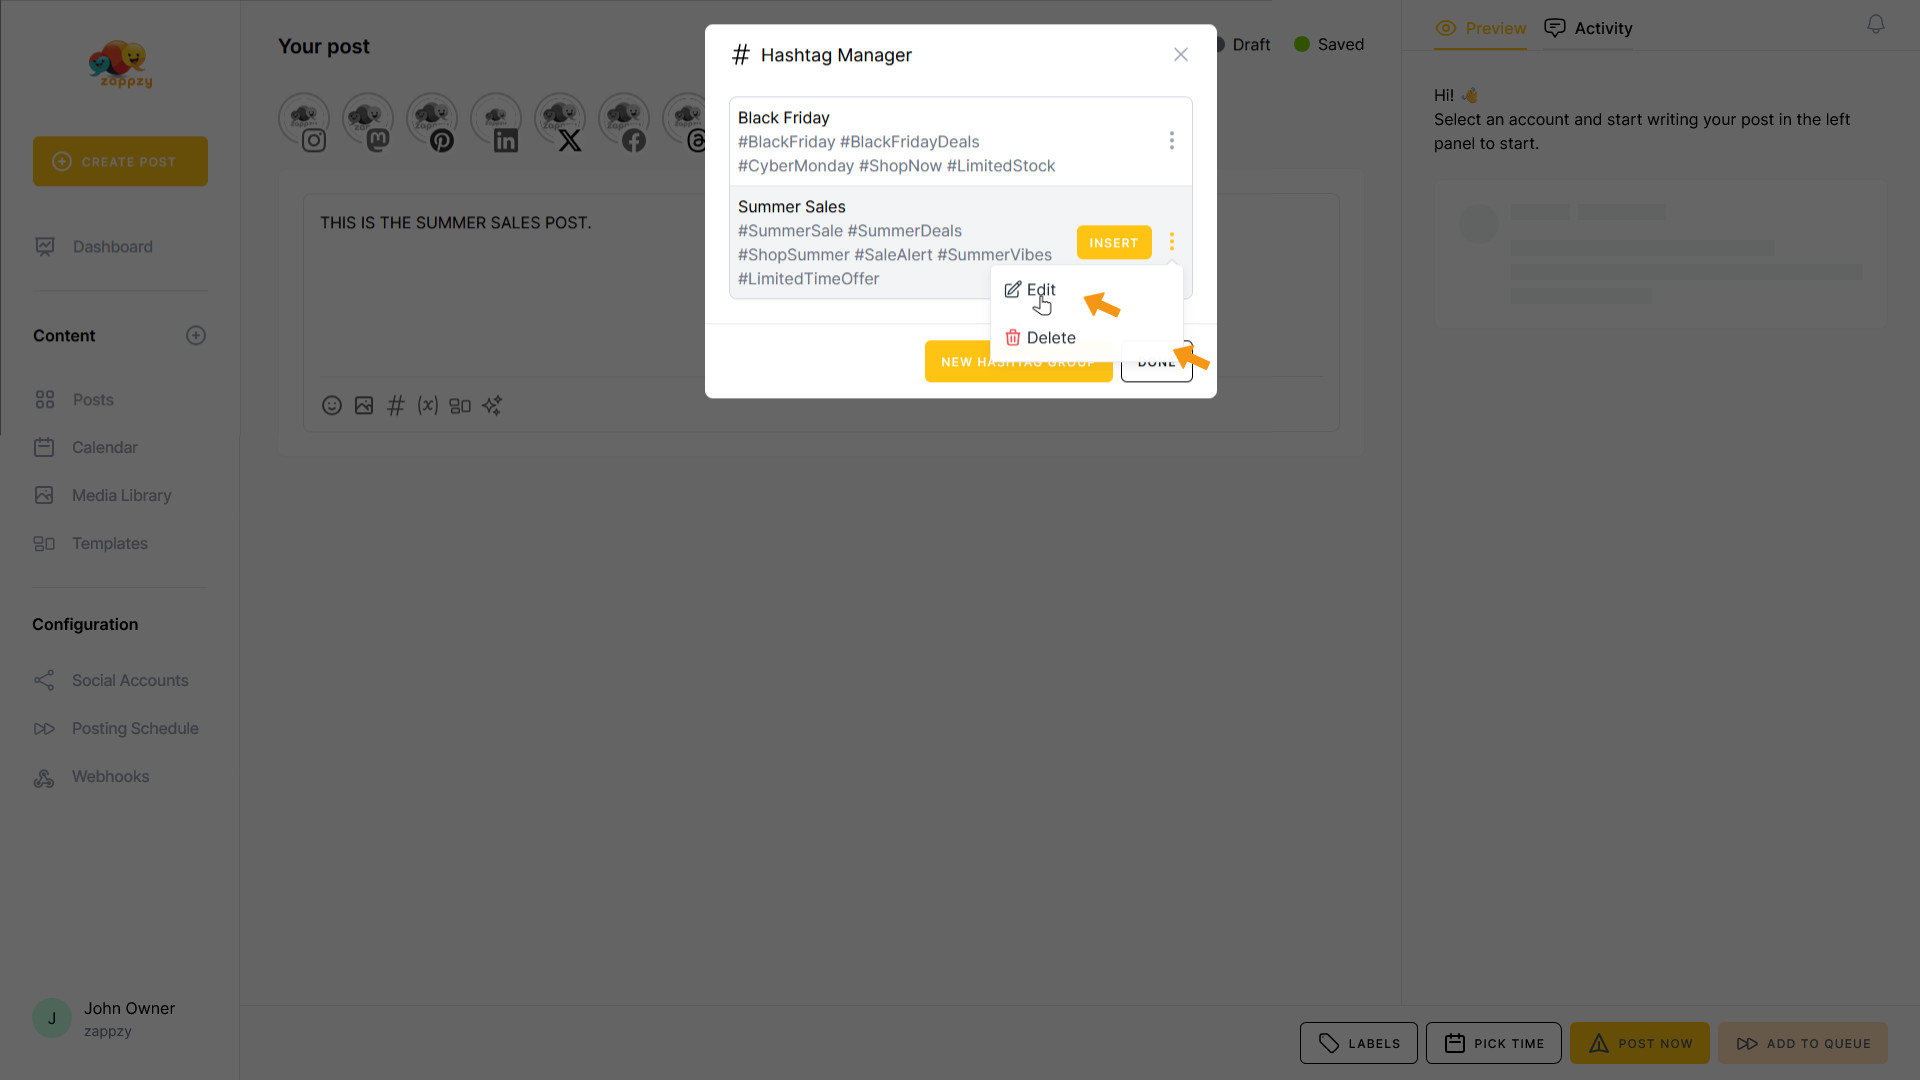
If you want to edit or delete hashtags, click the # icon as explained earlier. Navigate to the hashtag group you want to edit—you'll see three vertical dots on the right side. Click on them.

A menu opens. If you want to edit a group, click Edit.
The familiar window opens where you can edit your hashtags. In this case, we'll remove #LimitedTimeOffer and save the hashtag group again.
As you can see, the Summer Sale hashtag group now appears without the deleted hashtag.

If you want to delete an entire group, navigate to the hashtag group you want to remove—you'll see three vertical dots on the right side. Click on them.

A menu opens. Click Delete.

The hashtag group is deleted immediately.
Warning: There's no confirmation prompt—once it's gone, it's gone!
Perfect! You now know how to work with the Hashtag Manager. It gives you control, consistency, and speed—so you spend less time wrestling with hashtags.