zappzy Support Center > Configuration > Posting Schedule: Set up automated posting times for your content

Video or step-by-step guide with screenshots. Your choice. Start how you like.
Step-by-step guide
When you create a post, you have three options: post it immediately (Post now), schedule it for a specific date and time (Pick time), or add it to your queue (Add to queue). The Posting Schedule feature controls when queued posts get published automatically.
Why do I need Posting Schedule?
Your audience expects posts at 9 AM on weekdays, 3 PM on Saturdays, and no posts on Sundays. With Posting Schedule, your posts automatically go live at these optimal times without you having to manually set the same times over and over again.
Once you're logged in to zappzy, you'll see the Configuration section (workspace owner or admin only). Click on Posting Schedule underneath.
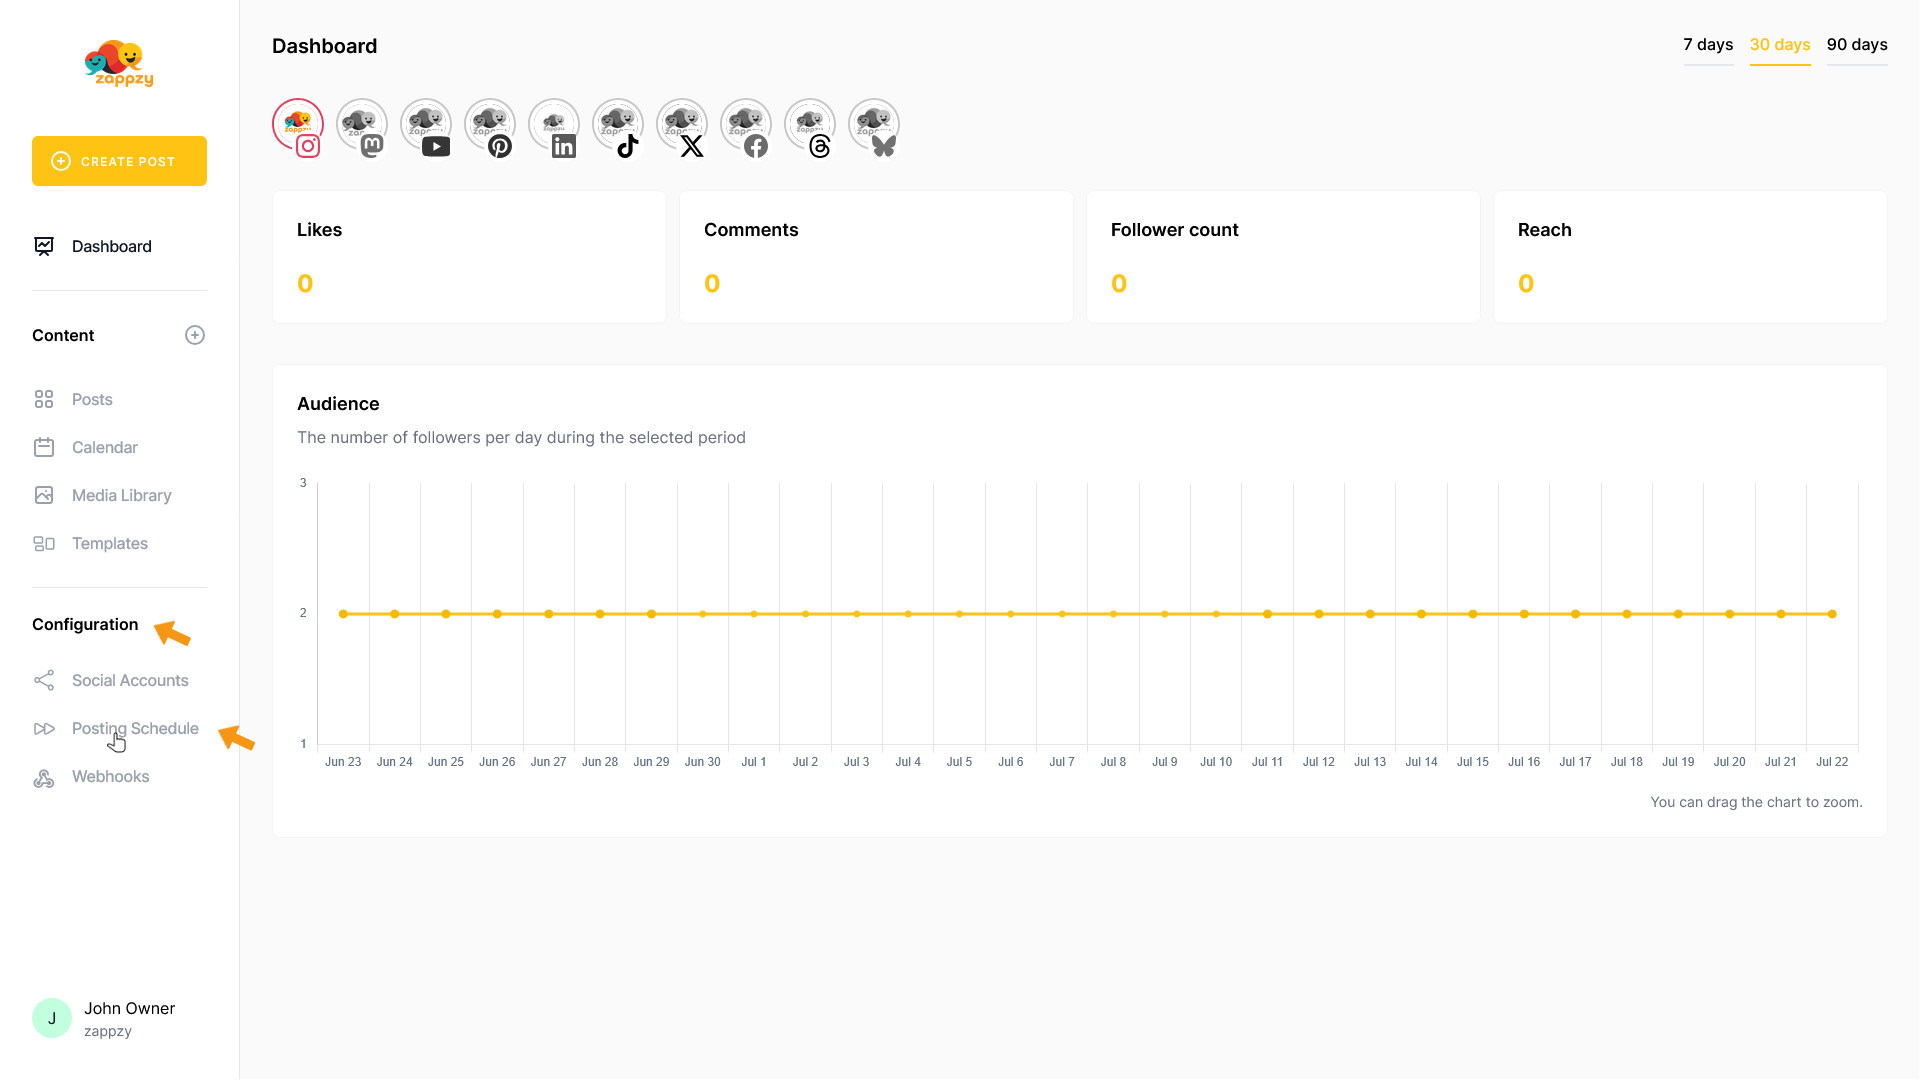
The Posting Schedule overview will appear on your main screen.
By default, there's already one schedule set up. You can delete this if you want and create a new one, or simply add more publishing times to the existing schedule.

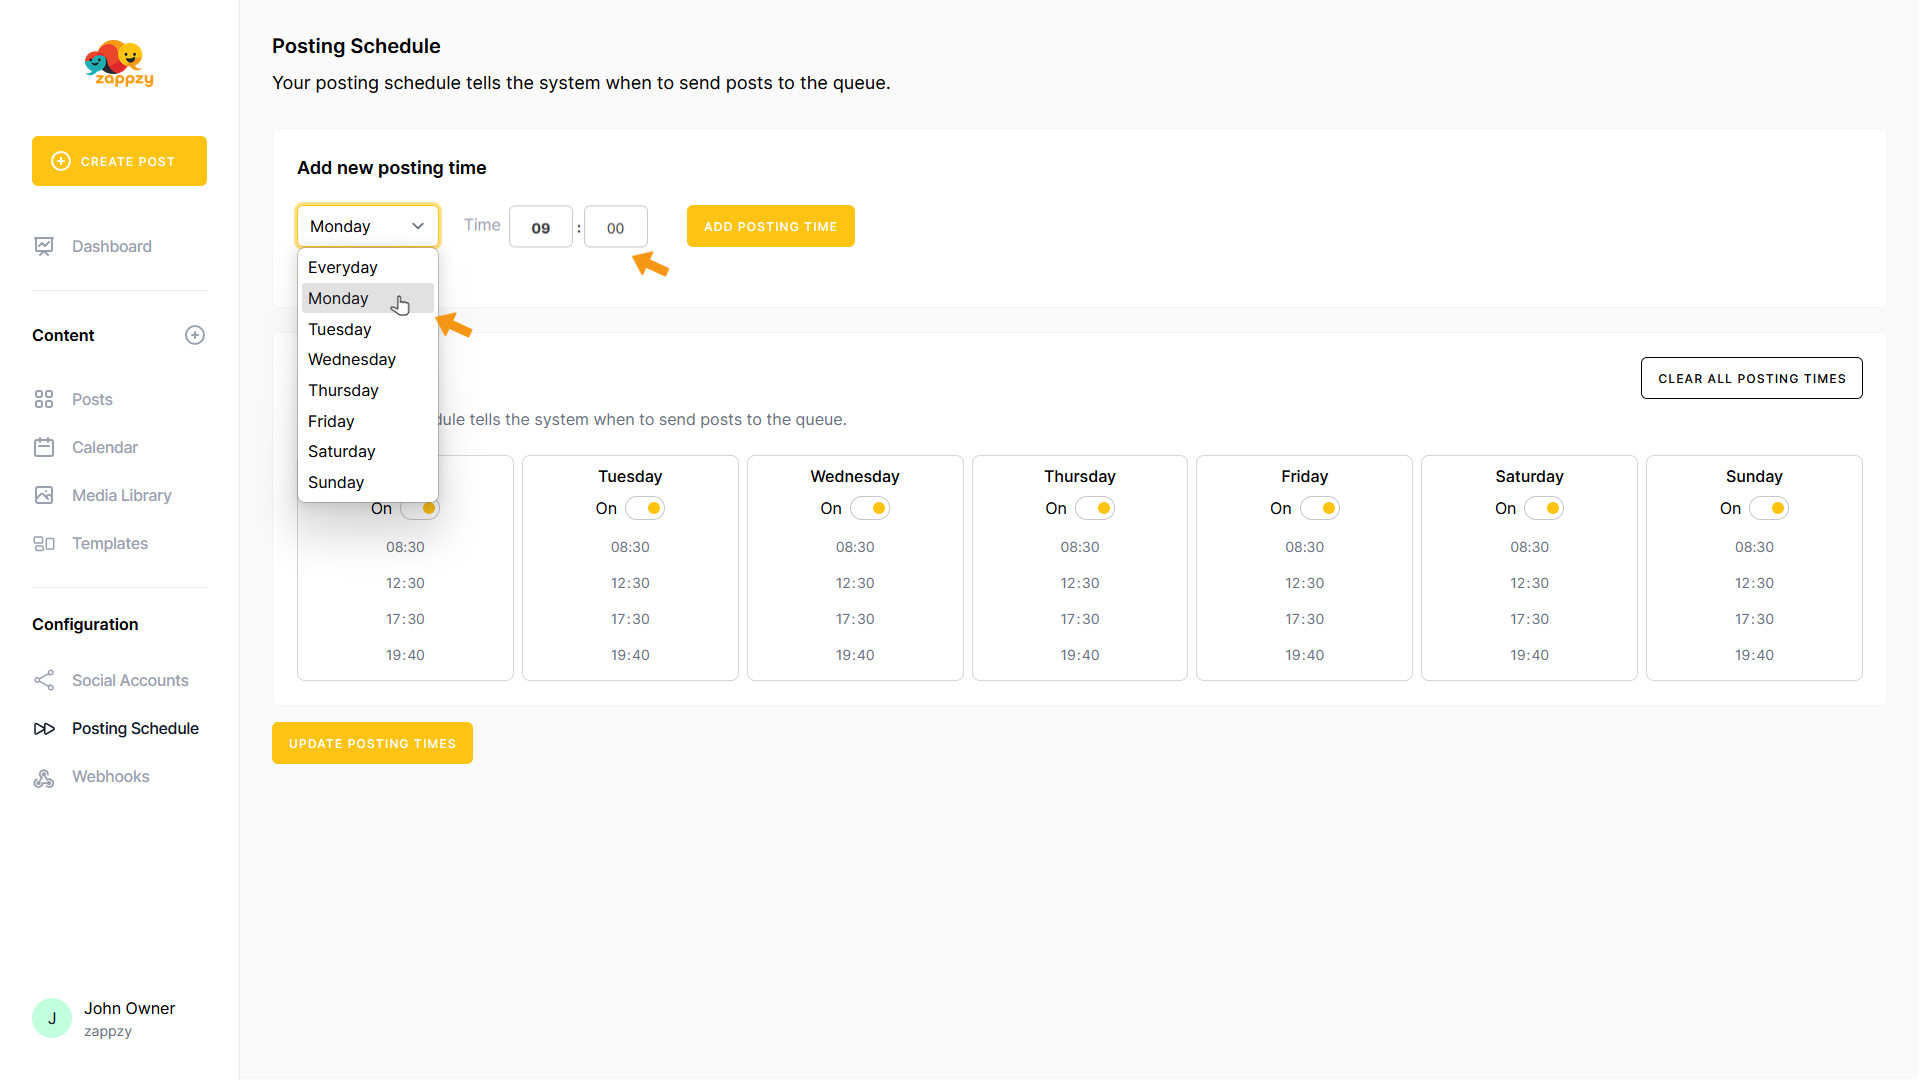
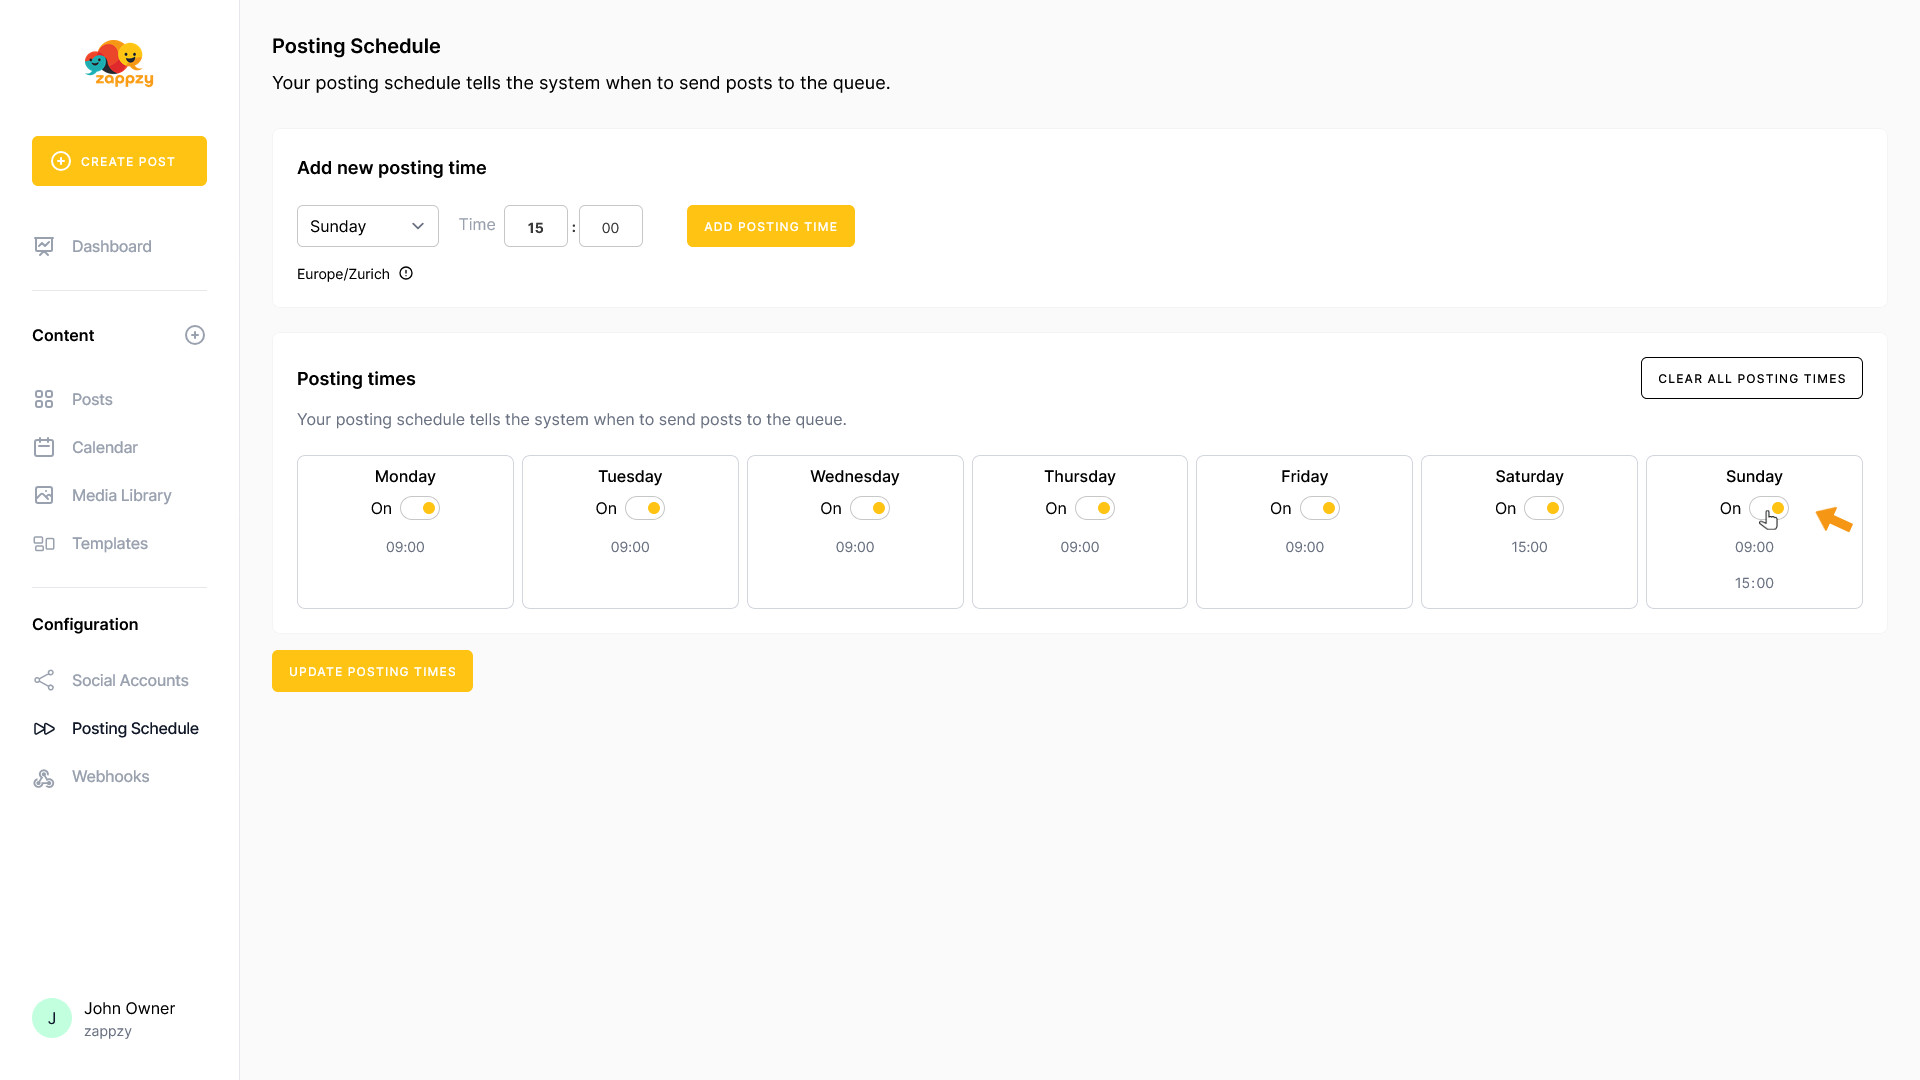
To add a new posting time, click the dropdown menu under Add new posting time. Choose either a specific weekday or Everyday (which adds the time to all seven days). Enter your preferred hour and minute in the Time field.
Then click ADD POSTING TIME.
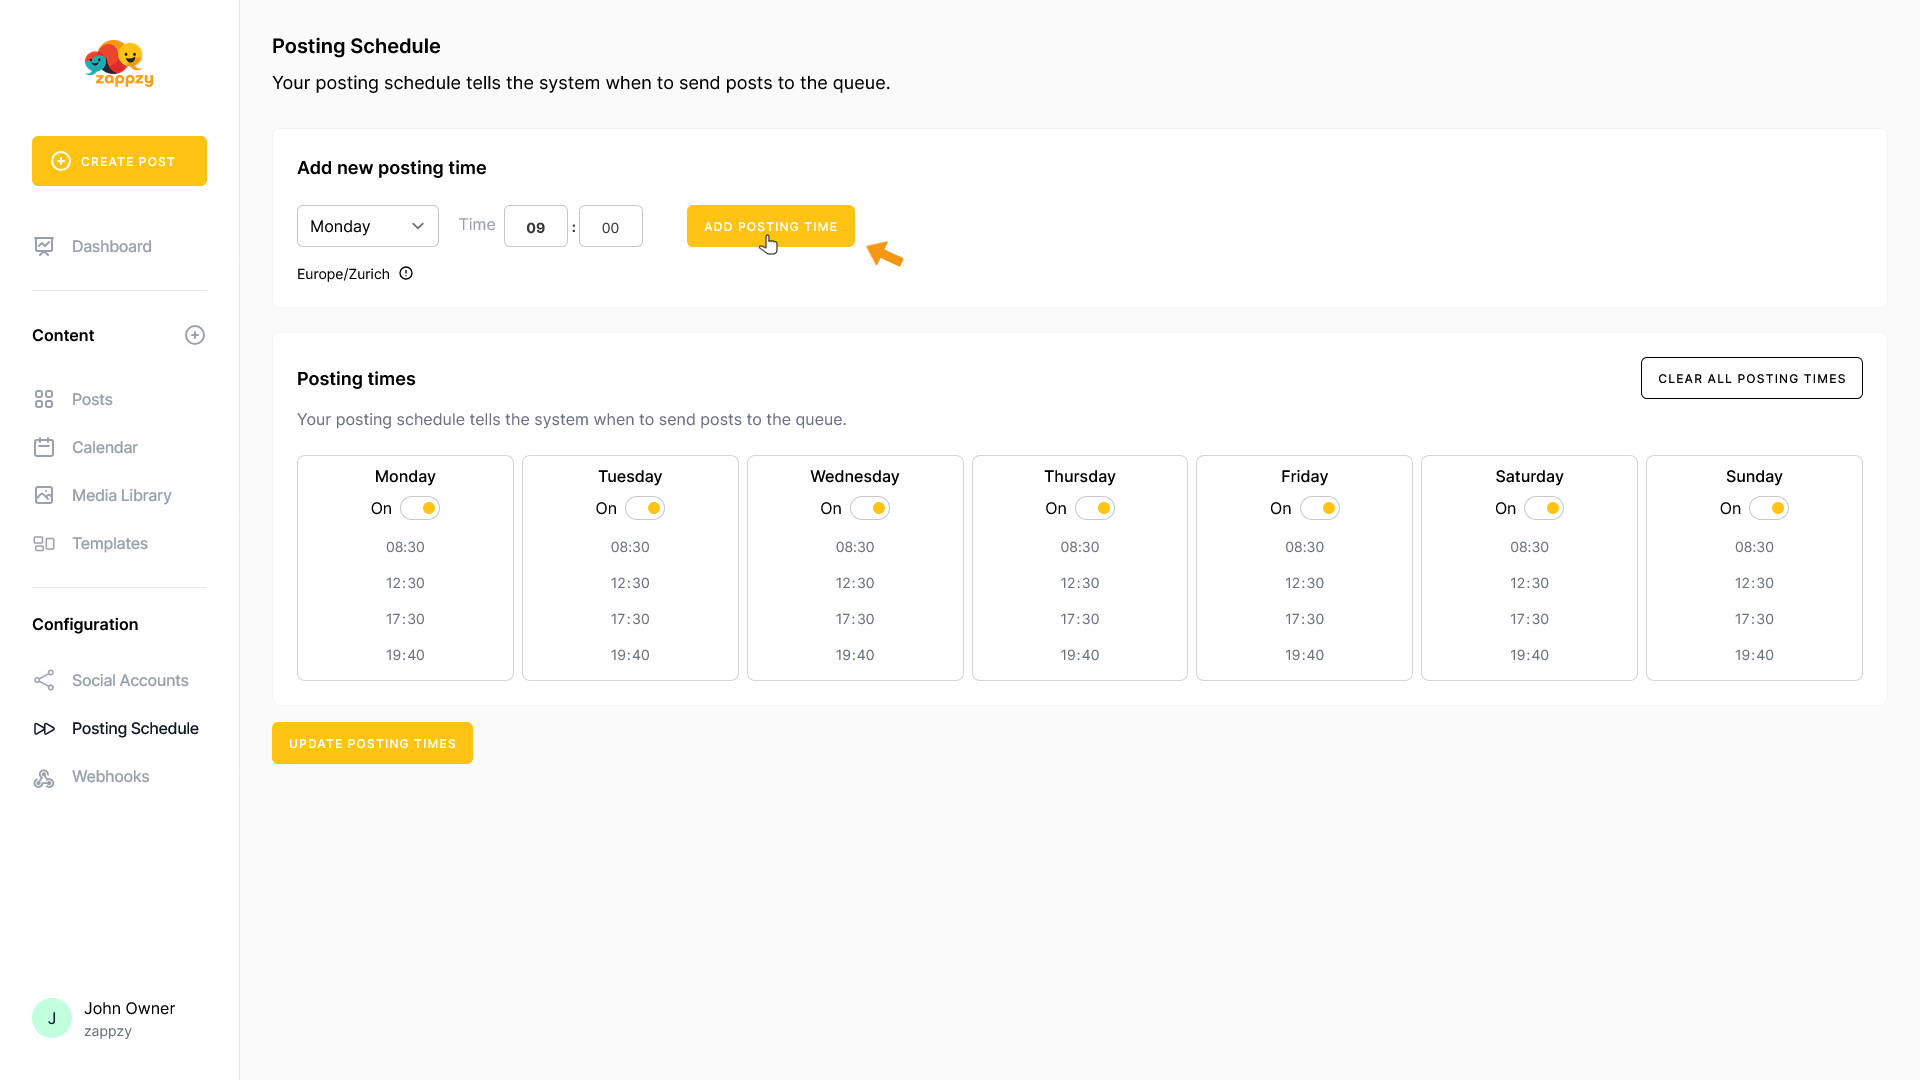
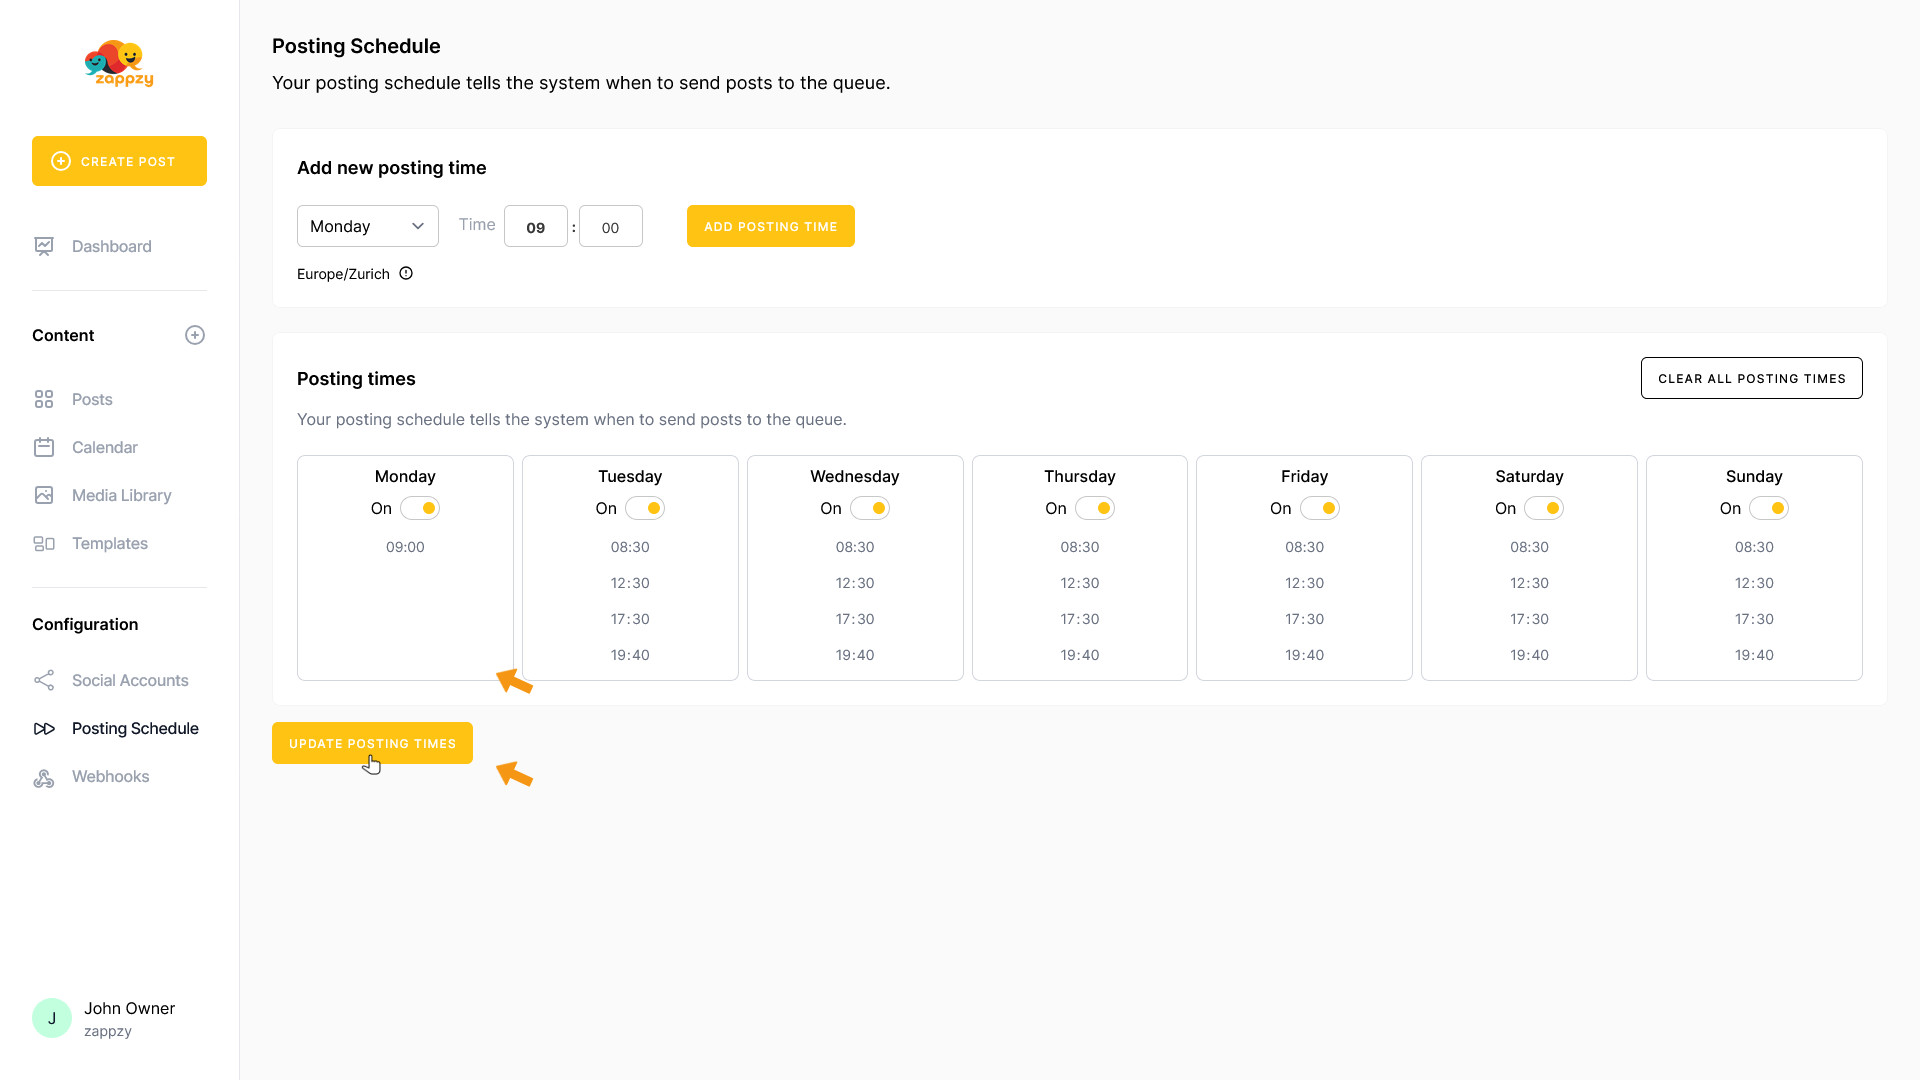
The new posting time now appears in the Posting Times table below.

To delete specific times from your Posting Schedule, hover over the time within the day you want to remove. A red X will appear on the right side next to the time. Click the X to delete that time slot.
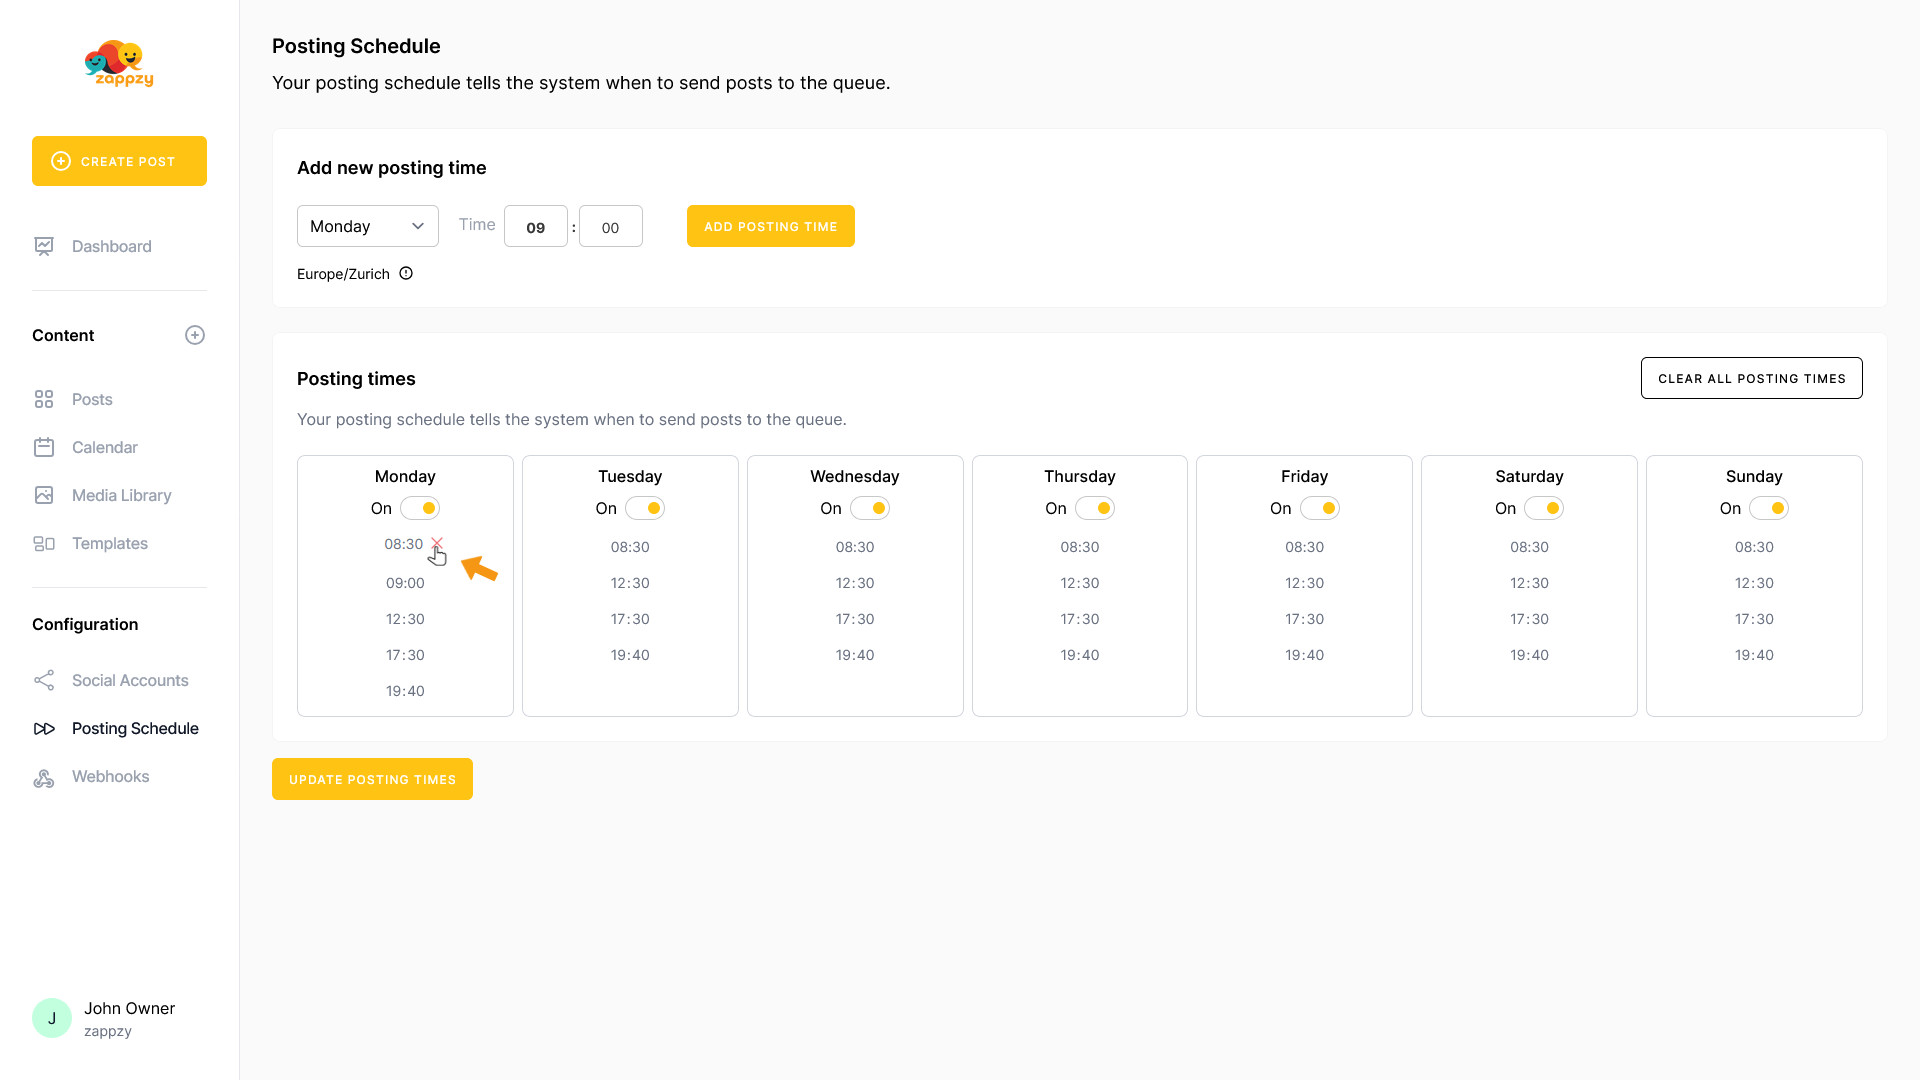
Repeat this process until your schedule matches your preferred timing. Then click UPDATE POSTING TIMES.
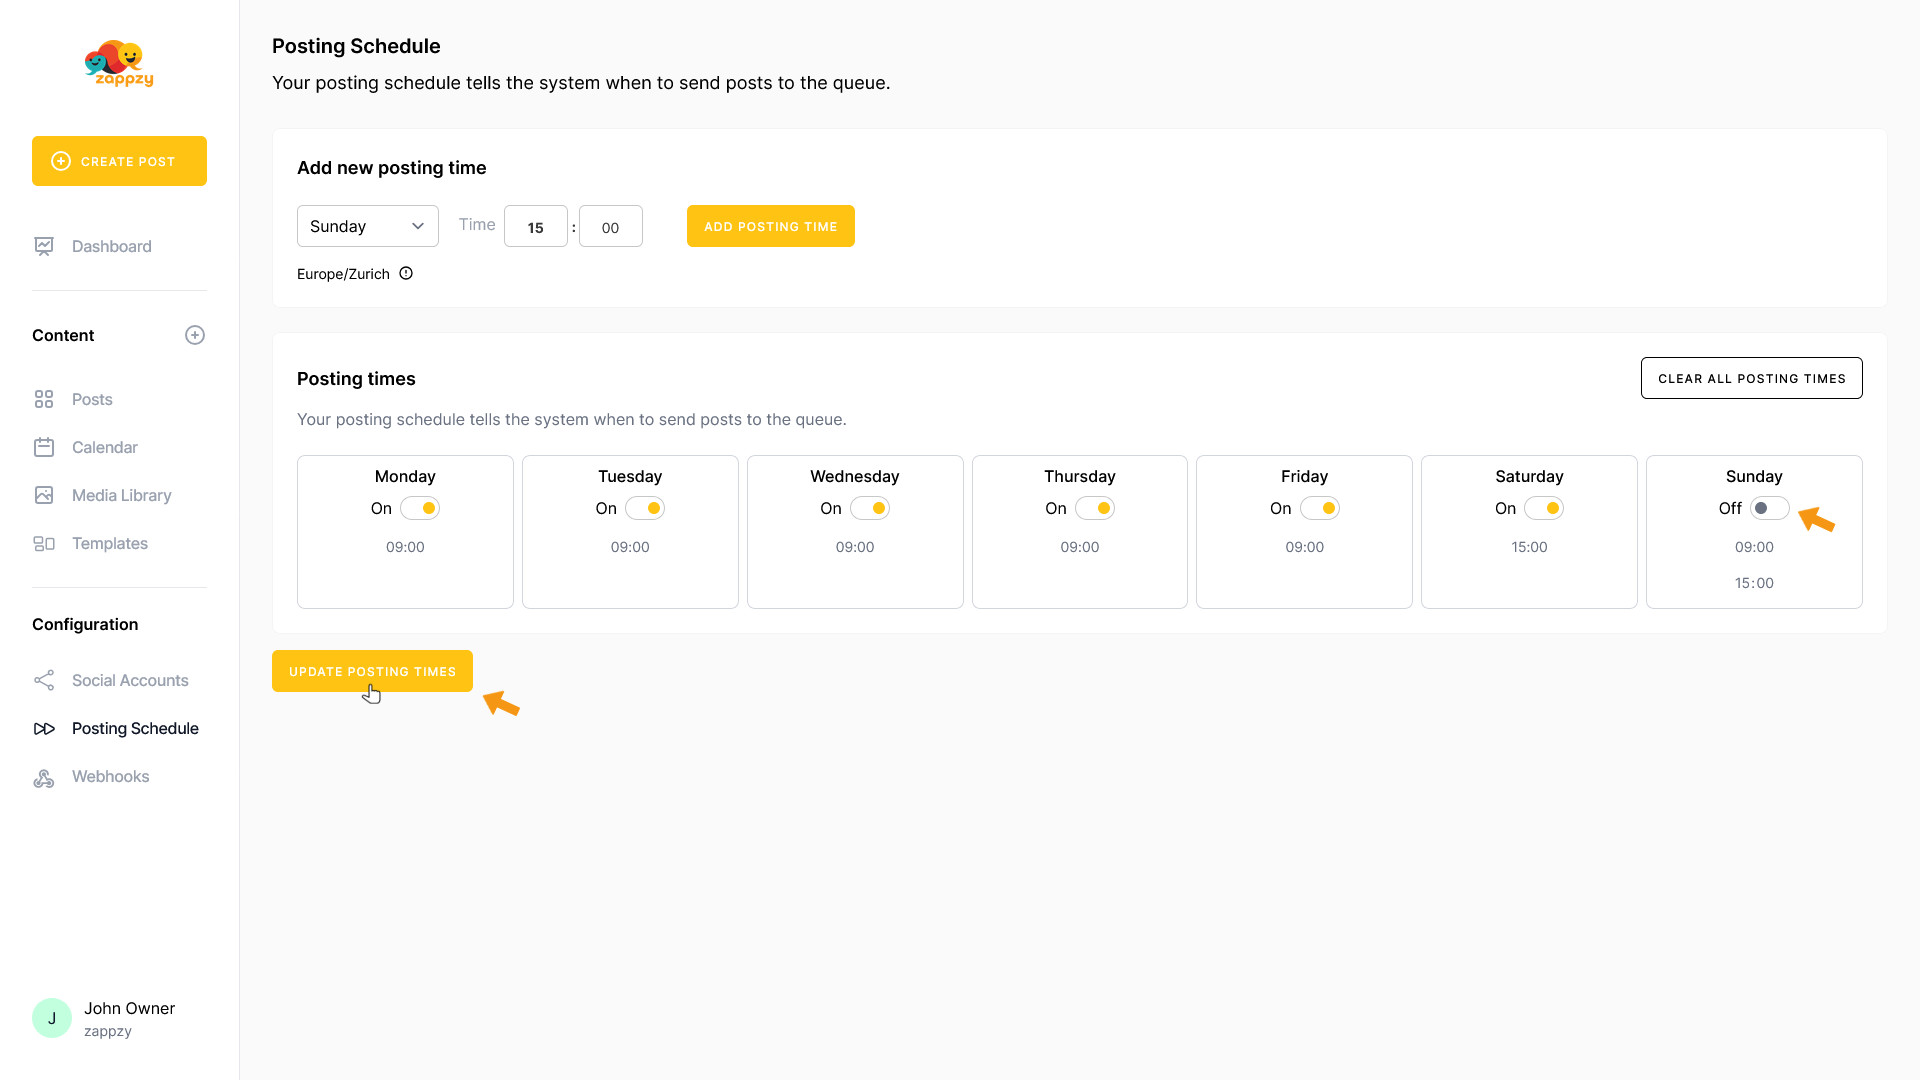
To disable an entire day, you can either delete all the times within that day, or simply disable the whole day at once (which is easier). Click the On switch below the day you want to disable.
It will change from On to Off, and the day is now disabled. Then click UPDATE POSTING TIMES.
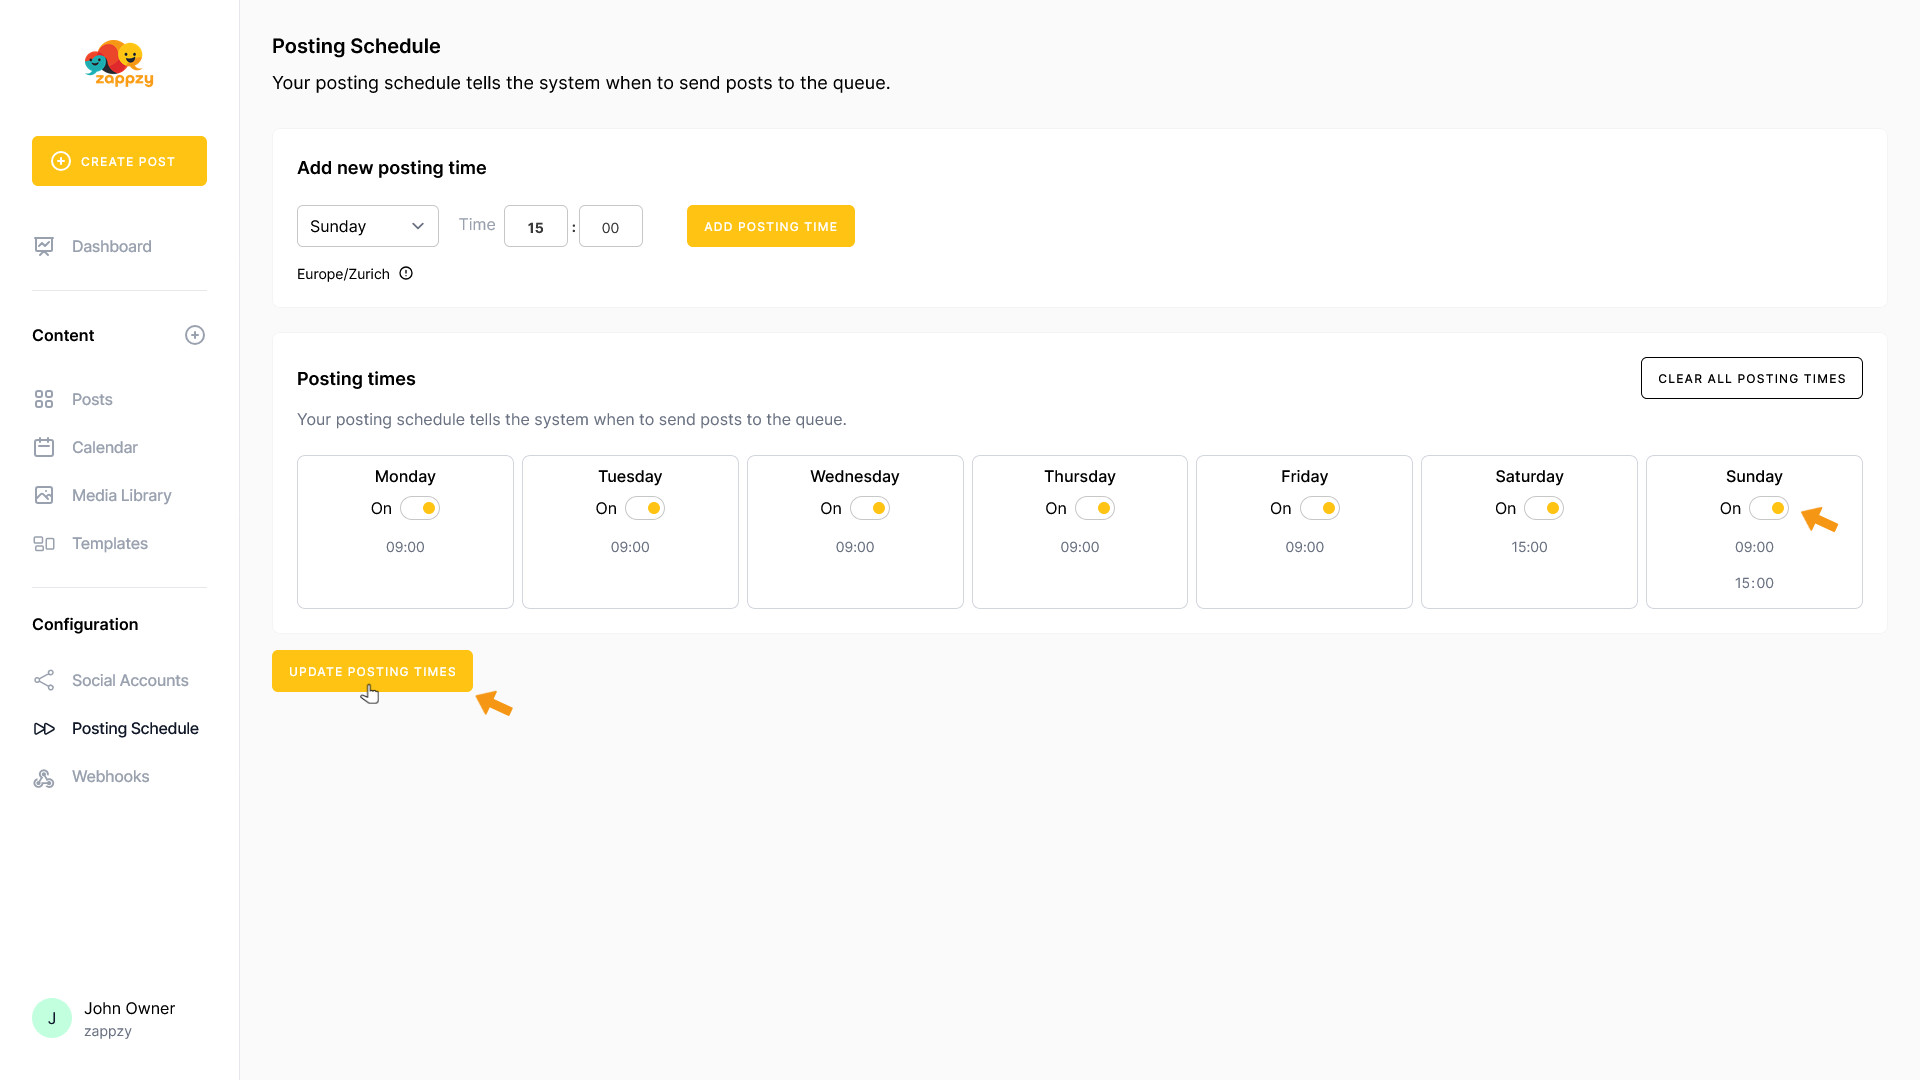
To reactivate the day, simply do the opposite: click Off below the day.

It will change from Off to On, and the day is now enabled. Then click UPDATE POSTING TIMES.
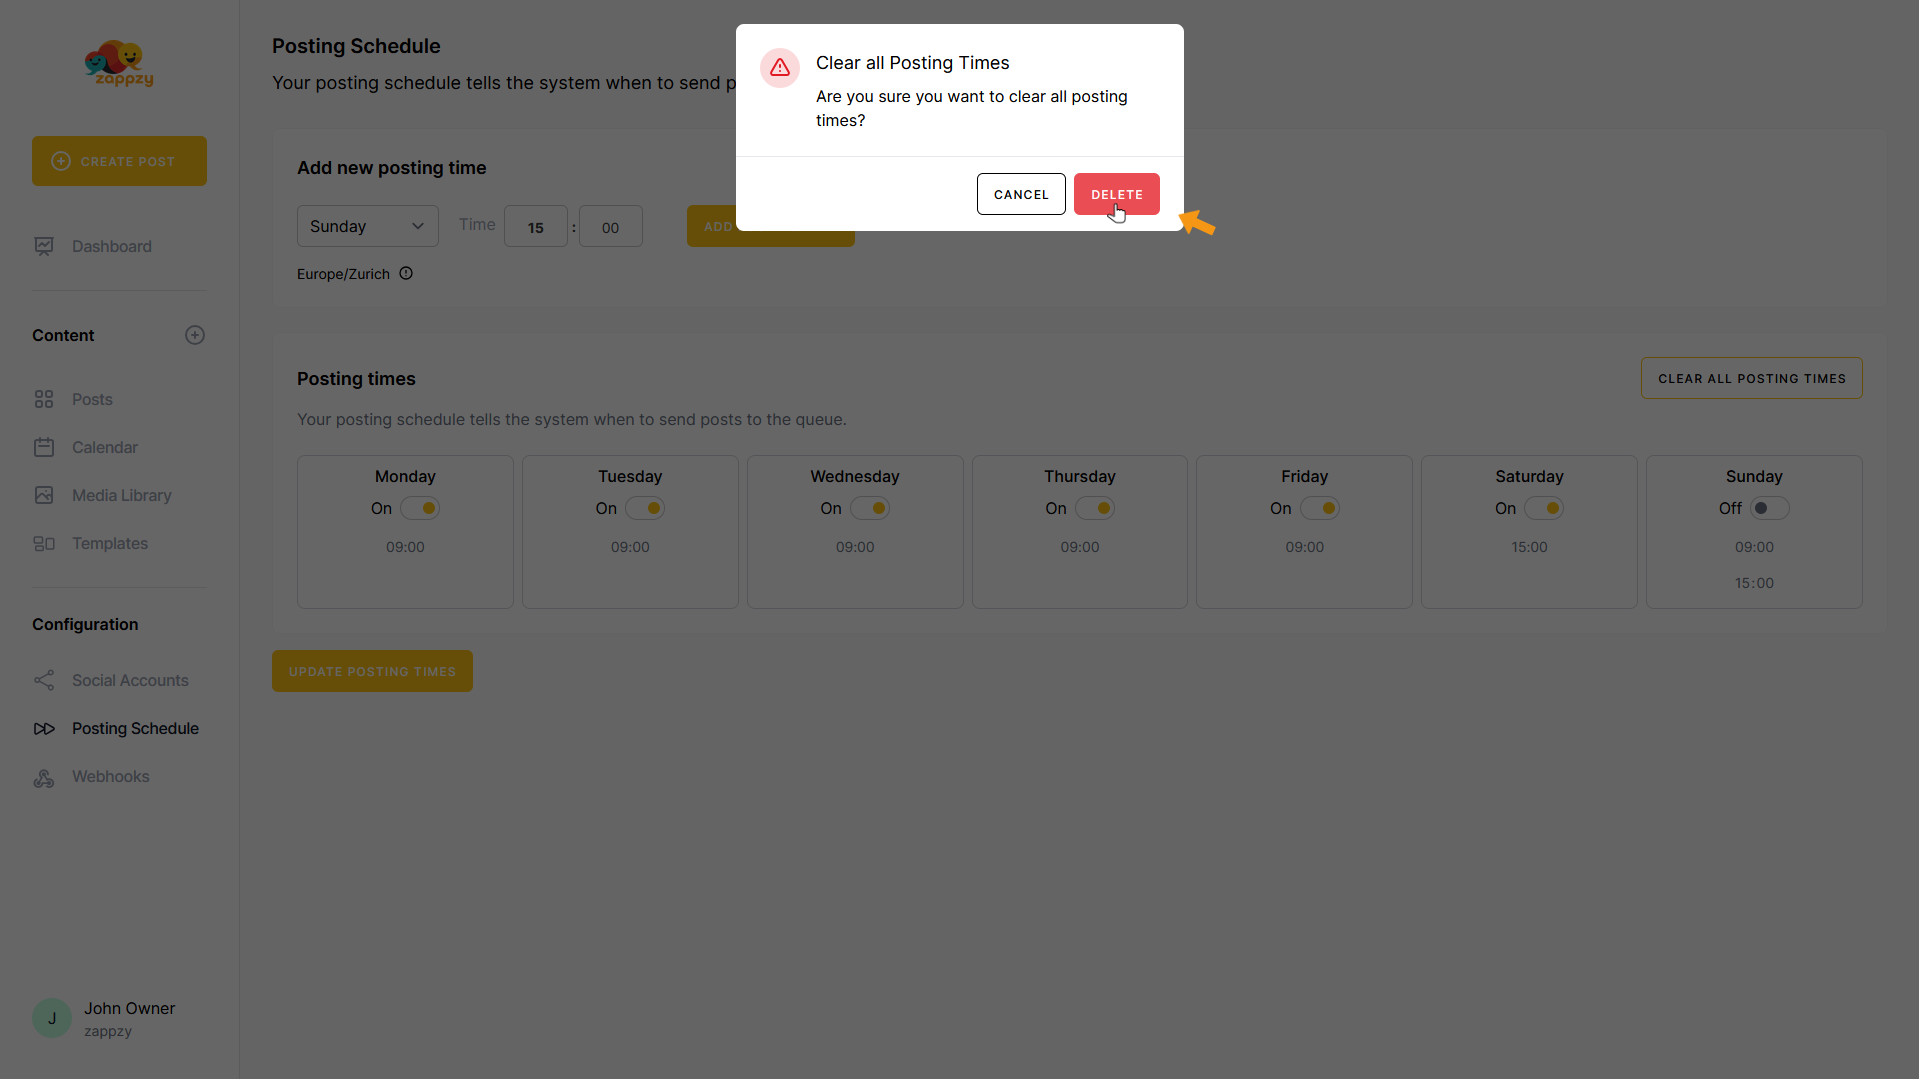
To delete all posting times, click CLEAR ALL POSTING TIMES.

A popup will appear asking if you want to delete all posting times. Click DELETE to confirm the deletion (or CANCEL if you want to keep your posting times).
After a moment, all posting times have been removed.
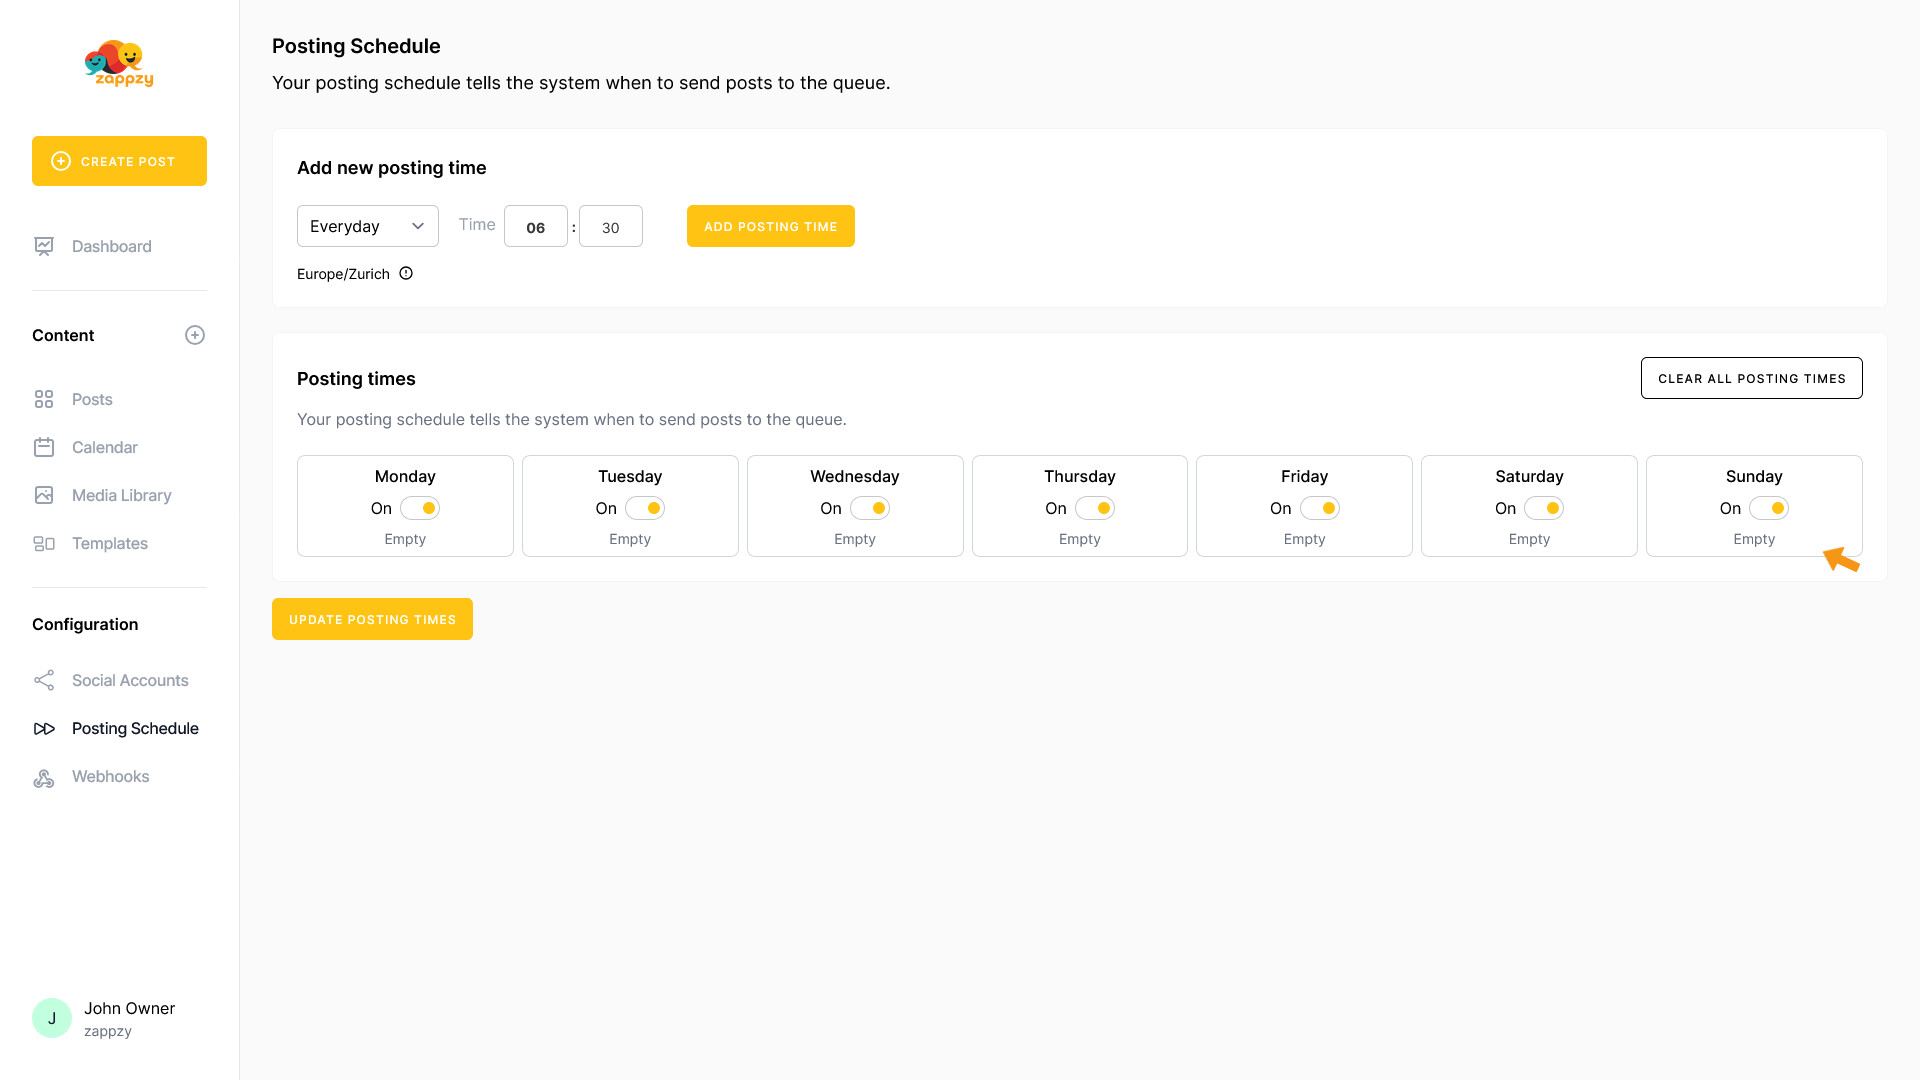
You can now add your desired schedule under Add new posting time.